

All Activity
- Past hour
-
Sorry but that is the wrong set of plans, there are plans for the Beta 10 and Beta 10B on the Eminence web site so if you want to assume that your speaker is one of those then that's the way to go. I did think of pointing you in that direction but you'd still be guessing as to which of the two speakers you might have or if Ashdown specified any changes other than the colour of the cone. What I suggest you do is build the cab but make the baffle/front panel removable. As you say this is a project and if the baffle is screwed but not glued then you can make changes to the cab more easily as you experiment. So the simple answer would be to build the BC110 30litre cab which is tuned fairly close to the original Ashdown cab. One 30l cab is much the same as any other and the only advantage of the BC110 is that it was designed to be easy to build and that makes is a good basis for building and experimenting within a project. in this case it's almost finished so no point in changing tack now. It'll work and do the job you have planned for it. You can then modify it if you think it has shortcomings you can fix. As an engineer you probably can glimpse the theory behind the design and probably want to start to get to grips with it. I'm sure we'd all enjoy discussing that with you but that'sa whole other thread
-
I'm using this neoprene foam instead of the very very very expensive short lengths sold by Fender, Thomann and the likes. https://www.amazon.co.uk/Longx150mm-Widex20mm-Insulation-Vibration-Furniture/dp/B09KTSNQY1/ You'll have enough for the rest of your life and you can reduce their thickness very easily with a simple cutter and create made to measure durable pickup height foam.
-
No surprises there. The original was very expensive for the time and I'm sure inflation will take its toll. At the moment home practice is taken up with band stuff but if I get a bit of time I might make up a practice board and put a beat buddy on it, with maybe just a tuner and looper.
-
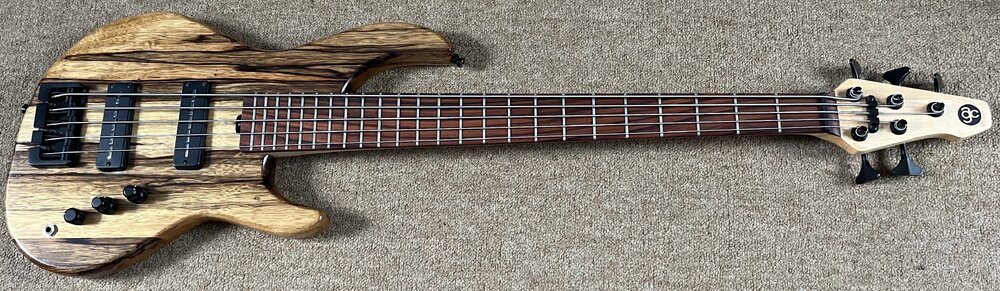
 Fabulous looking bass. GLWTS.
 -
I don't know why this wasn't clear enough.
-
Didn’t look cheap. $400+
-

12-string Custom Build - Which Builder and Why?
NancyJohnson replied to Sean's topic in Bass Guitars
Or just order one from Sweetwater and get your brother in law to bring it home from a business trip in Texas. The XB is a definite step up from the dUg pedal, but ultimately once you dial in your desired tone, you're not going to stray far from that. [Edit] My main issue tonally with the Waterstone was that when plugging into any singular amp/stomp, this was shaping everything that the bass was outputting. The lows might be nice, but the octaves were nearly always quite nasty (and vice versa). The XB seemingly resolves this, in wrestling some tonal control out of the instrument, albeit out of one stomp. -
QI’ve had a G4M Bass Guitar Foam Case for over 10 years, and done over 800 gigs with it. I can’t recommend them enough - fitted shape, lightweight yet offer amazing protection. Best of both worlds really - gig bag weight and convenience with hard case durability. ( They have back straps too, although I just use mine like a conventional case.) £49.99 at G4M, incredible value for money.
-
I had a Beat Buddy Mini. I thought it was excellent but I ended up using it mainly as a metronome and I sold it. I am tempted to buy one of the latest version when it comes out, depending on the price.
-
 Much cleaner and tighter sound IMO.Cheers.
 -
 The neck is narrowish near the headstock. Bit jazz bass style. Yes, great tonal options and punchy.
 -

 Markbass Travellor 1 x 15, 400 watt, 8ohm cab. In great condition. Hardly gigged. £250.00 Collection only or can meet within reasonable distance.
 - Today
-
 Mophil joined the community
 -

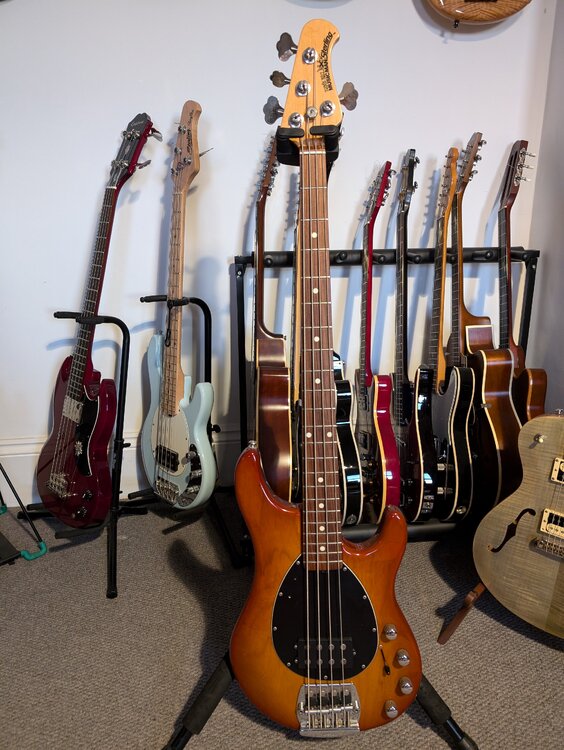 I think I’m GAS free as for a long time I wanted this exact spec Sterling. Beautiful bass and these earlier ones with the recessed plate and bridge mutes are particularly lovely.
 -

Harley Benton flats - they're a bit good!
Supernaut replied to mcnach's topic in Accessories and Misc
No thanks. -

G&L SB-2 Tribute, black with case, Bristol. £275
G-bitch replied to G-bitch's topic in Basses For Sale
 I'll have to come back to you in that Monday as it's at the office.
 -
Can't Get It Out Of My Head - ELO
-
Obsessed With You - X-Ray Spex
-
Ah ok cool, yeah drop me a text, interesting to see what you have. Cheers Si
-

Fender 62avri Jazz *further PRICE DROP & trade/px
Magister Ludi replied to tricky's topic in Basses For Sale
 pm sent
 -
Alembic Series 2. Why? I like spending other people's money.
-
I've not heard of anyone doing this before. Are these finishes compatible?
-
I love it, there's a few times ive had an idea, connected to my phone and recorded a quick video with the audio from the Go that would've otherwise been long forgotten. I love that I can play bass in the garden while my daughter's playing too. It also sounds great considering how compact it is.
-
You don't need to give me an excuse to show off my korinaburst Triad. It also has a Freeway 10 way switch fitted, for the standard options on one bank, then various series/parallel options not normally available. Pretty simple fit, visually undetectable, very elegant mod (works by tilting the blade switch up/down to access the two banks of options).
-
Just a little old-school board i put together using spare parts...
-
Busy evening. Got home and fitted the new pickup ring to the pickup - fit great first time, except the pickup height screw holes were a bit tight but they pushed though OK with a little persuasion. I decided to get stuck in and make some more progress, so I got down to dismantling the bass. Found some interesting things: The channels which the bridge saddle grub screws sit in are actually stamped into the bridge plate, proud and so there are shallow channels routed into the body to accommodate them. # Wonderful documentation - separate date stamps for body (Sept 1998) and neck (Oct 1998). Anyway, after unearthing some hidden treasure, I made my plan: That's a lot of wood to get through (about 47mm)! Body clamped securely in the bench vice. But I wasn't ready just to gung ho so I grabbed a scrap bit of wood for a test run. I deliberately picked one which wasn't much bigger than the 20mm bit so I could see how good my aim was. Turns out my aim is pretty good. Also checked that 20mm was indeed big enough to accommodate a jack socket. It is. Time to take a deep breath and drill for real this time. As you can see I did deviate a bit from the original pilot hole, but not in either of the directions which would matter. The drill did wander a little at the beginning when it was trying to break through the finish, hence the white mark on the bottom edge. But by the time I got to this depth, my drill wasn't making much progress. So I decided to stop there (about 10mm short of breaking through into the control cavity) and simply enlarged the old pilot hole a little to allow space for wires to come through. Jack socket loads in from the outside. A tad unorthodox, but hey, it's an unorthodox bass! Done. As luck would have it, I found a "football" jack plate in my spares box. So that saved me ordering one. Made a couple of pilot holes (using the hand drill this time - had quite enough of power tools for one day!) and fitted the plate to the side of the body. Last of all, I moved the jack socket properly (as in desoldered it, moved it to the side and reconnected it - which would not have been necessary if I had gone all the way through with the forstner bit but it's a small price to pay for sanity etc. Now there's a hole free in the top of the body for a pickup selector switch. But that's for another time.


