

All Activity
- Past hour
-

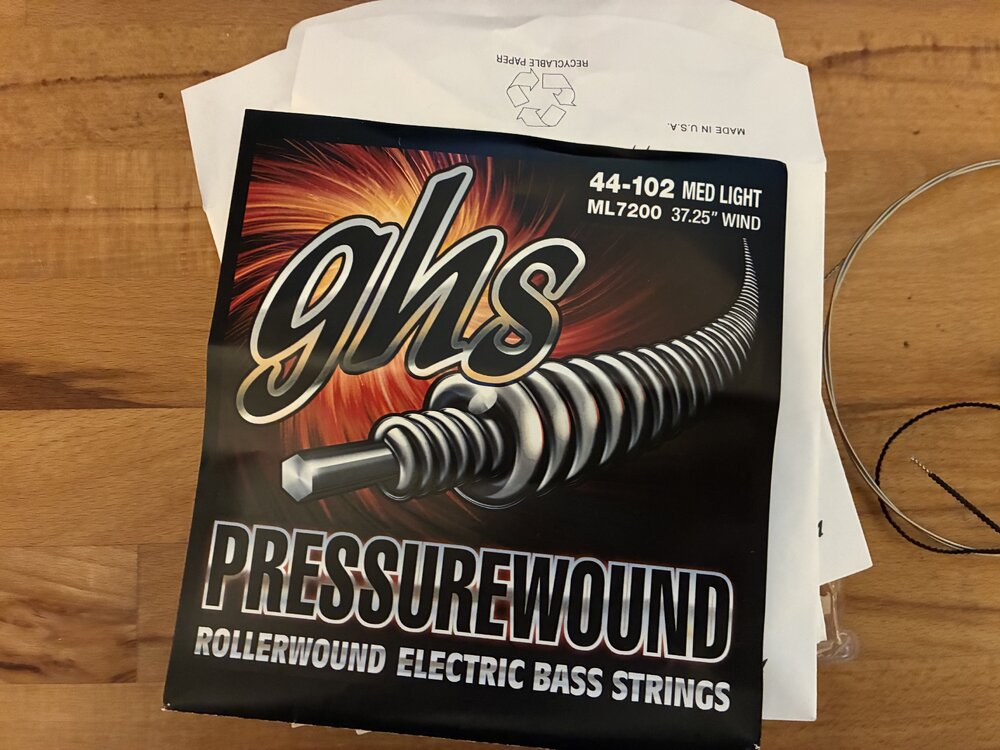 GHS Pressurewound medium/light 4-string set for sale. Tried these on a recommendation, but they're just not for me - the sound and general feel is great, but I just don't like the stiffer hex cores. The A and E strings have been trimmed slightly to be strung on a 34" scale P bass, but they were only on the bass for a day max. If anyone is curious, they sound like played in nickel rounds to me straight out the box. Looking for £20 posted in the UK if anyone would like to give these a go. Cheers!
 -
Like an amp that goes up to eleven?
-
It was the pasadero ( lounge?) bar in the town centre.Fairly local to me aswell, only live in Horsham. Ok will do x
-
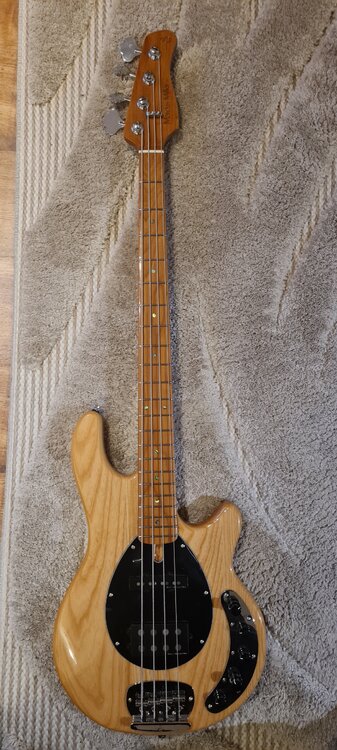
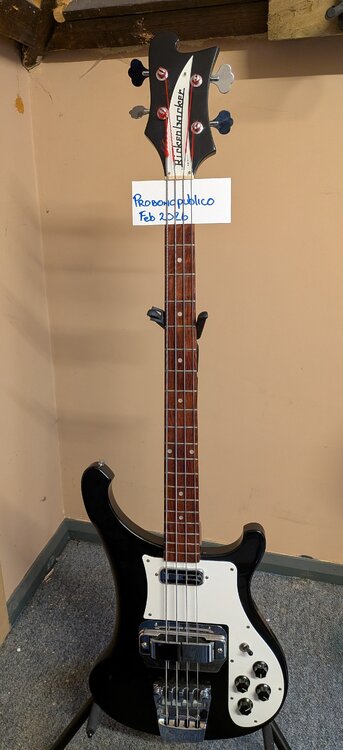 This is the next part of the wind down and realisation that I will not be Bruce Foxton, Chris Squire or Geddy Lee. It was purchased from Bass Bros in August last year whilst mourning the sale of my Fireglow 4003. The production of these basses began in the ’80s and the V63 is the forerunner to the C64. This bass dates from 2000. It was based on the 4001S basses used by McCartney and Chris Squire, and features no binding, dot inlays, a toaster neck pickup and horseshoe bridge pickup. This bass is in great overall condition although it has a couple of dings on the lower bout and headstock which I have captured on the photos. Original hardcase included. It plays great and is currently wearing a new set of Rotosound round wound. It came with a set of flat wounds which I’ll include. It’s not been gigged or taken it to a rehearsal since I acquired it and it’s never left my music room. It has the original silver Rickenbacker case with keys. It weighs 9.7lbs. The price includes mainland UK delivery. This will see my collection down to 2 basses.
 -
Oh yes, I wasn't blaming AI for that, its just another nail They did and it put some people out of work but it was also very expensive, so not many!
-
I am looking to replace the 12AT7 tube in my Mesa Boogie WD-800. The Mesa Boogie branded valve doesn’t appear to be readily available and so I’m seeking advice as to what other makes are recommended and which ones I should perhaps avoid. Thanks.
-
I’d use a proper speaker cable with Speakon ends; just avoid an instrument lead. The one you’re looking at will work, though 15 m is longer than you need.
- Today
-
Mark Adams is a name that doesn’t always get the same recognition as Bootsy Collins or Larry Graham, but his impact on funk bass is undeniable. "Just a Touch of Love" is the title track from Slave's fourth studio album, released in 1979.
-
I really like the Capo 😔 and the strobostomp to be honest everything else I'm less attached to.
-
 BuddyJones joined the community
 -

“Rush” UK Tour March 2027
Leonard Smalls replied to RAY AGAINST THE MACHINE's topic in General Discussion
Eek! -
Aria Sinsonido bass, control electronics/PCB AS690B
BuddyJones replied to sandy_r's topic in Repairs and Technical
I had trouble with the microphone set up on my AS-690B so I replaced it (removed the electronics too) and put a piezo pickup under the bridge but the sound is not too great, what other options might I have? Thx in advance, I may sell it if anyone is interested. -
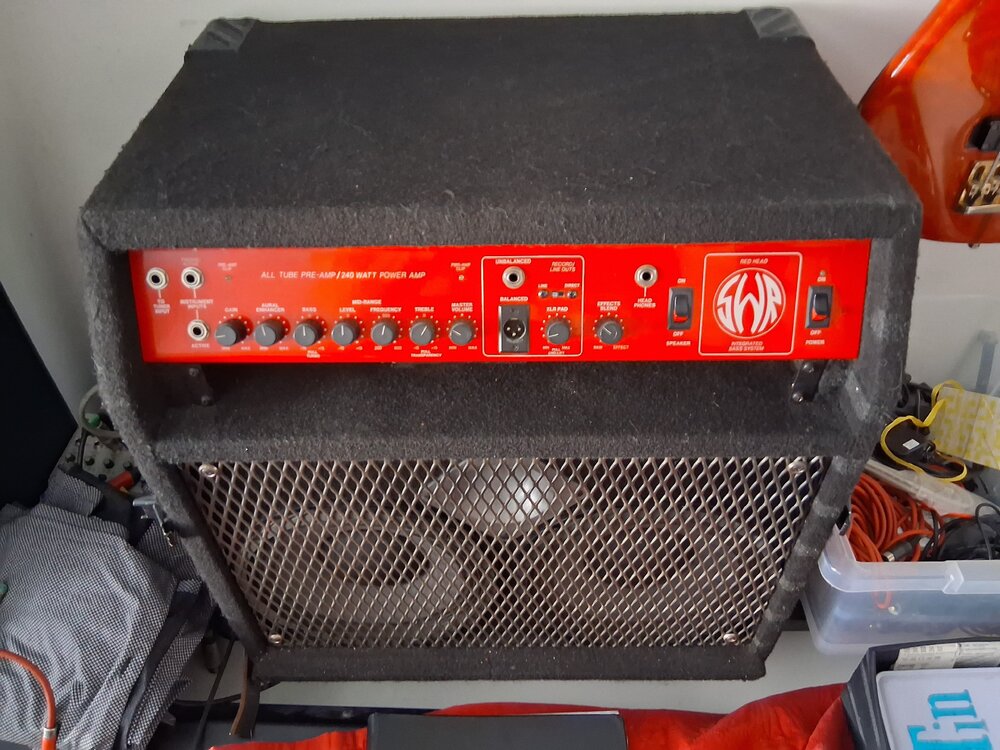 SWR350 redhead combo. 2 x 10. Also included is front clipped wooden cover. Just been serviced ,new pre amp valve fitted. A classic model with a monster sound. Cash on collection only. £350.
-
- 1
-

-
Spector NS5CR - transition between SSD NS5CR and Euro LX, made around 2000. I've told this story before but I first played this bass at a BC bash in 2007 and had a 'wow' moment even though it wasn't even plugged in. A member called Homerplaysbass owned it and he was the latest in a line of owners A little later on he sold it to another guy just north of London and in 2009 he put it up for sale on here and I bought it for about six hundred quid. This was a few months after selling three Smith BSR5GN basses. I discovered that the neck had a slight S curve but about 7 years later Jon Shuker managed to steam it back into shape and it's never played better. I have other basses but this one emits some pretty tasty growl and it achieves a remarkable balance of being warm but not muddy - it actually sounds like a Smith but without the mid scoop which means it plays nice with other amps. There are no deadspots at all and the B string is firm and fruity. I've modded it with custom Wizard humbuckers, coil splits, a Noll semi para preamp. Fifteen years later, there have been contenders - the Moon MBC5 is in the same ballpark but it's darker sounding, the Vigier Passion also but it's brighter sounding. But this one sits in the middle and while I might change the electronics at some point, it's a keeper.
-
Krakow is lovely, really beautiful City, and if you`re interested in history Auschwitz is close by. I wouldn`t say it`s an enjoyable experience but I`m very glad I went.
-

Advice from Cambridge-based bassists needed!
TKenrick replied to TKenrick's topic in General Discussion
Thanks @urbanx, I think he's really open to anything at all. I suggested open mics as they tend to be a good way to meet people, do you have any particular recommendations? -

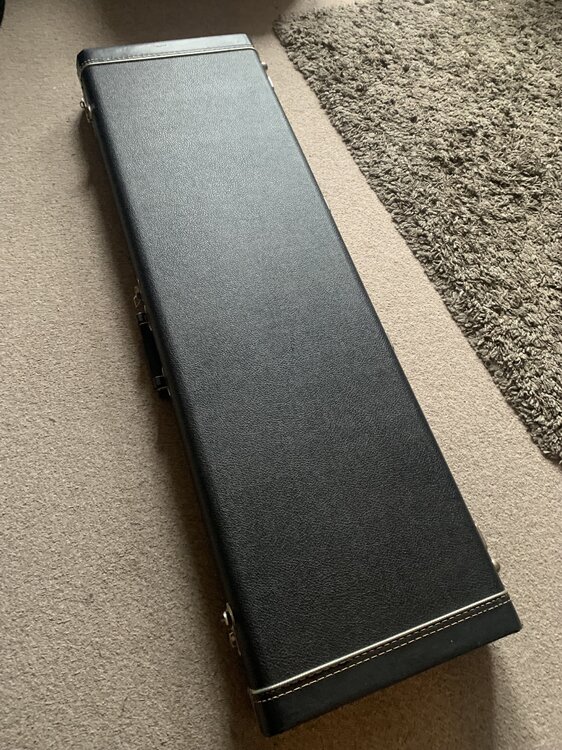 The case was included with an early 1994 US MusicMan Sterling Bass I bought several years ago. The seller said that it was the OM case. I’m no expert but I have seen early Sterlings with this style case and the internal dimensions are correct for the size of the model. When I sold it on the buyer preferred a gigbag so I stored a much later and recently exchanged Sterling SB14 in it. The case is in excellent condition inside and out. Catches and hinges fully working, no key of course! Very few marks or dings to the tolex. A nice well made case. Pickup preferred but I can post at buyer cost. Note that this case is specifically for a Sterling bass I doubt it is wide enough for most basses. It certainly won’t fit anything with a four per side Fender headstock unless it is short scaled.
-
- 1
-
-
Yeah that makes sense actually 👍
-
Got two VIP for Krakow, a bit spendy but around the same price as a standard UK ticket. Hotel was cheap, flights not available yet but hopefully minimal cost too. Makes much more sense to me - plus three nights in Krakow!
-

Sire Z7 4 String For Sale like new condition
patrikmarky replied to RSbassman's topic in Basses For Sale
 These are a fantastic bass . I can live with the headstock when you see quality and sound of these ..I have a couple of 5 string .
 -
I had a Noble, stupidly sold it and so have another on the way. I had the Sushibox Neptunium (which I believe is effectively the same clone as the Nobelium, less the 2nd tube) at the same time as my first Noble. It was good, but it wasn’t as good as the Noble. So when the Noble reappears for me, that will be the primary board, but yes, keen to try the Luce with the Regal and Linden to find similar sounds for my other boards. Si
-
 I got this some years ago as a spare when I gigged my early JV Squier Jazz Bass now I tend to use a gig bag so it is surplus to requirements. An old Fender case specifically made for a Jazz bass. I believe it is from the early 80s however some forums say they started being produced in the late 70s. It’s a robust bit lightweight case. The catches work although one has been repaired with wire. The handle is fine and the stud feet are intact. There is a crack and impact damage at one corner. I had repaired it with the obliquity gaffa tape but I removed it to show the extent of the damage. The cloth strap that keeps the lid from fully opening have come unstuck over the years but still remain so could easily be re-glued. I would imagine anyone with an older 80/70s era Jazz might be interested if they don’t have an original case. Not sure of any value but even with the damage it will keep your prized Jazz from harm. Pickup preferred but I can post at cost UK only. My old JV is definitely not included in the sale 🙂
-
- 1
-
-
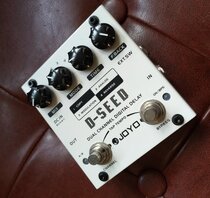 Two channel digital delay, 4 modes (copy, analog, modulation and reverse delay), it can take a footswitch as well (not included) Great condition, home use only.
 -
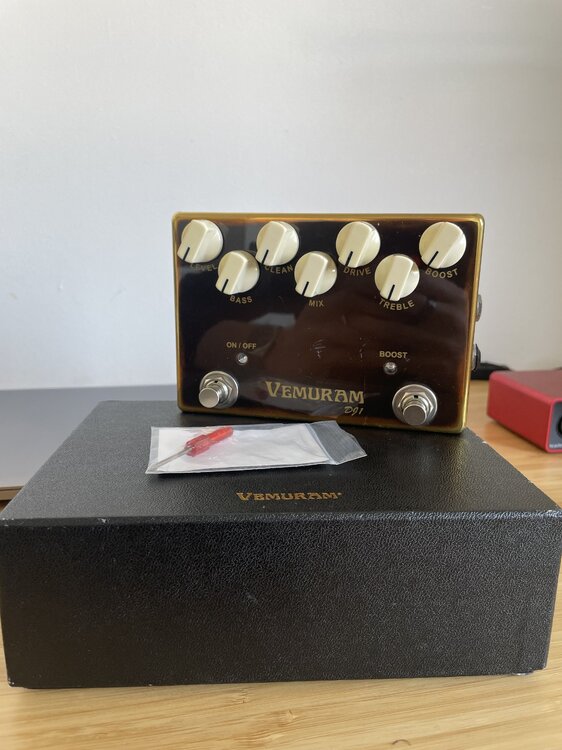 Extremely rare and sought after bass drive/preamp pedal. Serial number #81 Few scratches but in perfect working order and sounds really good especially with a passive jazz or p-bass. Comes with original box and white knobs. Message for more info.
 -
 Price drop!


