


JPJ
-
Posts
2,059 -
Joined
-
Last visited
Content Type
Profiles
Forums
Events
Shop
Articles
Everything posted by JPJ
-
 Beautiful, simply beautiful. If I had the money you'd currently be suffering from a dislocated shoulder I'd have taken your hand off so quick, but as I'm skint you'll have to settle for a bump instead . As the owner of an Overwater J5 with the John East pre I'd recommend anybody contemplating buying this bass to stop contemplating and start buying 'cause you won't be disappointed
 -
[quote name='Andyjr1515' post='1320237' date='Jul 29 2011, 11:28 AM']Yeah - that was a bit of a surprise when I took off the pickguard . The bridge routing is fine. I might alternatively pop a trim on (a la Gibson humbuckers)[/quote] There's always the chrome trim that Yamaha used on the BB series basses.
-
[quote name='Andyjr1515' post='1319912' date='Jul 29 2011, 12:00 AM']Hi JPJ Fantastic! I'm really pleased & looking forward to seeing your pics Any[/quote] Thanks Andy, I've added a few iPhone photos to my build thread. I'll get some better quality ones up at the weekend.
-
So the veneer arrived As I'm trying to achieve a very organic feel to this bass with no sharp edges, I'd already rounded over the edges of the top which left me with a few dilemmas when it came to applying the veneer. If I veneered up to the face side of the radius on the body edge, how could I be sure to get a clean glue line so that the top stain would penetrate properly, or could I 'bend' the veneer over the body edge radius so that the glue line was on the edge of the bass where the finish will be solid black lacquer? For my first attempt I tried the 'flat on the front' approach which was an unmitigated disaster. Having glued the veneer down and allowed it to dry, I started sanding out the edge. Unfortunately, I had'nt clamped the veneer preferring to rely on masking tape, and the result was as I sanded I kept hitting unglued 'voids' which then chipped and teared as I sanded. So as has been the tradition with this project, I sanded off the entire veneer (yes, I do now have a right arm like a Russian shot putter ) Having failed with the first attempt, I reapplied a new piece of veneer to half of the bass using: a) lots of glue; and lots of clamping force, and bending the veneer over the edge of the body. The result was immediately better. Following Andyjr1515 advice, I then trimmed the openings before adding the second piece of veneer here shown with some of the clamps/tape in place. Once the glue had fully cured and having then trimmed off the excess veneer, I ended up with this. The veneer wrapped over the edge with very little encouragement other than the moisture from the glue. I did apply glue to both the veneer and the body but being a fully fledged wood butcher I couldn't bring myself to allow this to go off before mating the surfaces as Andy does and besides, I don't think Mrs JPJ would appreciate her iron dissappearing down to the workshop (shed) I'm now sanding the edges (one of [url="http://www.axminster.co.uk/flap-wheels-prod834123/"]these[/url] in the drill press makes this an easy task) ready for grain filling and lacquering. I have had one or two smallish glue voids but having learned from previous mistakes, I've been carefully repairing these as they arise. Hopefully, this weekend will see the first of the final 'final' finishes going on
-
WITHOUT! BTW inspired by your work, I'm 3/4 of the way through veneering the top of my current project. I'll get some photos up at the weekend but in the meantime, thanks for the inspiration
-
Simply WOW Mr Wilson's work really is first class
-
 [quote name='wateroftyne' post='1309298' date='Jul 19 2011, 04:02 PM']No-one's bought this yet? Unbelievable....[/quote] I'm wavering.....
 -
That was the original plan when I built this But I realised that I didn't really need a humbucker at the bridge position as I had enough wiring and switching options with a single coil
-
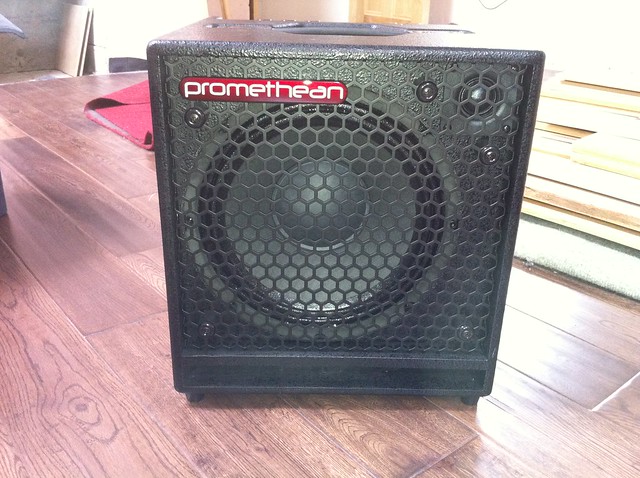
Thanks for the advice guys, reading this and the other Promethean thread it seems that its the way to go for my needs. As to another North East bash, I say "Hell Yeah"
-
I love my PJB Bassbuddy preamp for recording/rehearsing and have recently purchased a Stagg EUB to explore DB. I'm now looking for a small form combo for home use and occassional house rehearsal with a guitarist, to use with both the Stagg and my electric basses (five strings low . I'm drawn to the PJB stuff and need opinions on both the 100w Cub and the similarly powered Briefcase. The Cub looks an amazing bargain given that it has two channels. Does anybody have experience of these combos that they'd be willing to share before a I go and spend a whole load of cash on one of these? Cheers
-
I've just purchased some 0.7mm quilt maple veneer from [url="http://www.rosebudveneer.com"]www.rosebudveneer.com [/url]in Kentucky USA. Excellent quality product (no voids or splits) great figure (better than the ebay pictures!) and delivered in 6 days.
-
Bartolini's same to suit the fretless better than any others imho
-
[quote name='Crazykiwi' post='1291436' date='Jul 3 2011, 08:49 PM']I can't imagine how to get radiussed inside corners with a chisel. I'm planning something similar and will go down the router route.[/quote] Simply drill the corners with the right size drill bit before you remove the rest of the wood. I prefer the router approach and have two, one 1/2" for heavy duty cutting (like the shape of the body) and one 1/4" for detail work (pup routes, neck pockets etc). The router is no more dangerous than a chisel if you use it correctly. Yes it can kick or 'run' if you cut in the wrong direction or cut too deep. Rule of thumb is never try to cut deeper than the width of the cutter in one pass, but I prefer to half that for better more predicable results.
-
[quote name='Dosi Y'Anarchy' post='1286391' date='Jun 29 2011, 01:40 PM'][/quote] There is something more than a little 'Spinal Tap' about that photo, Stonehenge anybody Have a bump on me
-
Doesnt look like ash to me. The redish hue probably means its from the mahogany family, and I remember those old Hondo II's being quite heavy and that would support this theory. Nice project btw, love the proposed new colour.
-
This weekend I've finished stripping the last of the black lacquer off the edges, tidied up the joint line, opened out the control cavity and battery box openings and rebated both. Next job comes from the perfectionist in me ;D Because of the re-thicknessing, the jack socket hole wasnt central and too near the face of the bass. Now being a bit of a hoarder, I still had the off cuts from the blank the body was made from. So I decided to make a plug to fill the jack socket hole so that I could re-drill it on the new centre. So I set about routing out the old hole. Sunday morning was spent finishing off the jack socket relocation. First, I finished routing out the old hole. Then I shaped a piece of the original body blank to fit, trying to line up the grain as best I could (anal I know ). Then I glued the block in place Finally, once the glue had set, I sanded the block to the body shape and re-drilled for the jack socket (I'm using a neutrik locking jack). The project is now pretty much on hold waiting for the veneer to arrive as there is no point doing any of the finishing until all the wood butchery is completed.
-
I had the VS Musician head with a matching 4x12 that was about four foot tall! Must have been very early 80's. Replaced it with a Carlsbro Stingray Pro mega rig (300w head, 150w slave amp, 2x10 cab, 2 x15 cab, all bi-amped).
-
Progress has slowed again due to work commitments. I did get the back of the body rounded over and the 'belly' contour roughed in: Since taking this photo, I've refined the joint line across the belly contour removing the last of the black lacquer at the same time. I'm now spending time sanding around the edge to eliminate the joint line. I've also stripped the front of the bass (again) and now that the body is the right thickness (you know when something feels right) my optimism for how this bass may turn out has risen again. The only possible drawback was going to be that big "dutchman" in the front. So to get around that problem, I've ordered some quilt maple 0.6mm thick veneer to apply over the front of the bass (overkill given that the front is already quilted maple). There should be enough veneer for 4 bass fronts so I may decide to veneer the flat surface of the back as well and only have the japaning lacquer on the edge/belly contour.
-

Powered speaker as alternative to amp for double bass?
JPJ replied to tharidla's topic in EUB and Double Bass
My two'penneth I would not recommend those cheap Behringer mixers for live work as the noise floor is pretty high with an annoying hiss. I would recommend a PJB bass buddy as a practical single channel preamp, and don't Radial do a dedicated pickup/microphone blender in their line of DI boxes? I've also tried the Mackie SRM450 as a bass monitor and didn't really like the lack of clarity, I found it just too 'muddy' -
What a cracking price have yourself a free bump for a real bargain
-
Wow, just when you think you've seen it all, somebody comes up with an unusual but spectacular choice of colours. Makes me think Danelectro for some reason but I really like it
-
need a propper valuation for my precision lyte
JPJ replied to Eddie Twothumbs's topic in Bass Guitars
I had a candy apple red metallic one purchased new for £450 around 1990. This had the PJ config, active two-band eq and gold hardware. Twas a very good bass, lovely tone, I just found the neck to be a little 'flexible' and I felt like I was constantly tweaking the truss rod. -
Well after another protracted period of thinking about this project whilst doing other domestic projects, a similar build thread on a local forum spurred me to return to this project. The problems with the three-way switch continue in that the dutchman when fitted, left the three-way switch sticking out of the back of the body. A quick check with the calipers revealed that in my haste, I'd ended up with a body that was only 39mm thick instead of the more musicman-like 45mm hence why the three-way was too deep for the body! The only solution was to a) remove the dutchman and laminate another piece of swamp ash onto the back of the body to give me the correct finished depth. First step was to order some 18mm thick swamp ash to laminate to the back and then to machine off around 10-12mm of the existing body in readiness for the lamination: That done, I routed out the defective area around the three-way switch in the front: Then I made an insert to go into the new 'hole': Then sanded this smooth: Finally, having laminated the new swamp ash onto the back of the body, I rough cut the shape with a laminate trimming bit and then thinned the body to 46mm total in readiness for final sanding. As I've also been able to source some black grain filler, my plan is now to finish the back in a trans-black finish with only the solid japaning lacquer on the edges. Tonight will be spent finishing shaping the back of the body including the belly area and rounding over the edges. As I now have a large non-matching dutchman in the face of the bass, I'm not going to be as particular with the finishing. If the bass works as well as I hope, then I'll make another body (using the lessons learned).
-
We played a local bike club rally the other week (i.e. big tent in a field) and the headline band were a sort of rock/punk covers act. The bass player fell off the stage (think farm trailer about 4ft high) towards the end of their set and knocked himself clean out. On coming round he was found to have four broken ribs and a suspected broken neck, and would have been airlifted to hospital had the air ambulance not been busy that night.
-
[quote name='TheRev' post='1271716' date='Jun 16 2011, 04:01 PM']Ultimately, I think it's more in the hands and ears than anything else.[/quote] [quote name='Beedster' post='1271706' date='Jun 16 2011, 03:55 PM']Pick your sound and your instrument and learn to be as articulate as possible with both, it's what many of the great players do.[/quote] Agree with both of these. My "db" experience is around 1 month and my reference point is my Stagg EUB but already I've found I can get quite different results/sounds from how I 'attack' the bass. It appears to me that the longscale is particularly more sensitive to the nuances of your playing than the electric bass. In fact, it reminds me of my conversion from fretted to fretless some twenty-five odd years ago, there is so much more expression available and the instrument is so much more sensitive to your touch/technique.
