Basvarken
-
Posts
203 -
Joined
-
Last visited
-
Days Won
3
Content Type
Profiles
Forums
Events
Shop
Articles
Posts posted by Basvarken
-
-
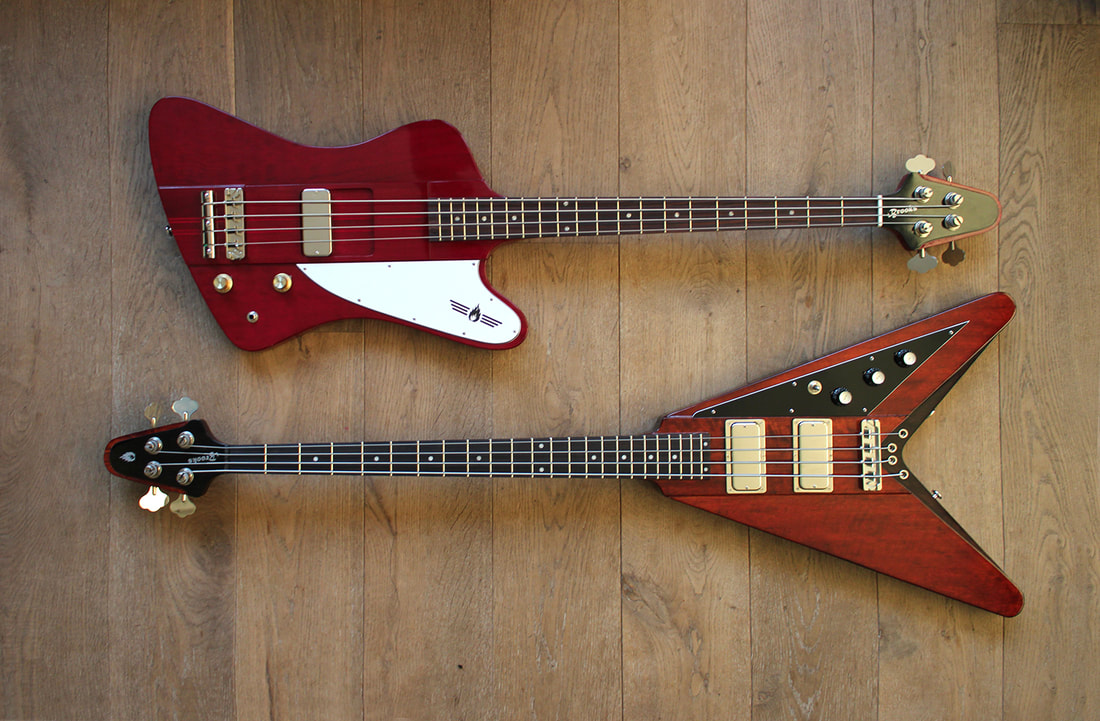
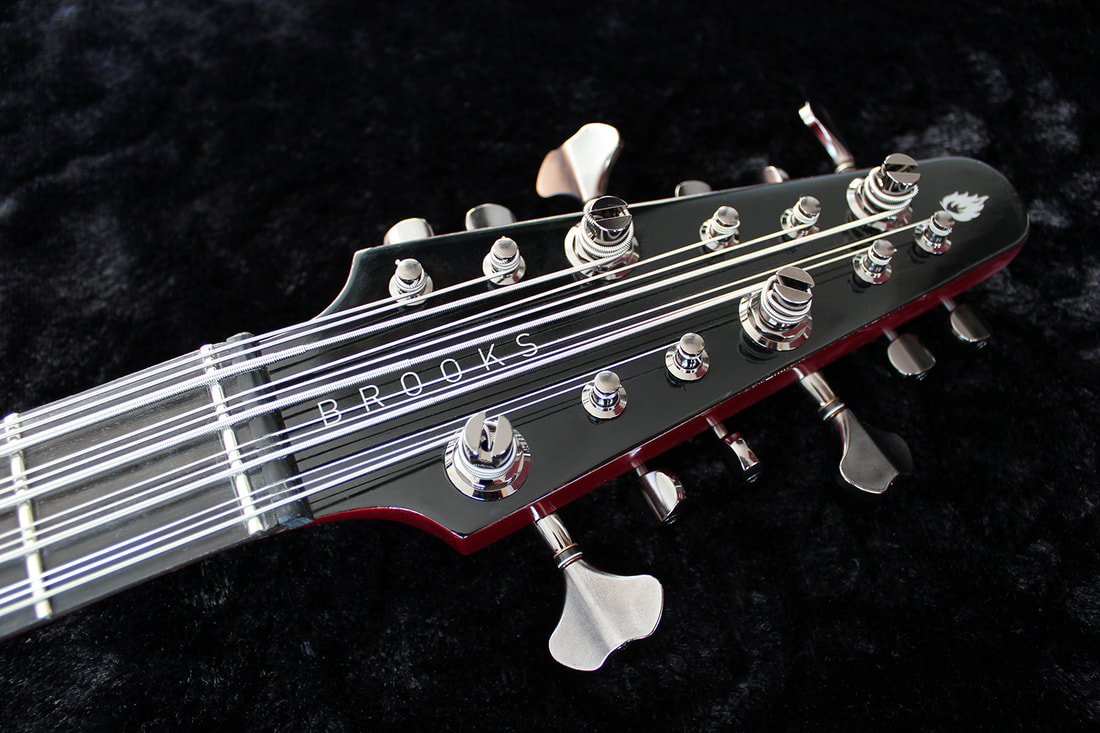
Two Brooks sisters, side by side
Grabbird and Thundervee
-
 11
11
-
-
Ladies, Gentlemen and everyone in between:
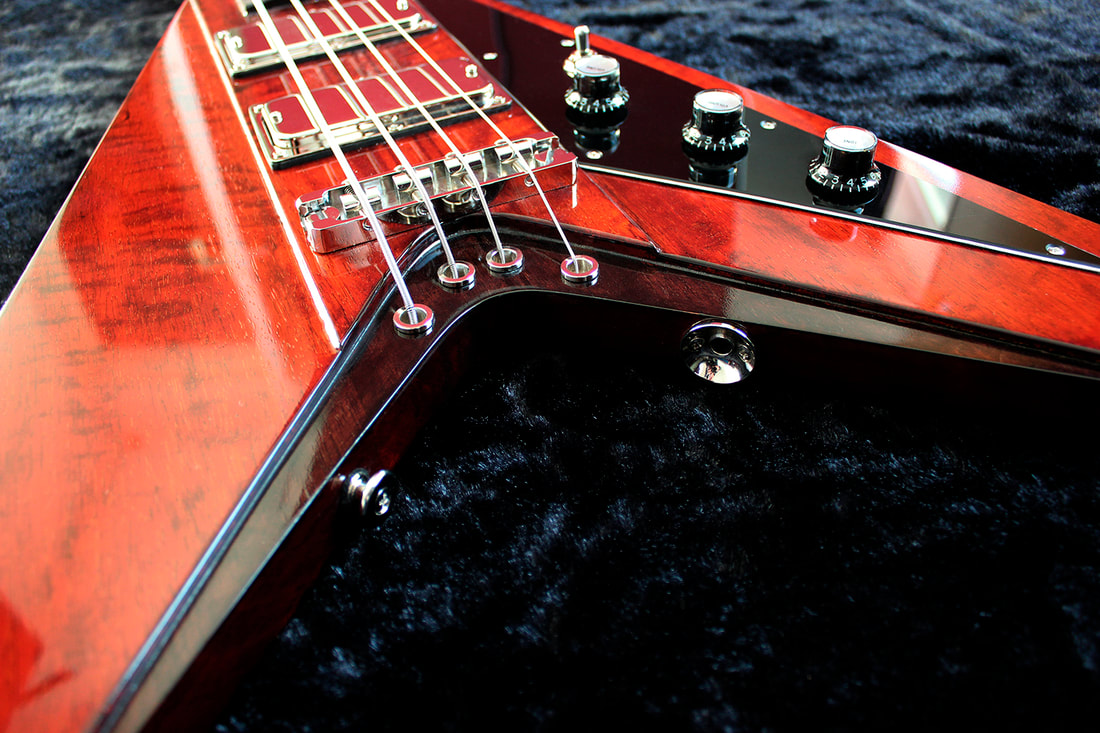
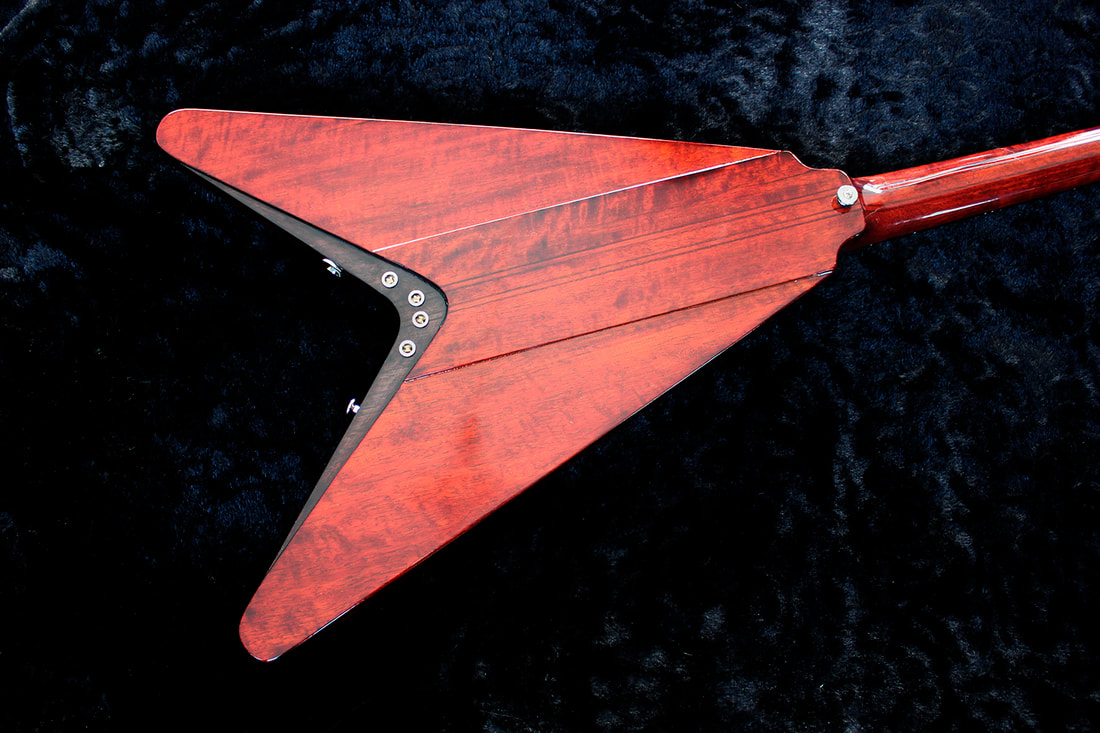
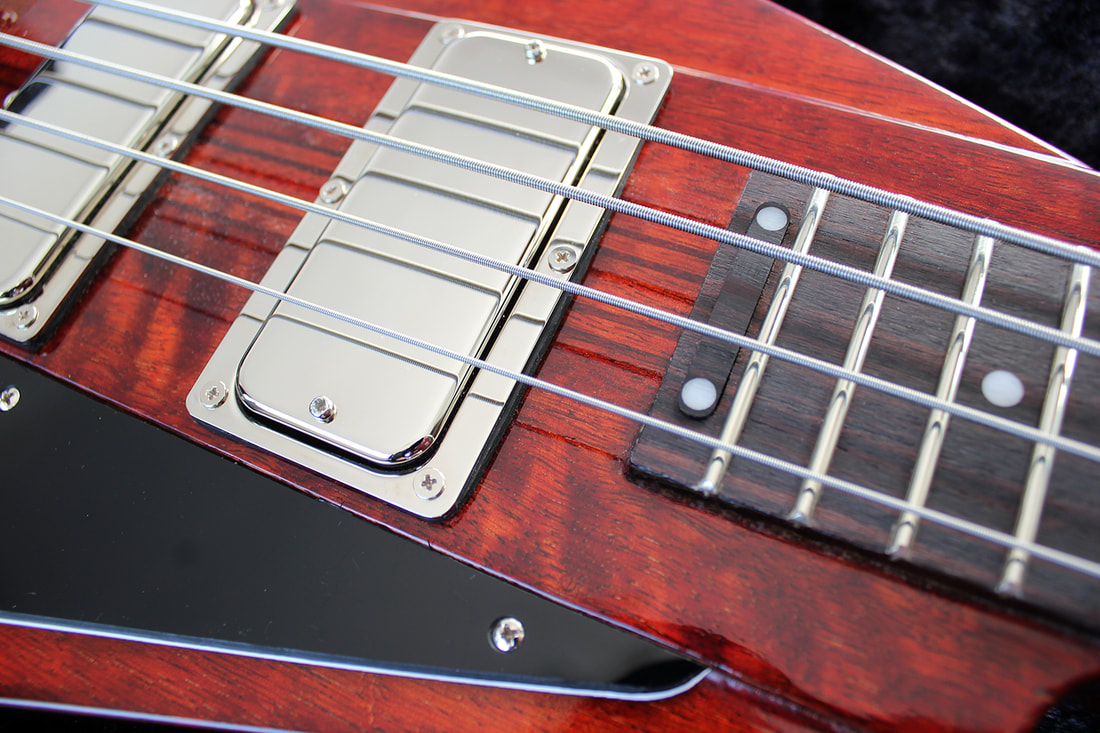
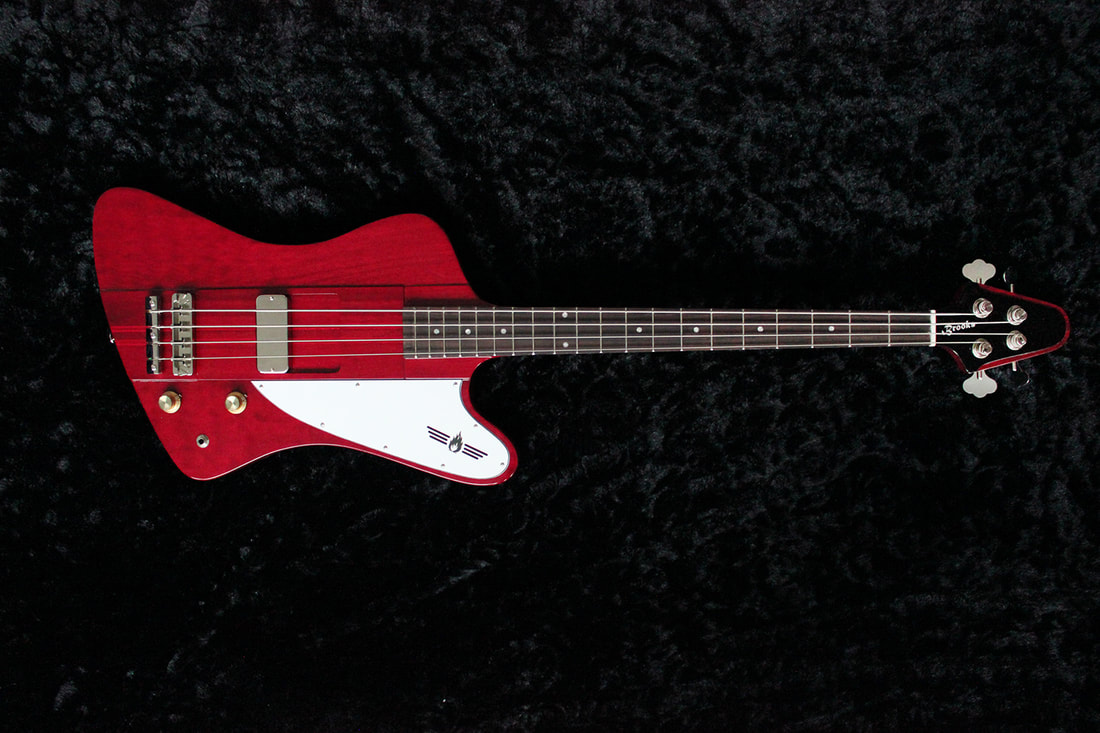
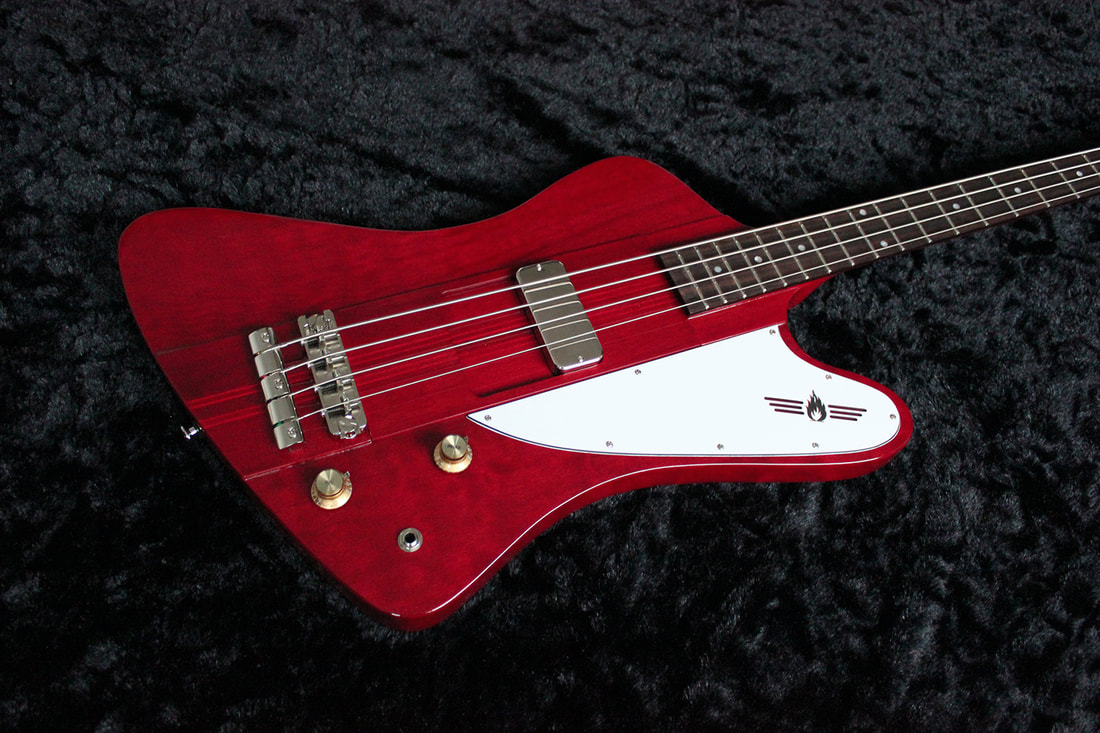
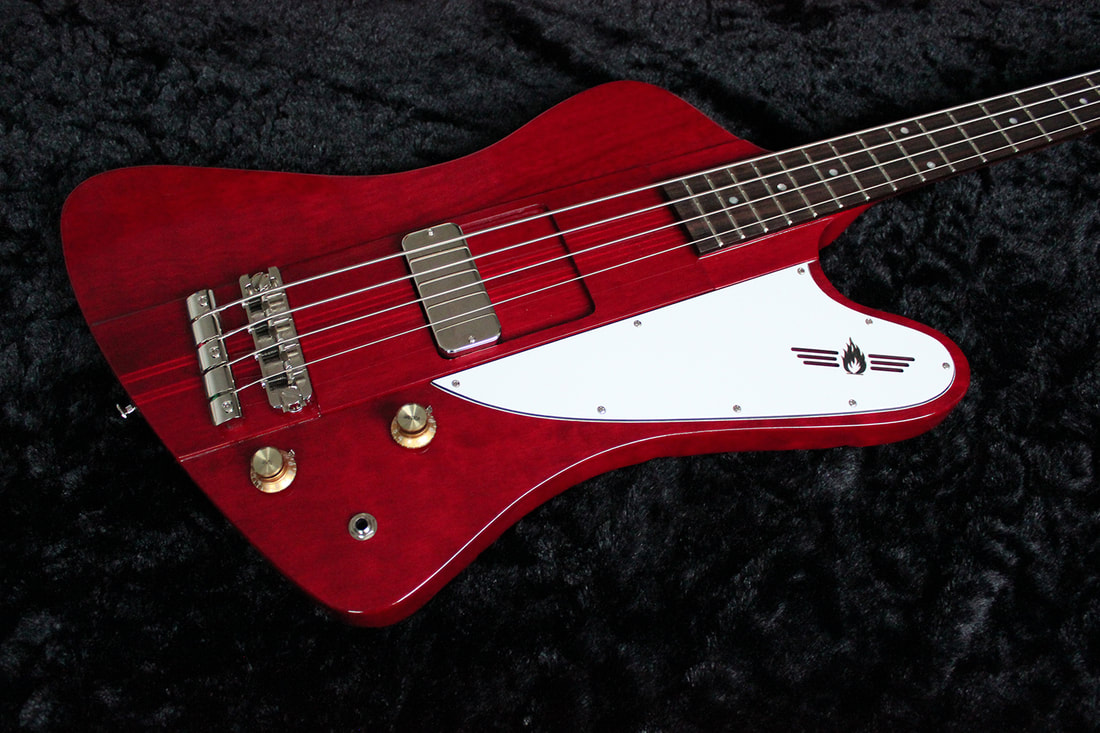
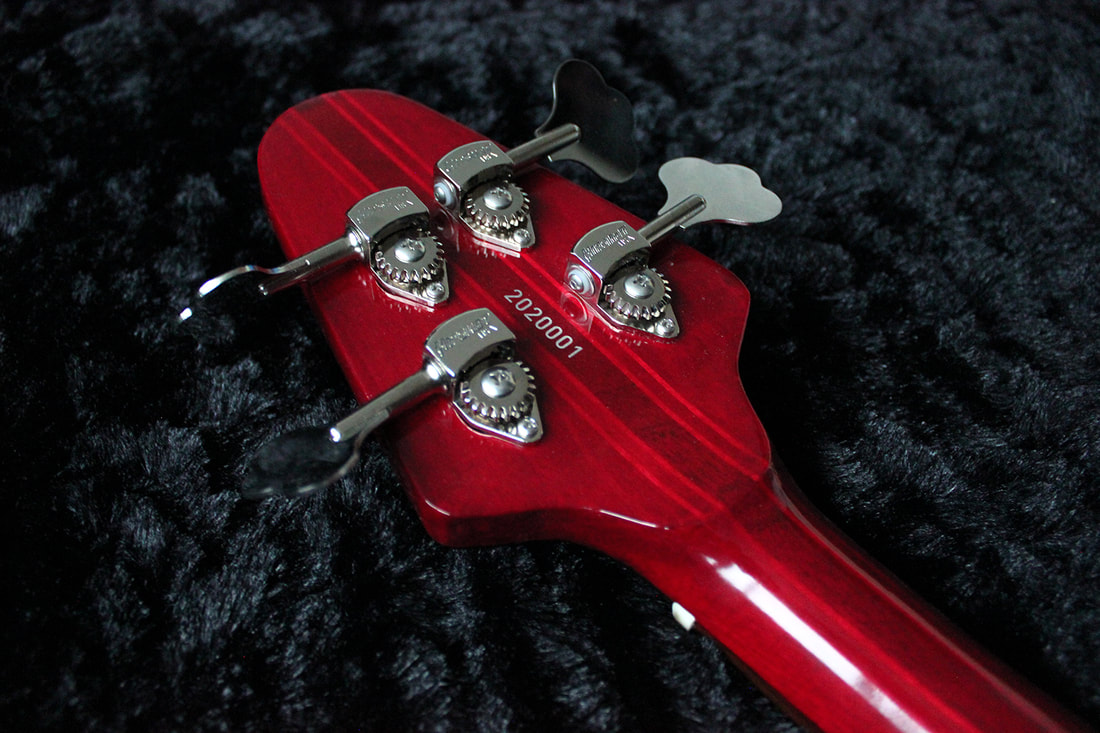
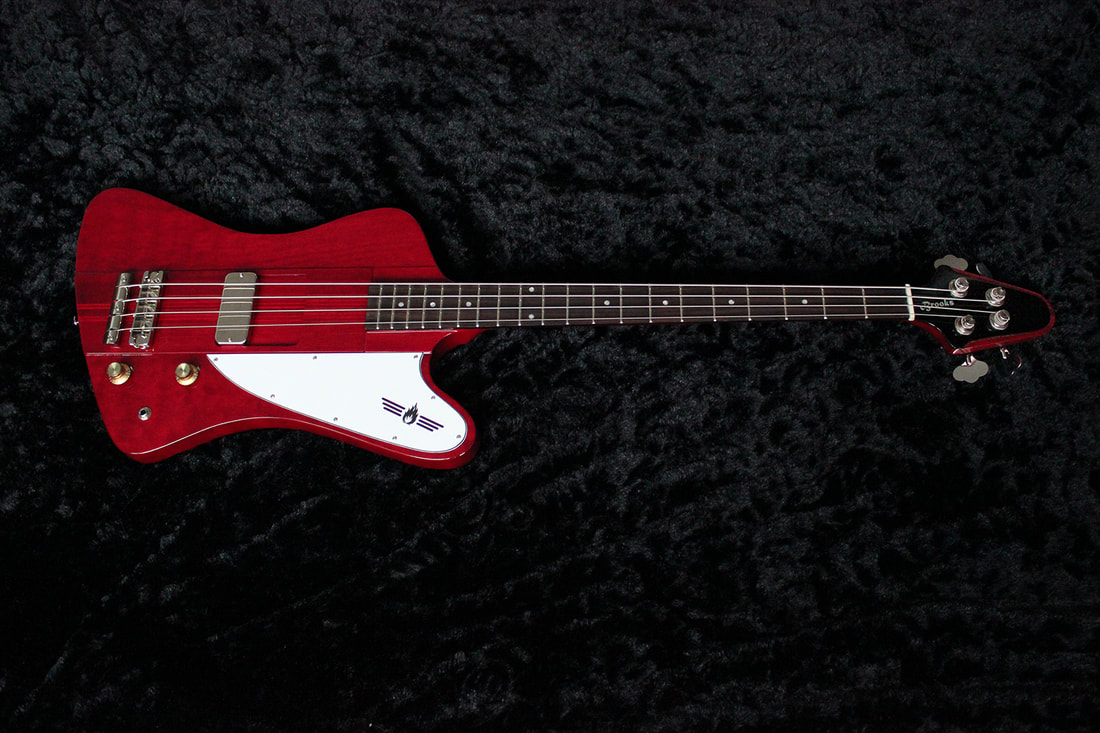
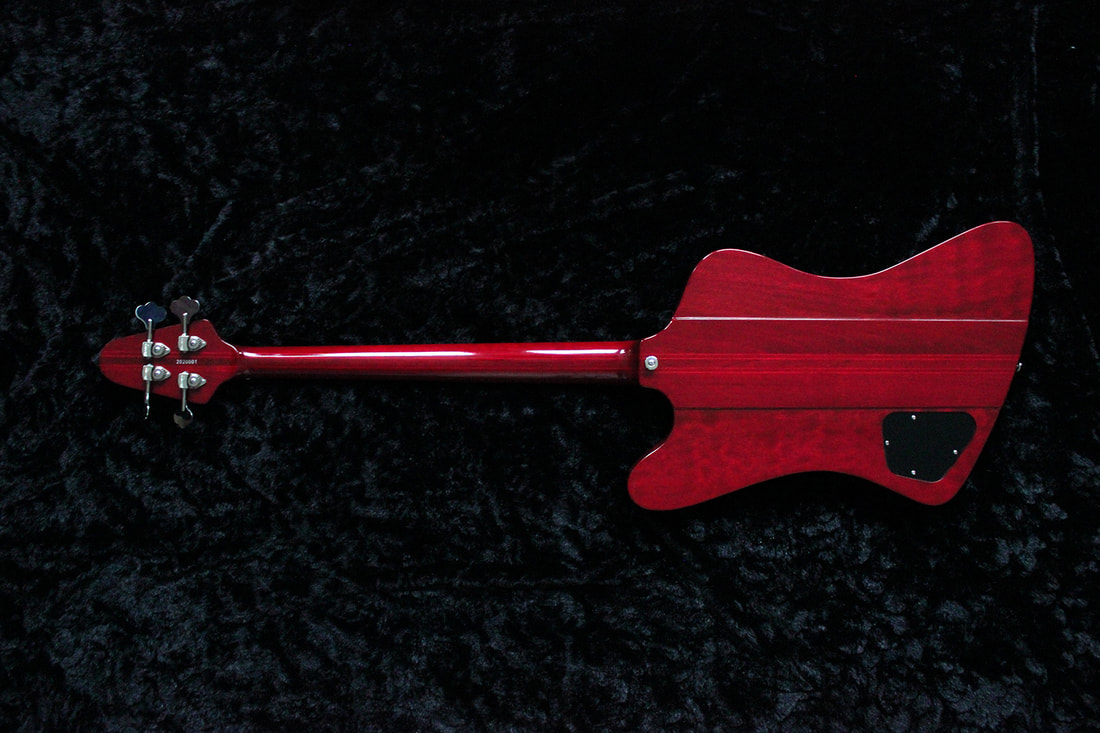
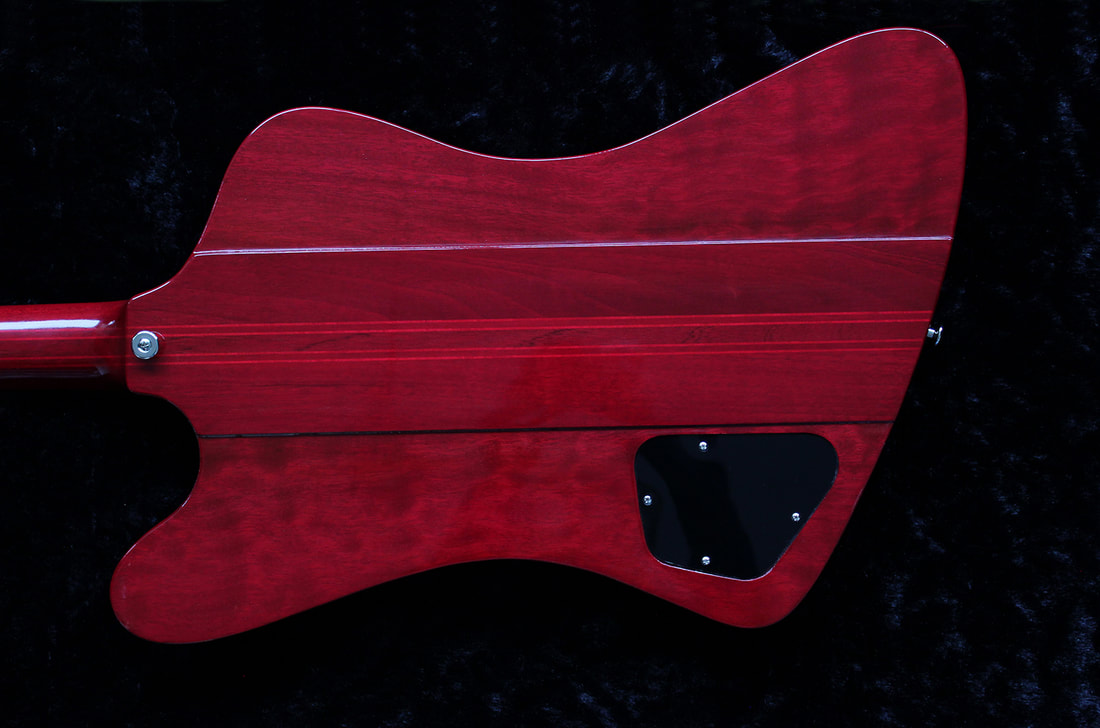
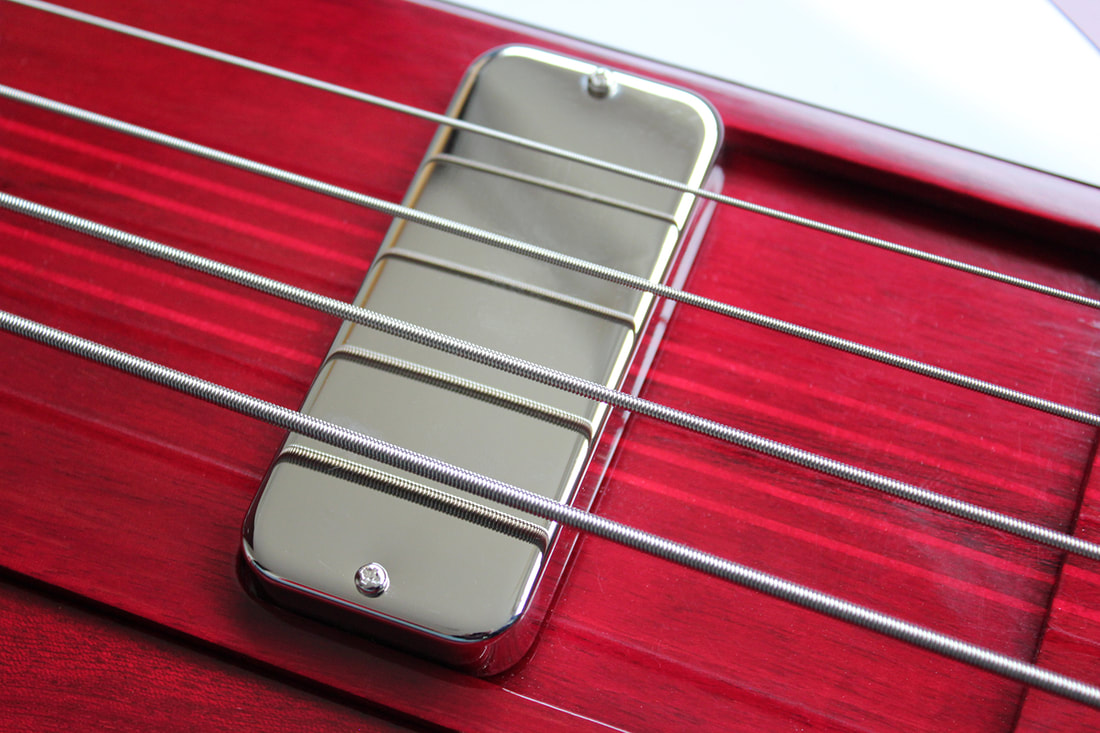
I proudly present the Brooks Thundervee.A hybrid between a Thunderbird and a Flying V.
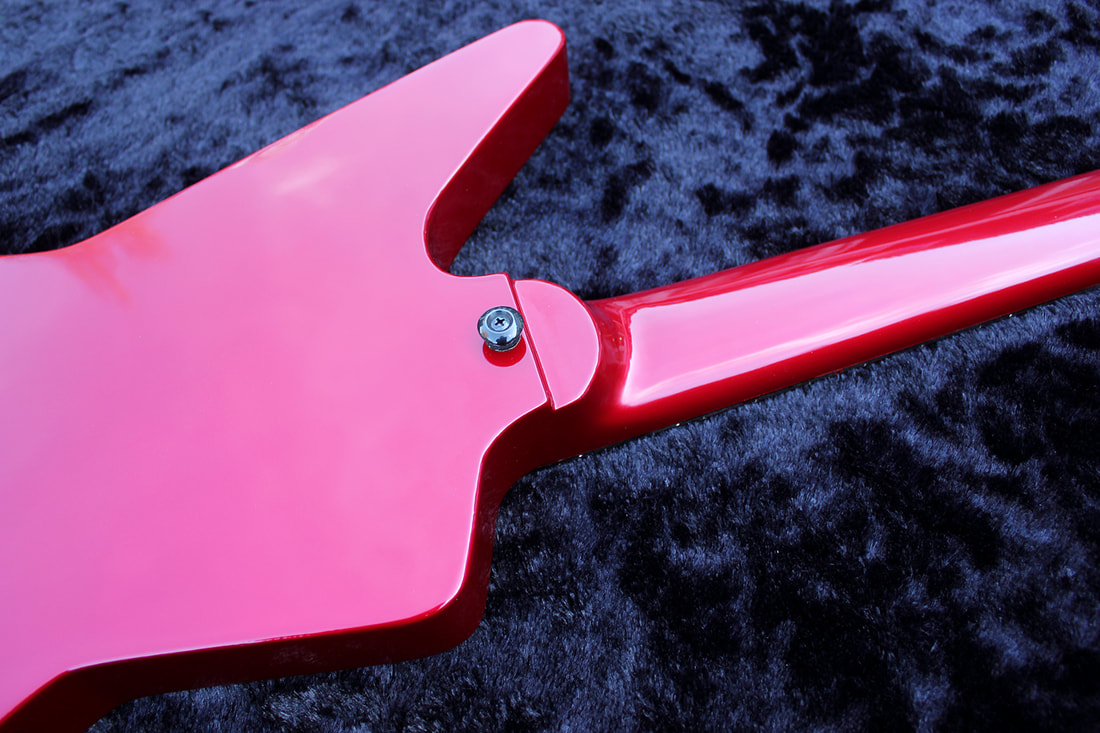
- Neck through with Korina body wings
- Nine ply Korina/mahogany neck
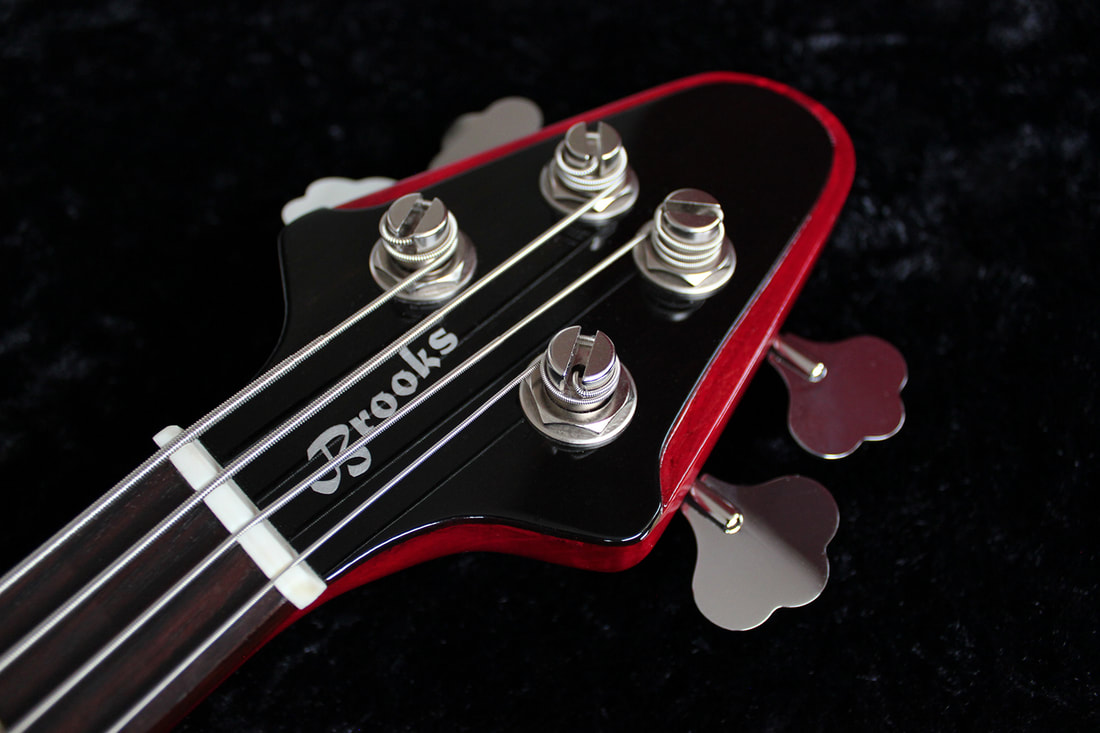
- Ebony faceplate on headstock
- Red Mahogany stain. Gloss transparent acrylic finish
- Rosewood fretboard
- 23 Jumbo frets
- 34" scale
- Handcut Buffalo horn nut
- Three ply black-white-black pickguard
- Wide travel Thunderbird bridge
- String through body ferrules
- Hipshot ultralite nickel plated tuners
- Spokewheel double action trussrod
- 2 x Sixties repro Thunderbird pickups nickel. 9.2 K Ohm
- Di Marzio EP111 toggle switch 4PDT for serial mode
- 2 x Volume pot Bourns 500 kOhms logarithmic
- 1 x Tone pot Bourns 500 kOhms logarithmic
- Kemet capacitor 47 nF paper insulation
- DR FatBeams 45-105Electronics circuit by BQ Music
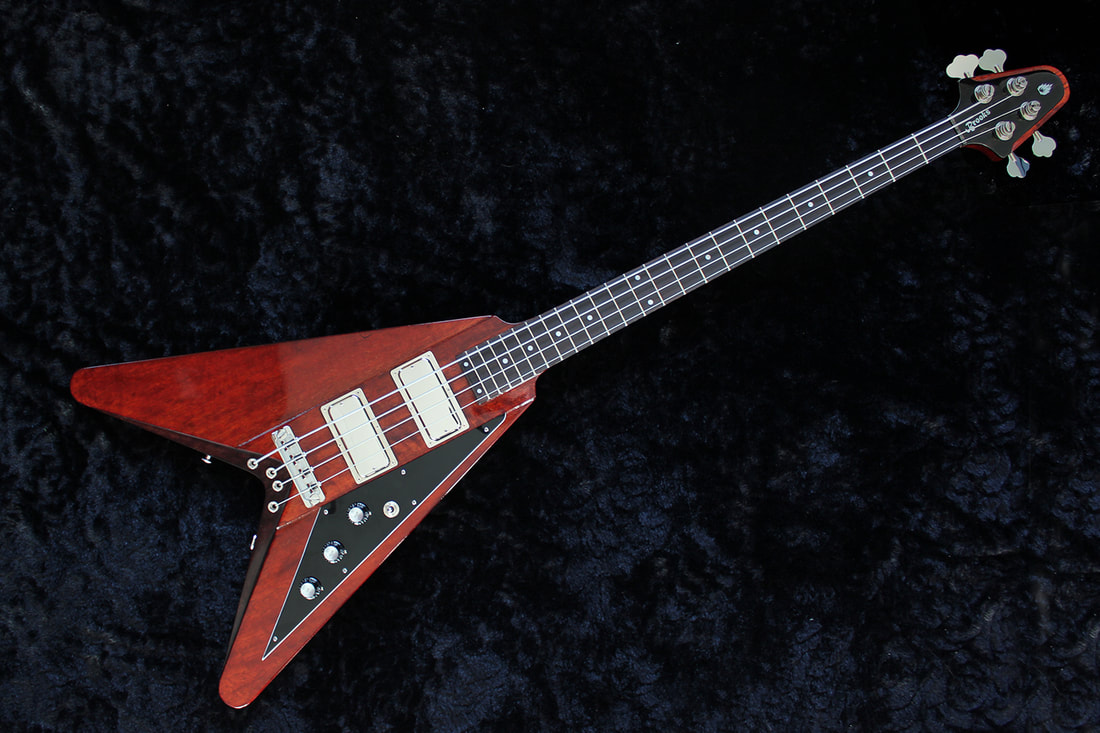


Pics of the build process can be found here
This is what she sounds like:-
18
-
-
On 29/12/2020 at 16:32, Jimothey said:
Congrats on being in the No treble top 5 readers basses of the week well deserved!! 👍🏻
Yeah that was a nice surprise!
https://www.notreble.com/buzz/2020/12/28/best-of-2020-top-10-reader-favorite-bass-of-the-week-features/ -
5 minutes ago, Richard R said:
Hadn't noticed they were videos, logged in from a secure works PC (on a very, very tedious conference call) and it just shows the static image, not as a link. Will check out later.
It is one YouTube video 😉
-
38 minutes ago, Richard R said:
Please post some sound clips!
I did. Check the video a few posts above...
-
 1
1
-
-
16 minutes ago, Romeo2 said:
WOW
looks like an absolute masterpiece, won't be picking up my jaw any time soon
we need a demo, go on, just the intro to Jeremy and we can start a cult in your name
Haha thanx.
Well, here you go:
-
6
-
1
-
-
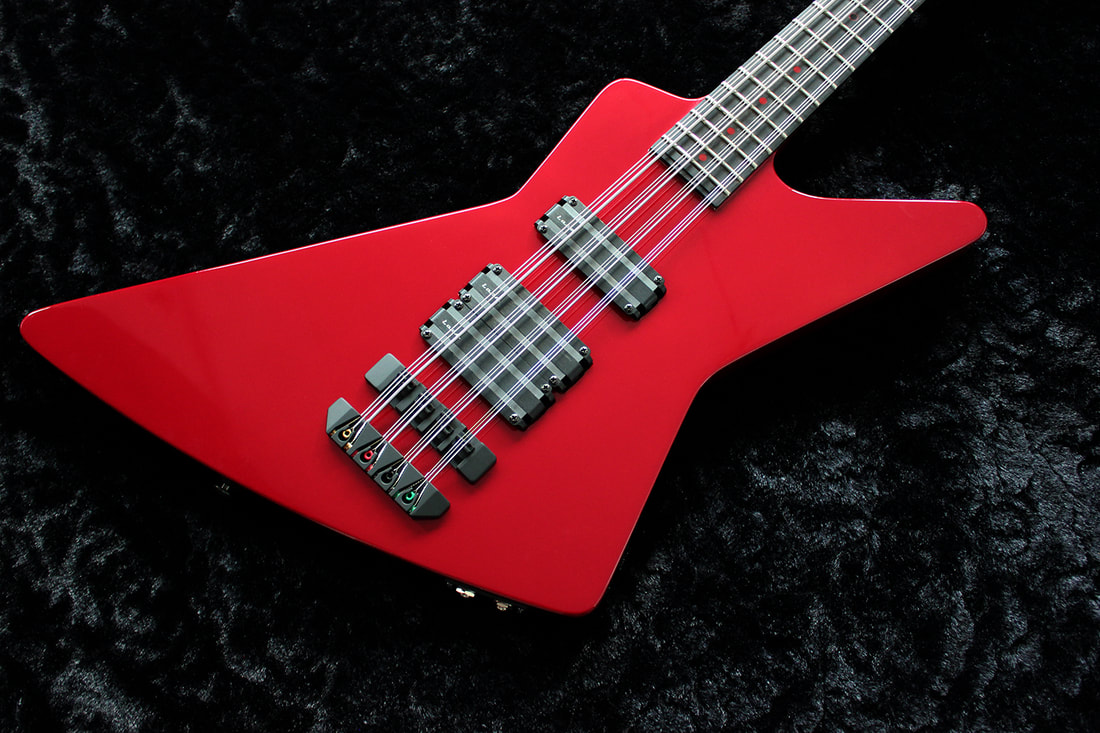
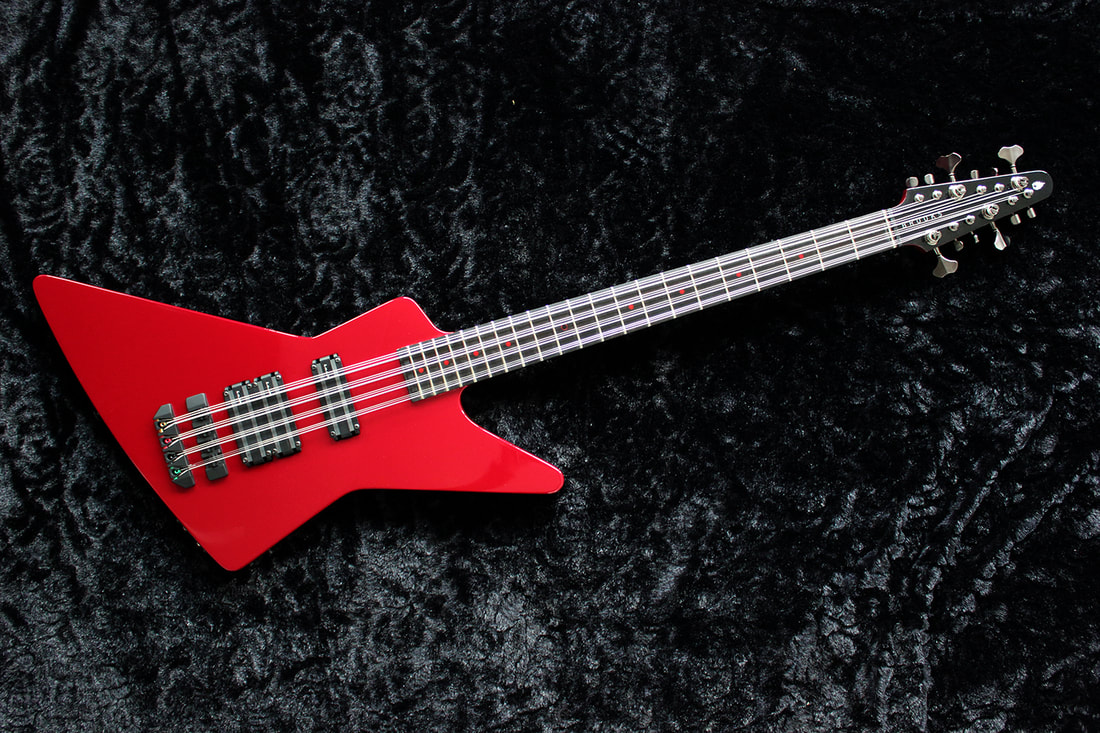
This is my second twelve string build.
It took me quite a while to get this one done. Totally underestimated the lacquer process of the intended Mazda colour Soul Red Chrystal.
But I'm quite happy that this red monster is finally ready to rock.
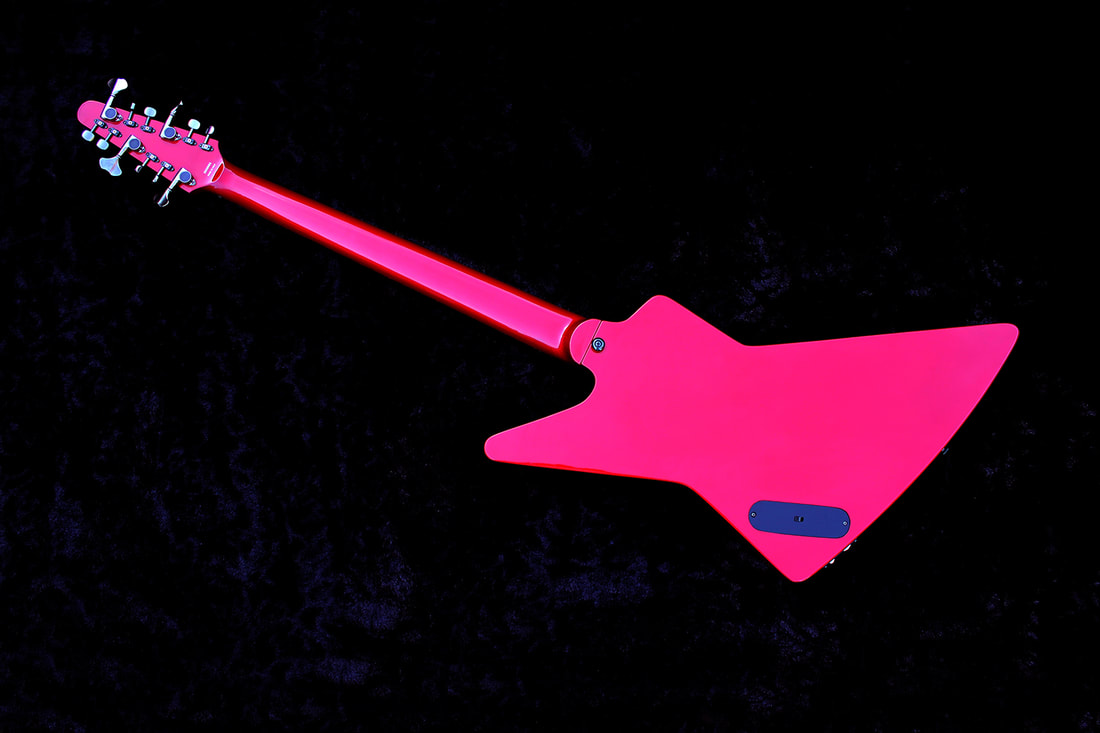
- Mahogany body
- Nine ply laminated Mahogany set neck. Glued in
- Soul Red Chrystal 46k finish
- Ebony fretboard
- Red position dots
- Jumbo frets
- 34" scale
- Buffalo horn nut
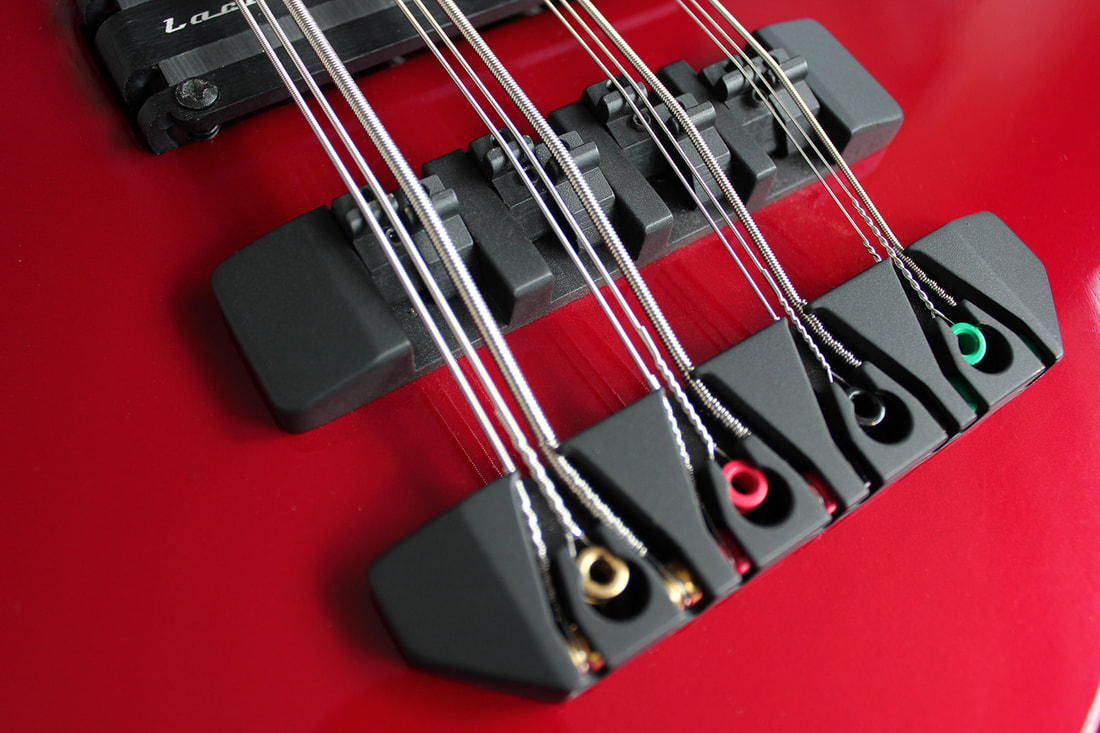
- ETS twelve string brass bridge set
- Two spoke-wheel double action truss-rods
- Carbon reinforcement strip in the neck
- Lace Alumitone Bass Bar in the neck position
- Double Lace Alumitone Bass Bar in the bridge position
- Two separate outputs.
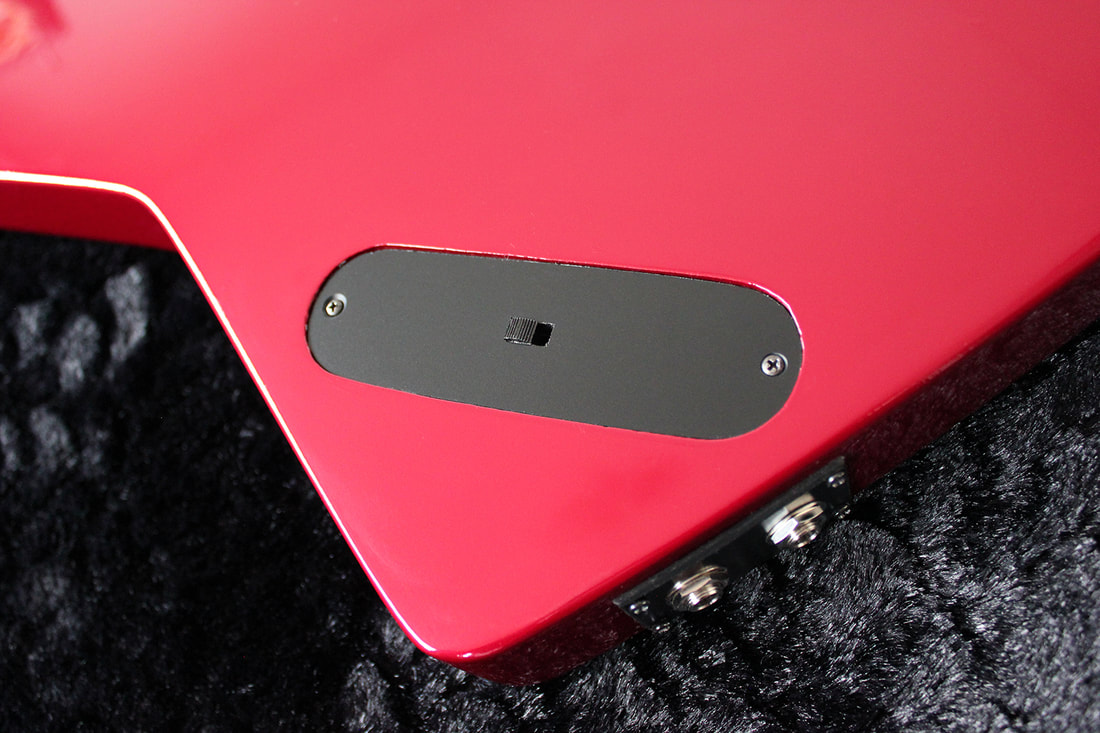
- Series parallel switch on the back
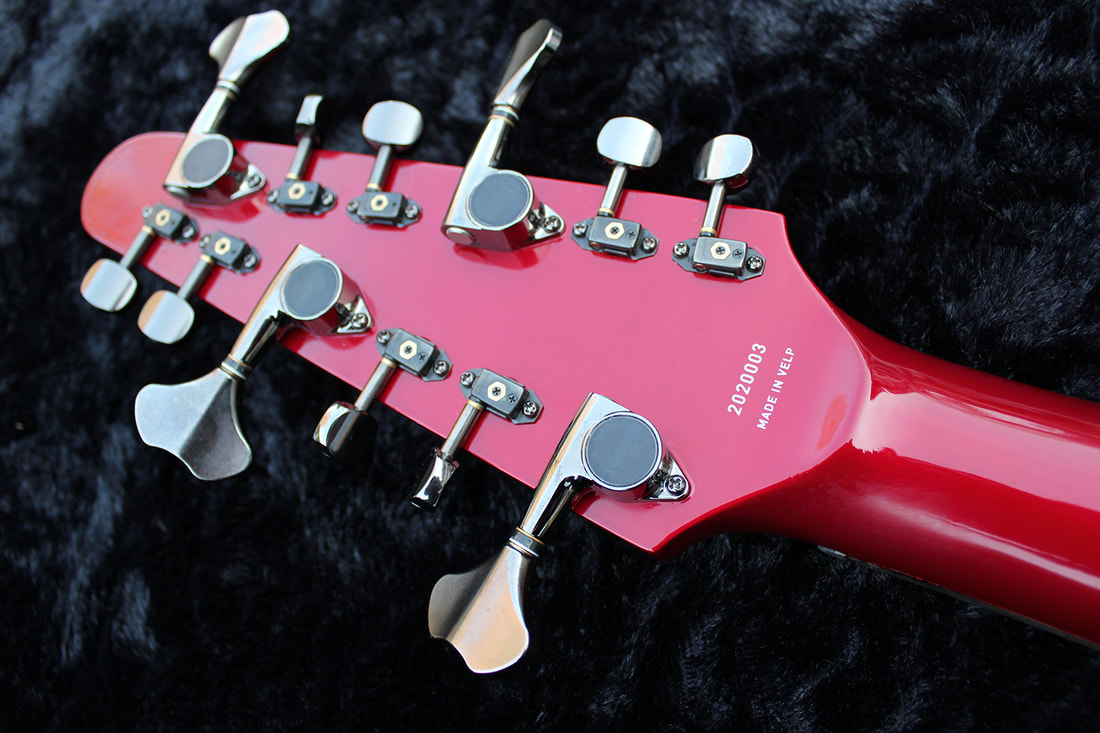
- Gotoh GB 350 lightweight bass tuners
- Gotoh Stealth ST 31 guitar tuners
- d'Addario EXL 170 - 12 strings
- Weight: 5.2 kg
Electronics circuit by Bas Becu.
Pics of the build process can be found here:
https://www.enkoo.nl/brooks-exb-12-3p.html

-
14
-
-
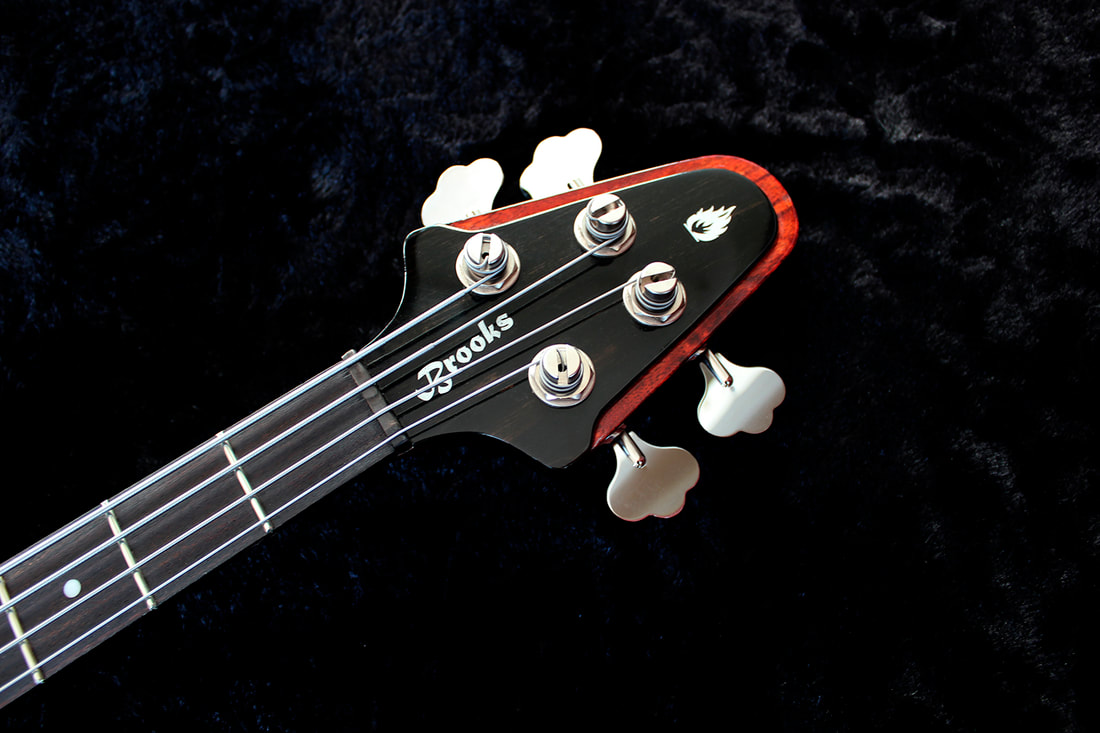
Thank you.
It's a Brooks Telebird.
https://www.enkoo.nl/brooks-telebird.html -
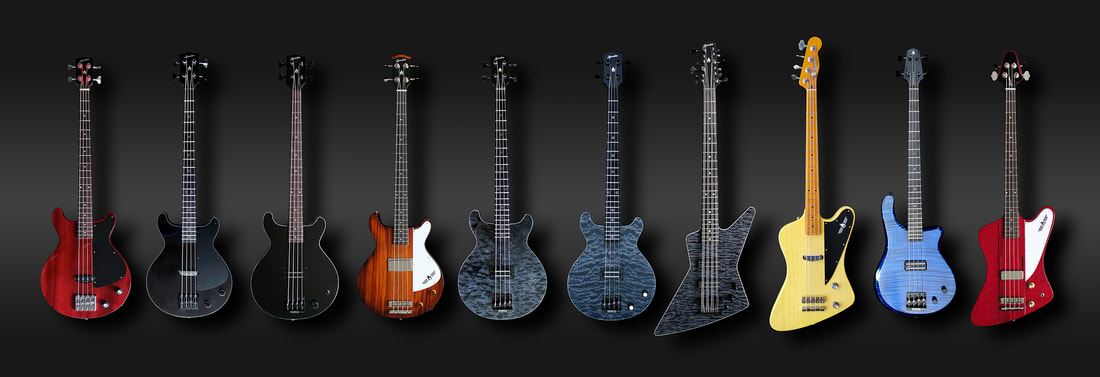
The basses that I built in the past three years
-
12
-
-
-
-
Wow! The Brooks Grabbird is Bass of the Week at NoTreble!
https://www.notreble.com/buzz/2020/03/09/bass-of-the-week-brooks-grabbird/-
5
-
-
5 hours ago, Happy Jack said:
I do hope you've registered that Flame logo ... much nicer than the original.
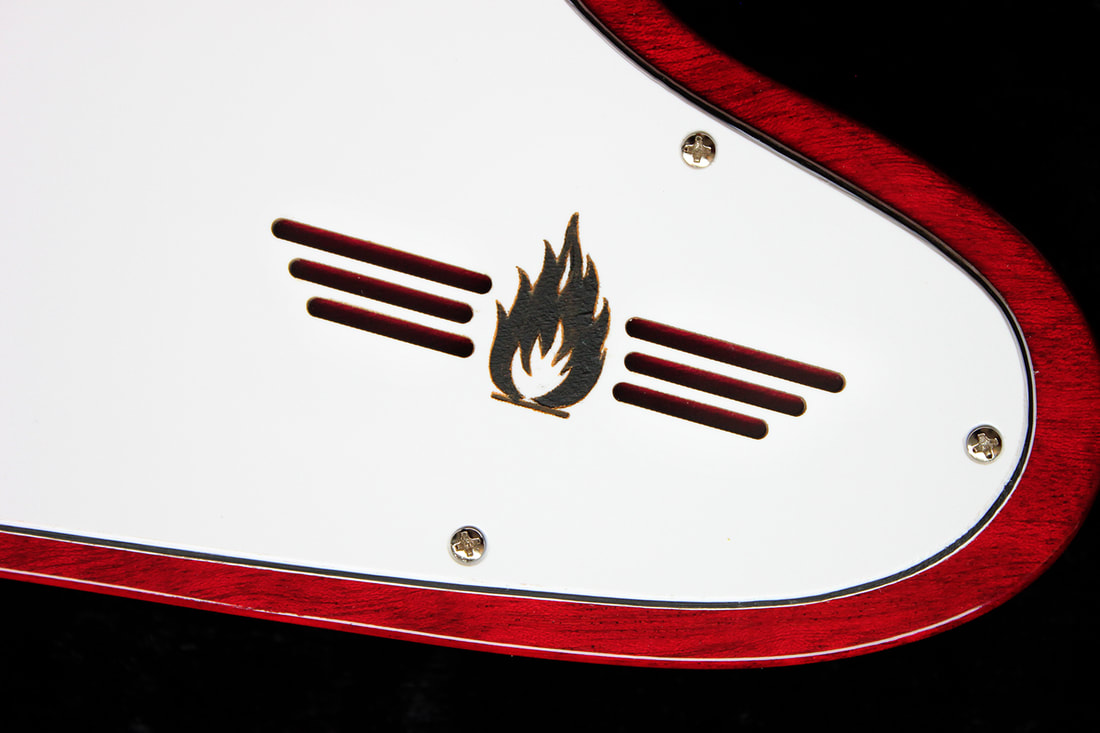
Well that would be difficult. The flame is an international warning sign. It doesn't belong to anyone really.
I've been using it as a logo since I was a teenager, because I used to be a highly flammable little upstart. 😂
I'm more mellow now, but the flame stuck 😉-
1
-
 2
2
-
-
59 minutes ago, EliasMooseblaster said:
Looks amazing and sounds glorious! What a great idea.
Is that humbucker an original Gibson pickup, or did you use somebody else's?
Thank you. The pickup is a "Thunderbird Bass Pickup Vintage Style for Gibson" by EY guitar Music.
I'm a huge fan of those pickups. -
Here's a video to give you an impression of the sounds of the Brooks Grabbird
-
4
-
1
-
-
8 hours ago, DoubleOhStephan said:
Me too 😁
Such a cool idea and lovely looking bass.
Out of interest, what fretboard radius does it have?
The Grabbird has a 16'" radius
-
1
-
-
7 minutes ago, AndyTravis said:
I suspect after recent purchases, there would be an imminent divorce.
But you make beautiful instruments. And I am weak - I know where you are though, for sure.
Have you ever attempted a version of the Les Paul Signature bass (the posh Jack Casady).
No I haven't , but I did modify my JCS a bit. Inspired by the first generation of the Les Paul Signature bass
-
5
-
-
1 minute ago, AndyTravis said:
I want you to do me a Pelham Blue Ripper with Thunderbird pickups 😂
No problem Andy. Send me the specs and I'll make you a quote.
-
2
-
-
8 minutes ago, Happy Jack said:
Just love that trussrod cover!
What does the bass weigh?
4.5 kg
-
Made a template for the controls cover
 And I though of a solution for securing the pickup frame without ruining the clean look. I drilled holes for tiny magnets in each corner. In the back side of the frame. And I would place screws or carpet nails in the middle section of the body for the magnets to snap onto.
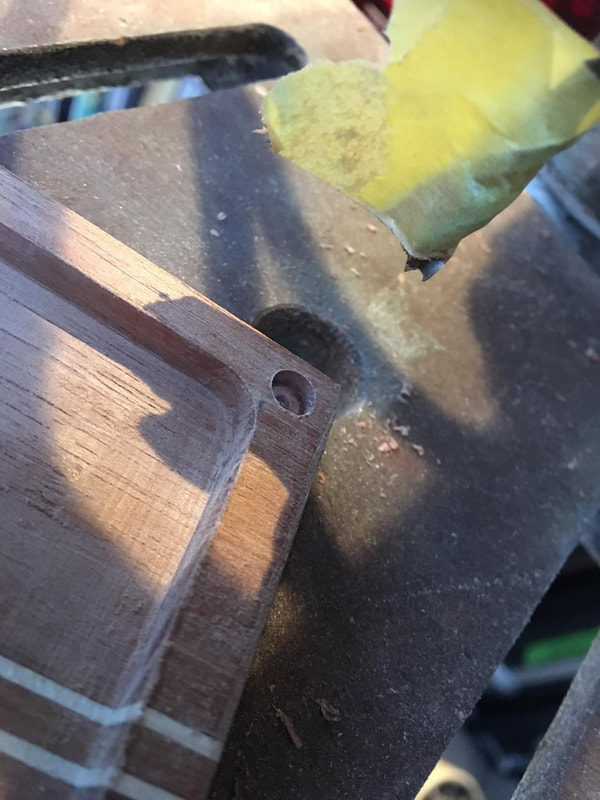
 Cut the slot for the top nut
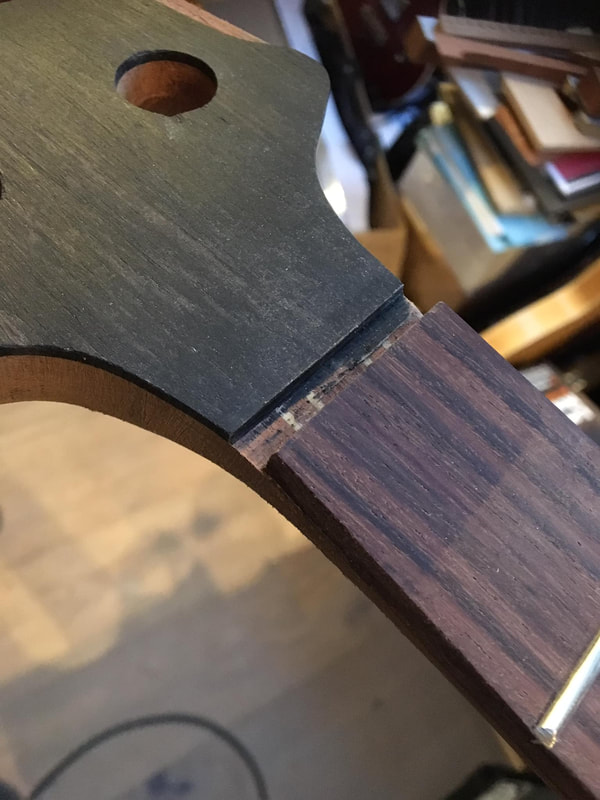 Prior to staining the body I used pore filler because the mahogany has very open grain.
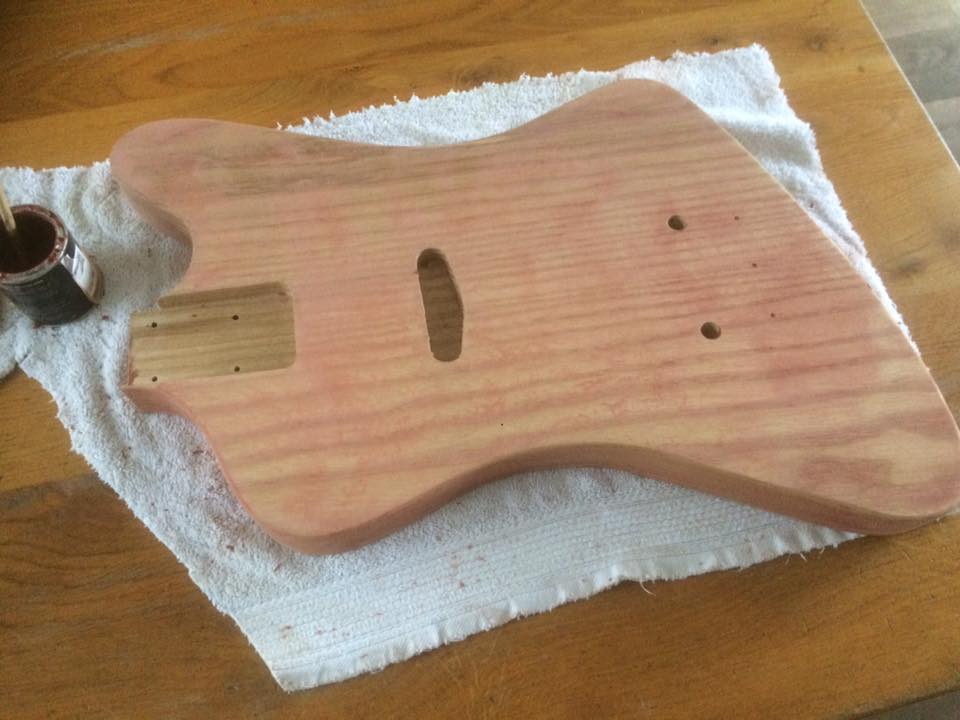 When the grain filler was sanded flush I stained the bass with a waterbased bright red colour by Clou.
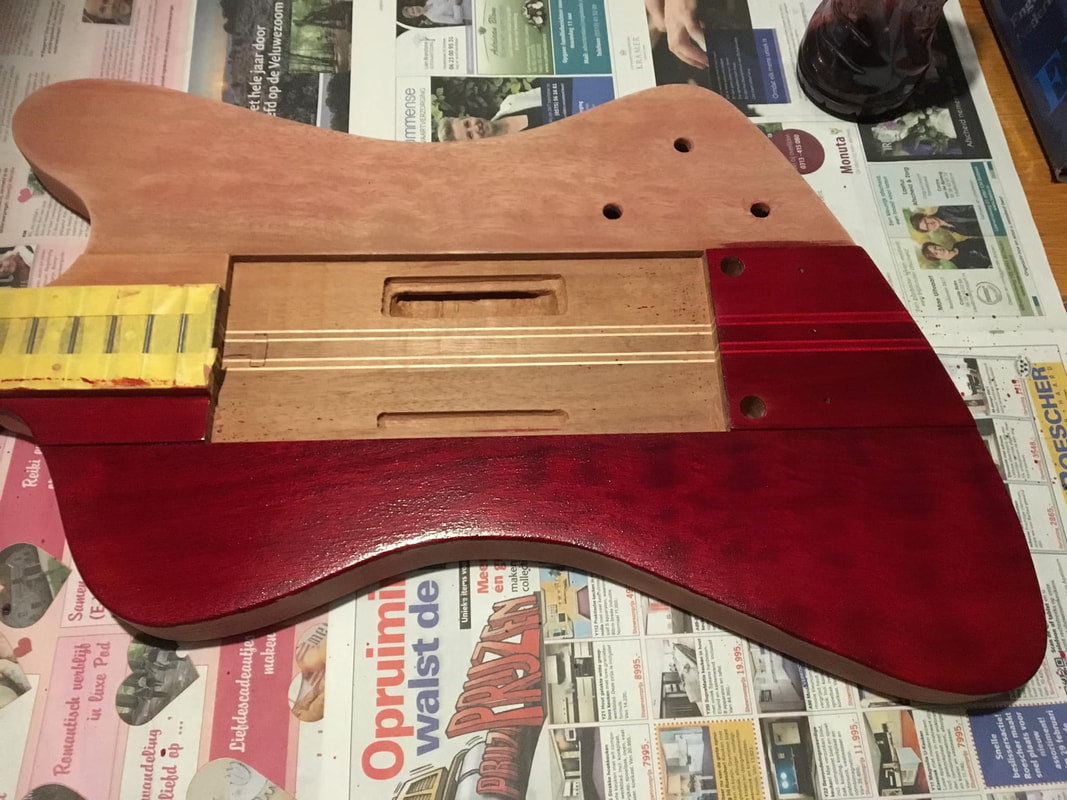
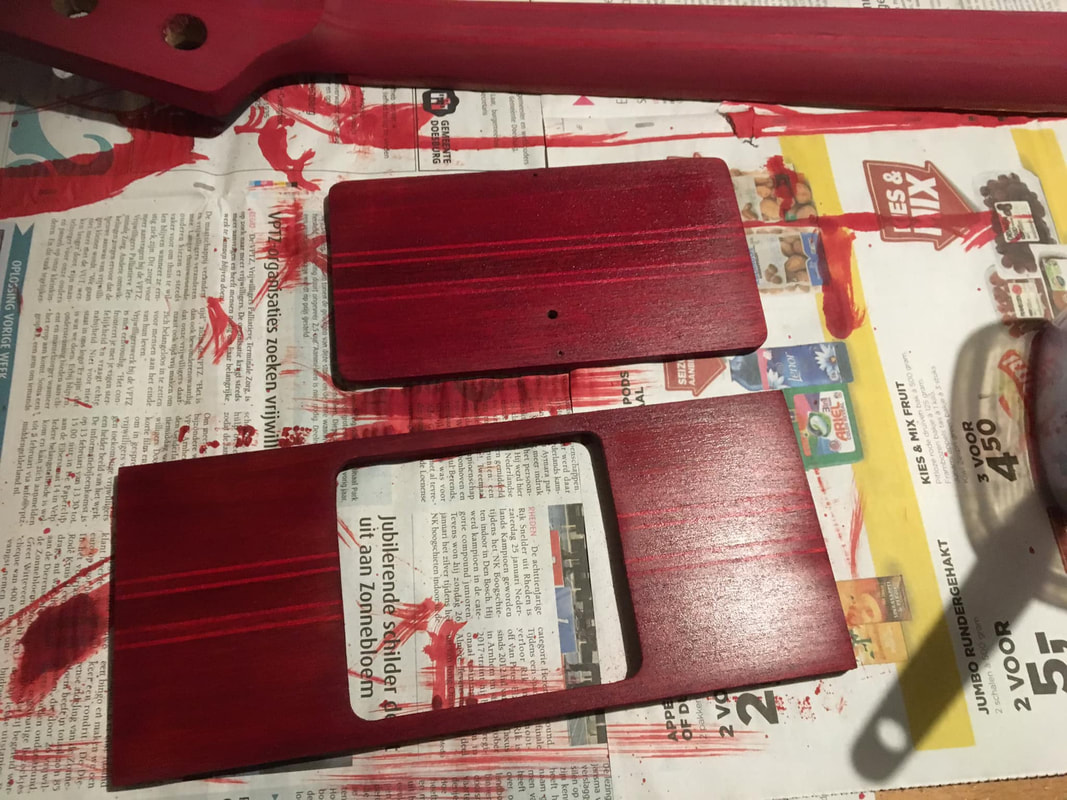 After the first layers of clear coat acrylic it looked like this
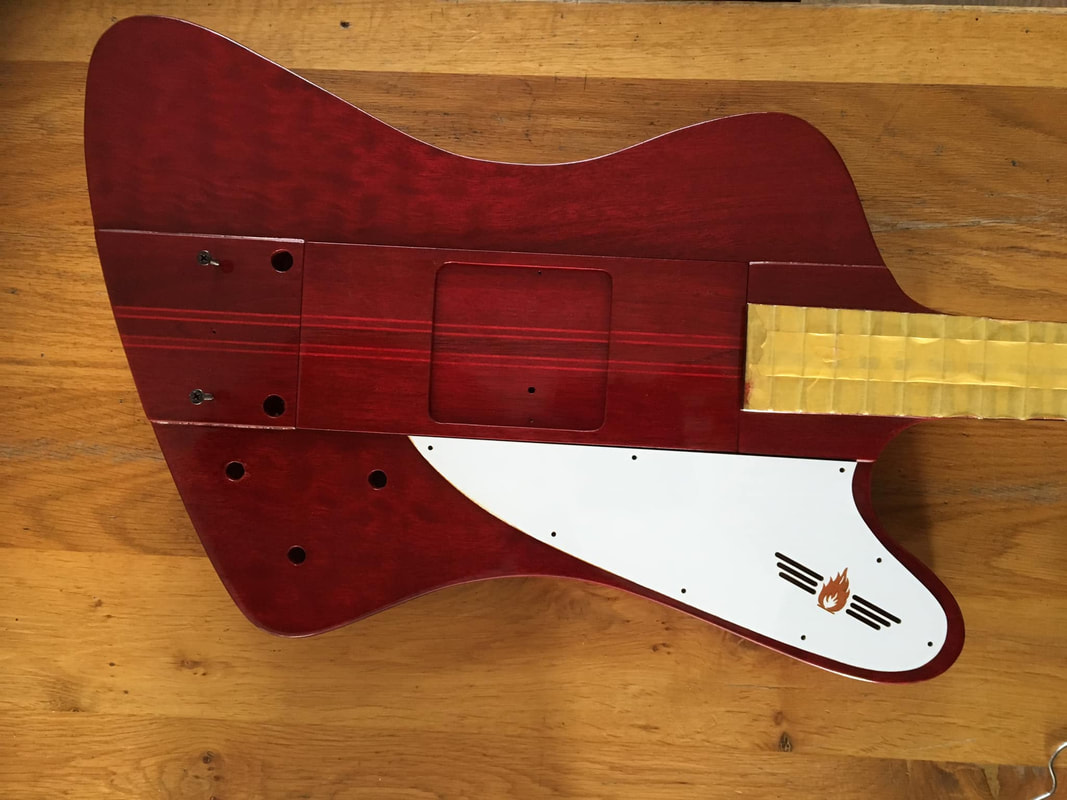
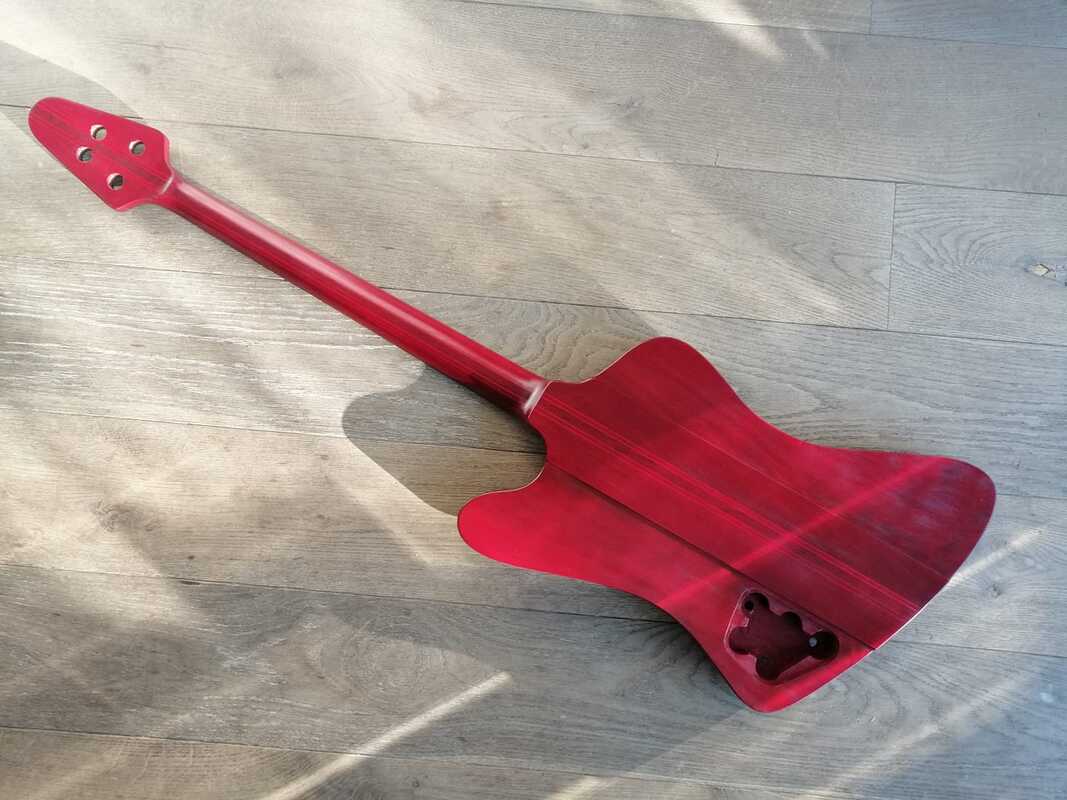 I applied the water slide decals
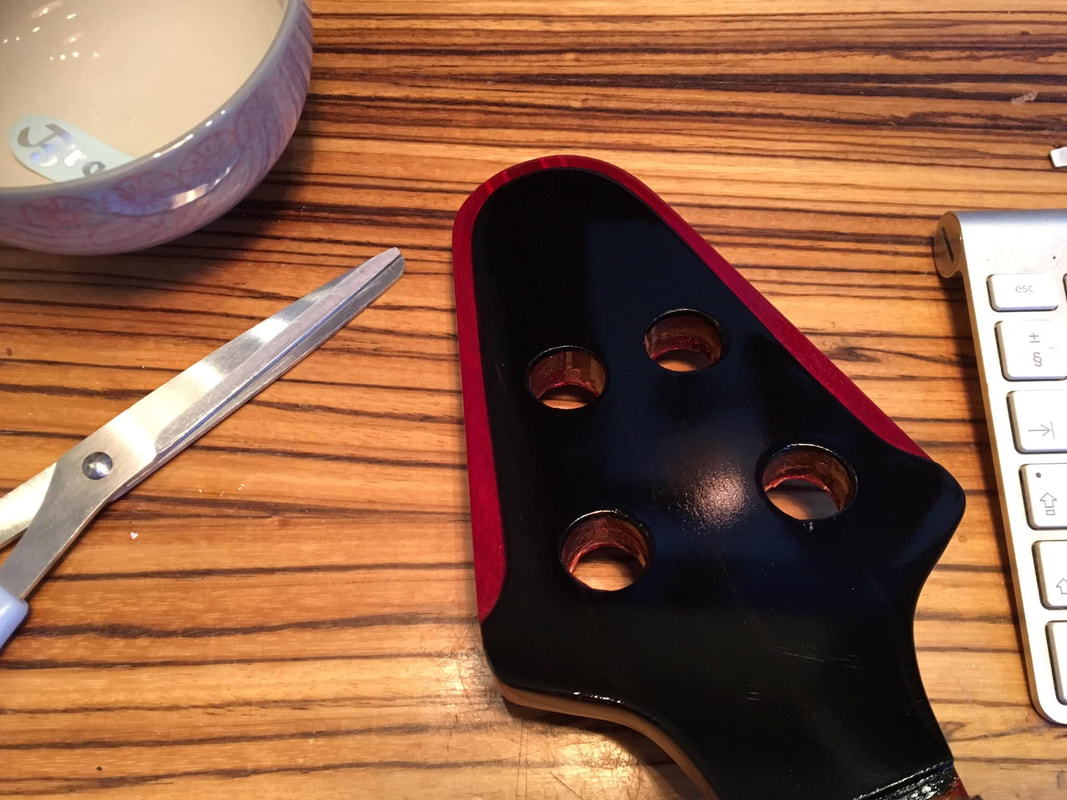
 After many layers of acrylic and lots of sanding in between
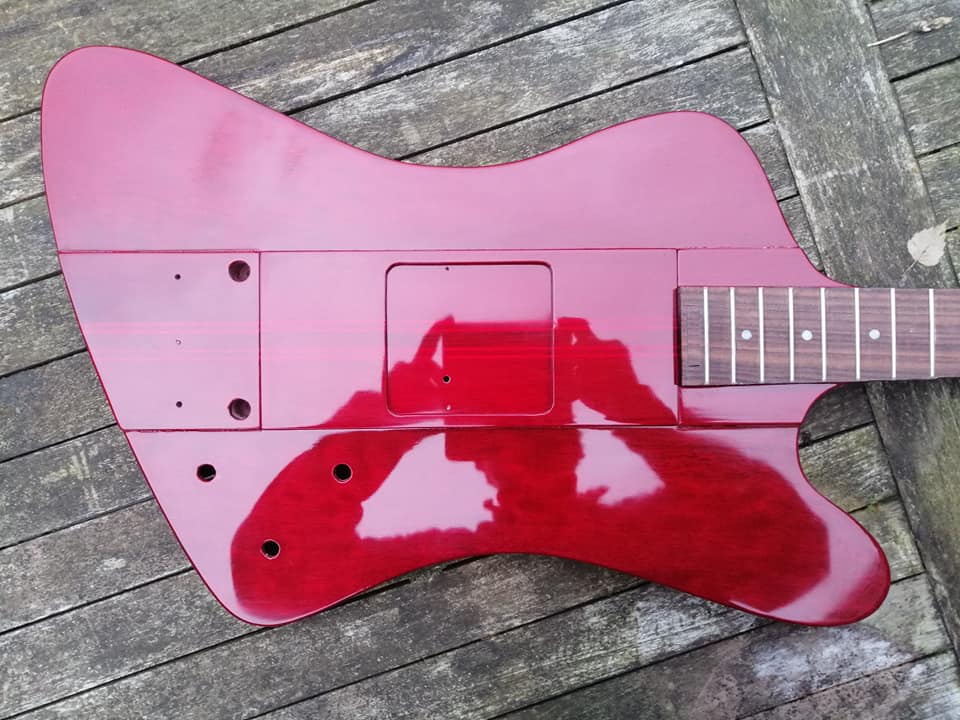 A friend of mine has a laser cutter. I sent him the design for the pickguard and the logo. He cut it out and engraved the flame logo for me!
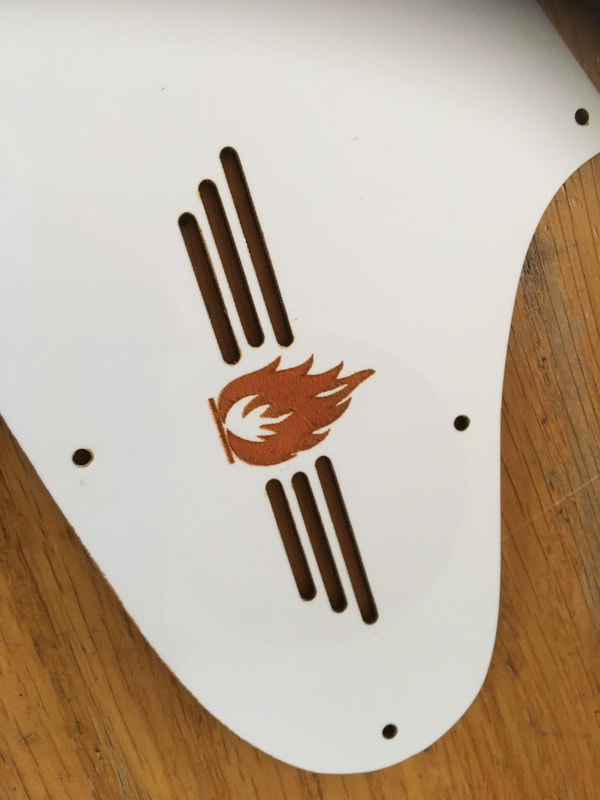
-
10
-
-
 Drilled the holes for the bridge studs
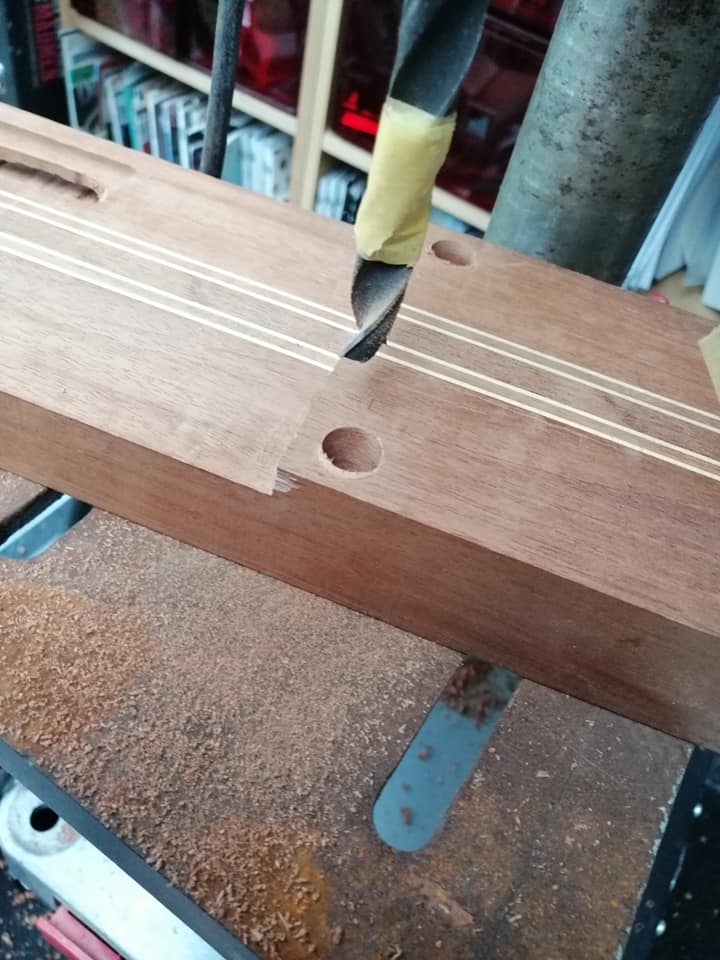 Drilled the holes for the tuners
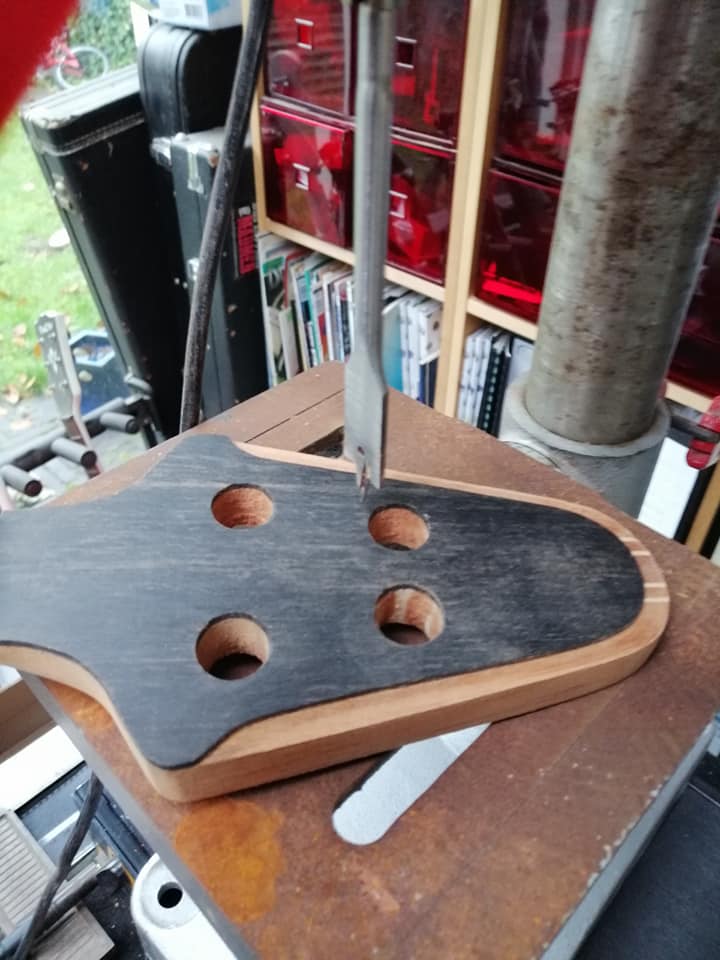 Center piece almost ready for glueing the wings
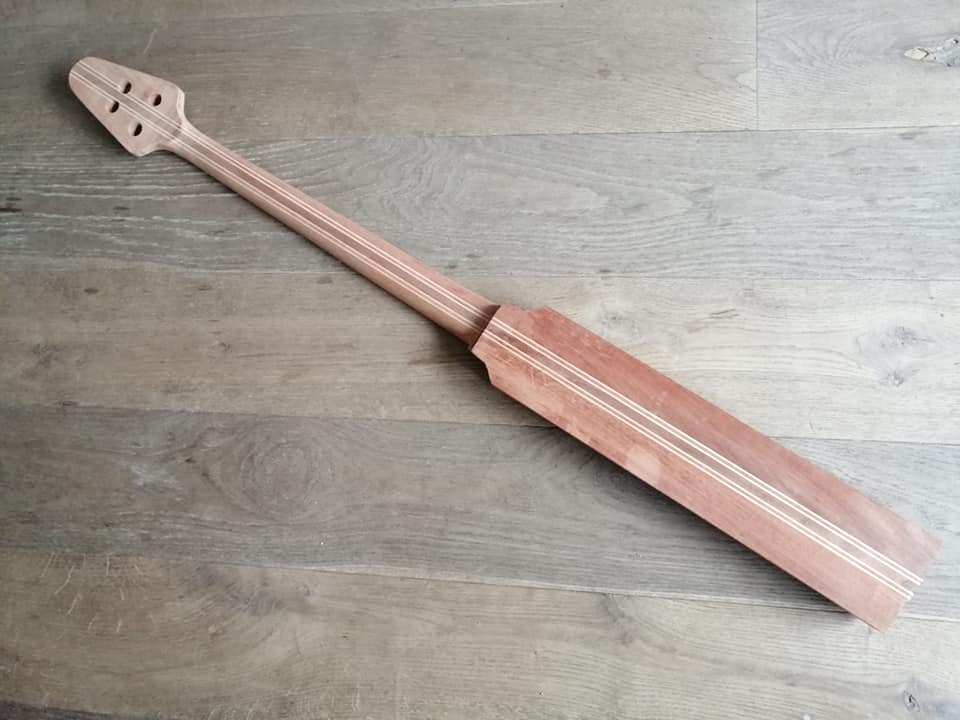 I had a nice slab of curly mahogany for the wings.First I glued the lower wing.
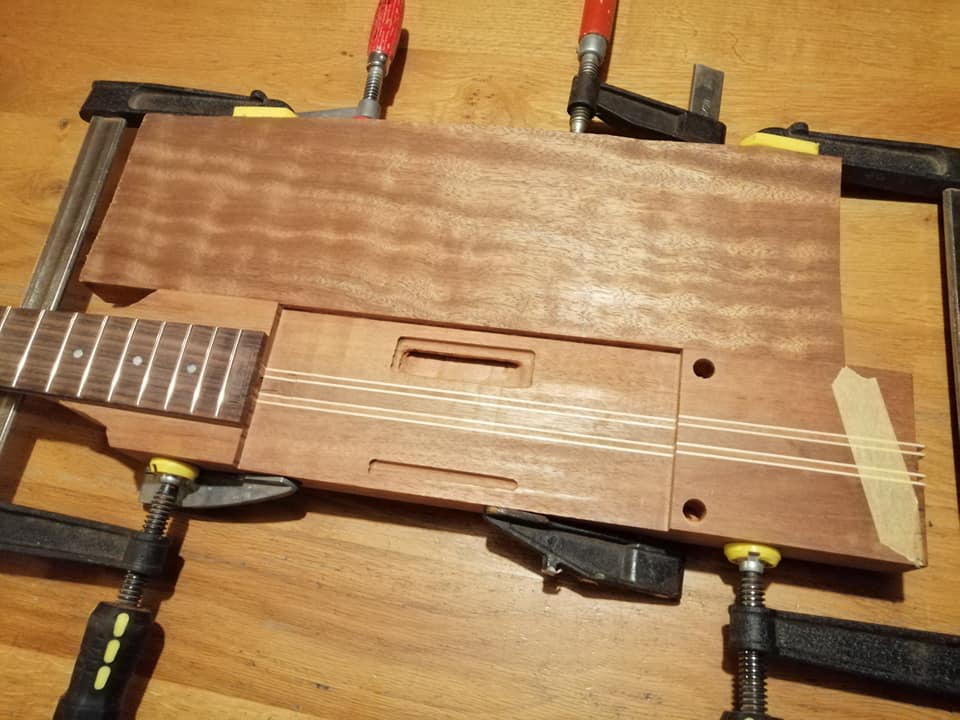 Then the upper wing. No pics of routing the control cavity in the lower (sorry)
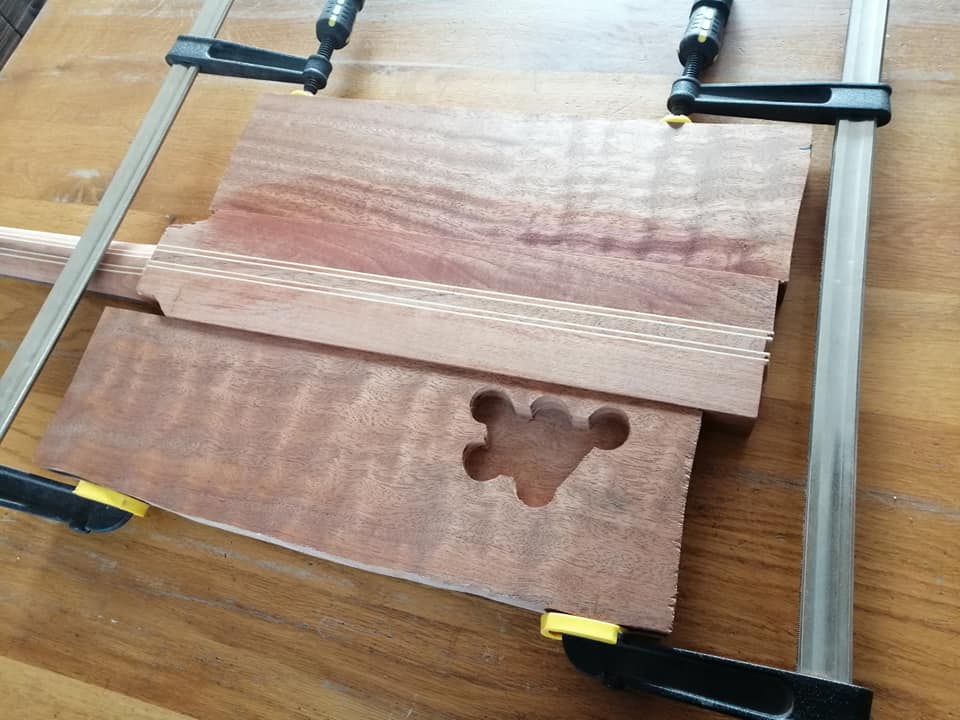
 Cut the rough body shape to get ready for the router to cut along the template.
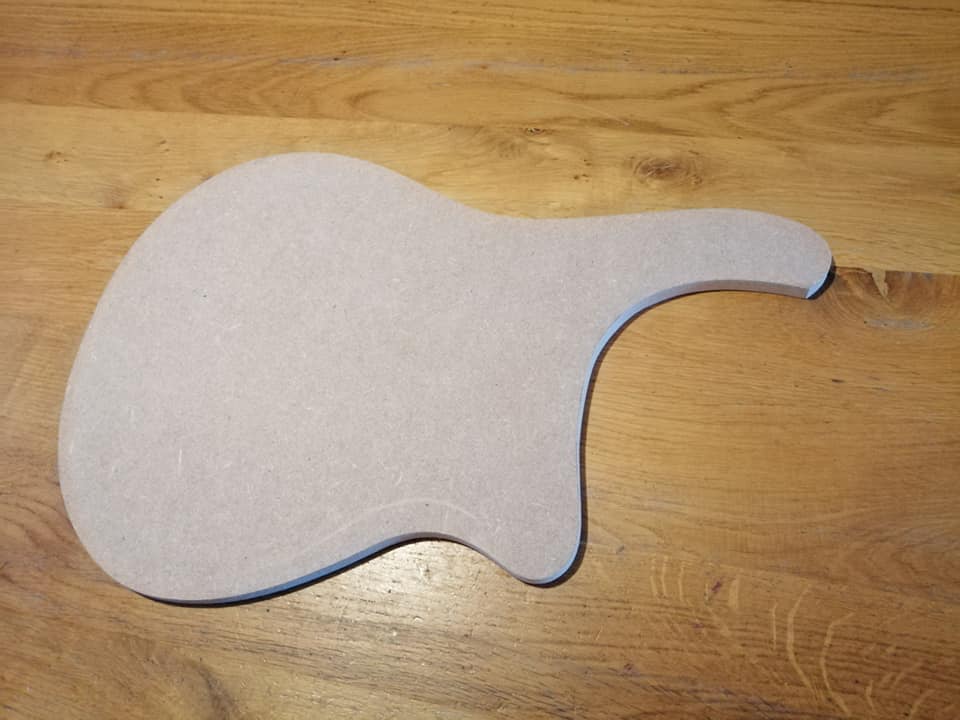 I have no pics of the planing of the wings to make them taper (just like the Thunderbird wings do)But here's a (not so clear) pic of the taper in one of the wings. You can see I had to fill up the gaps between the wings and the template because of the taper.
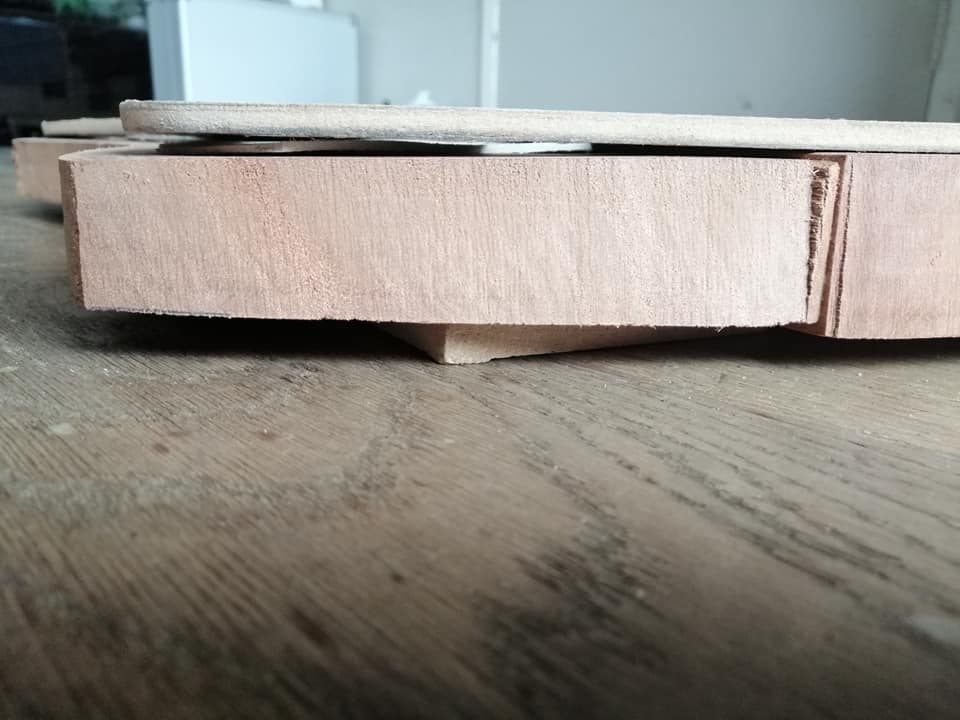 Routed the body shape
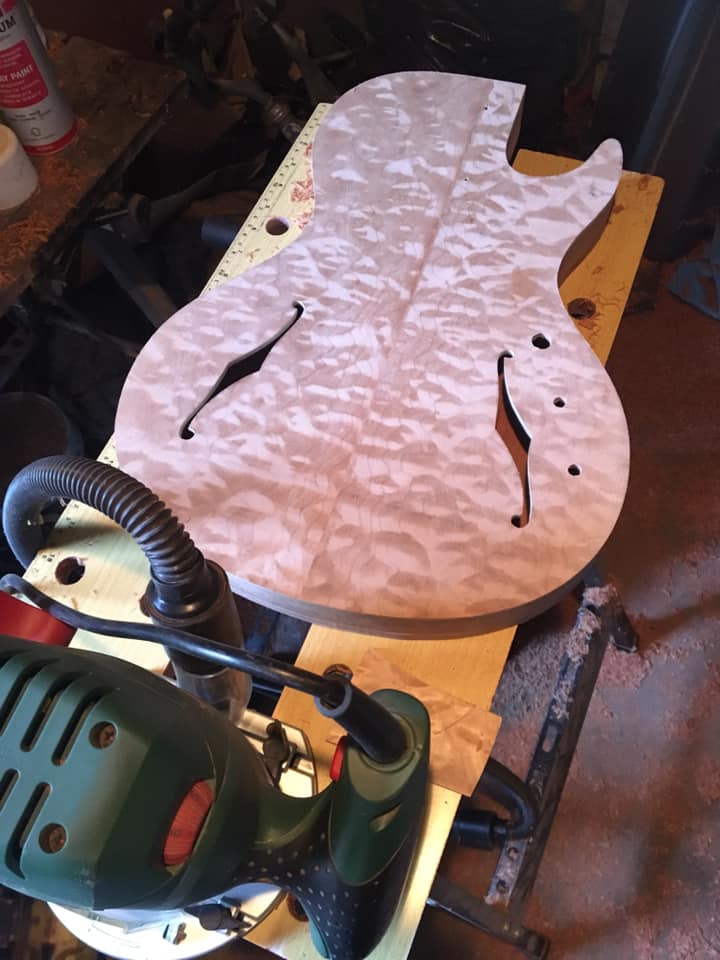
-
10
-
-
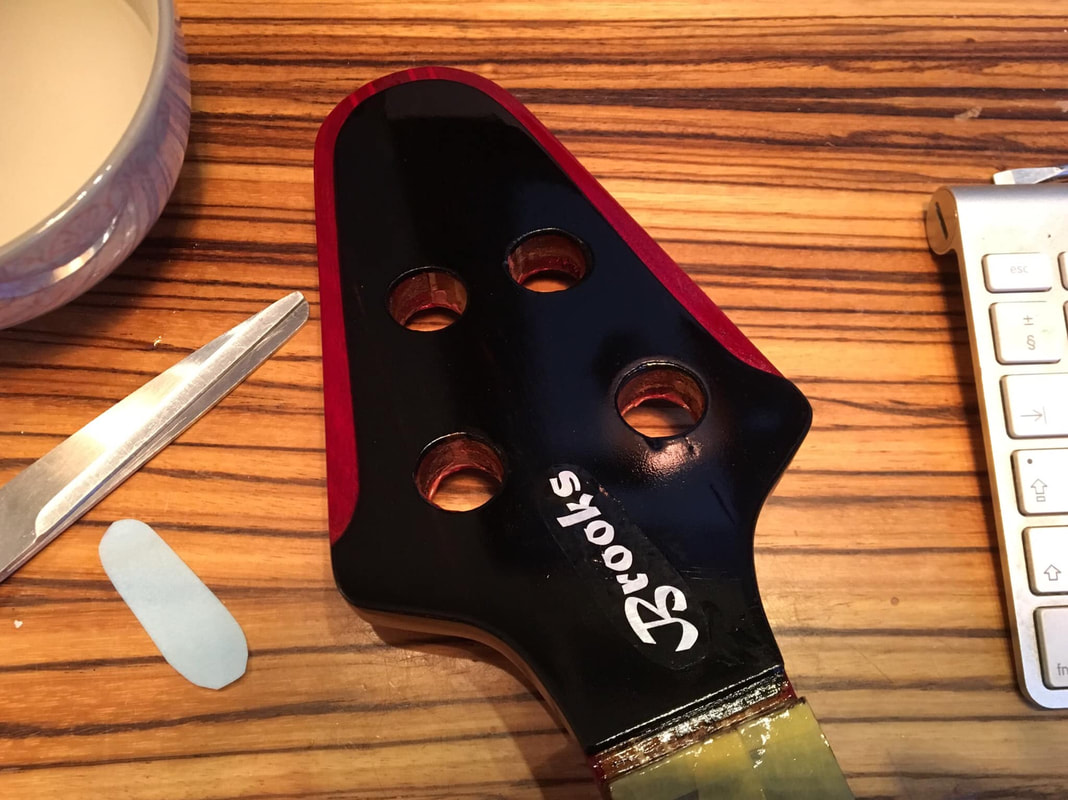
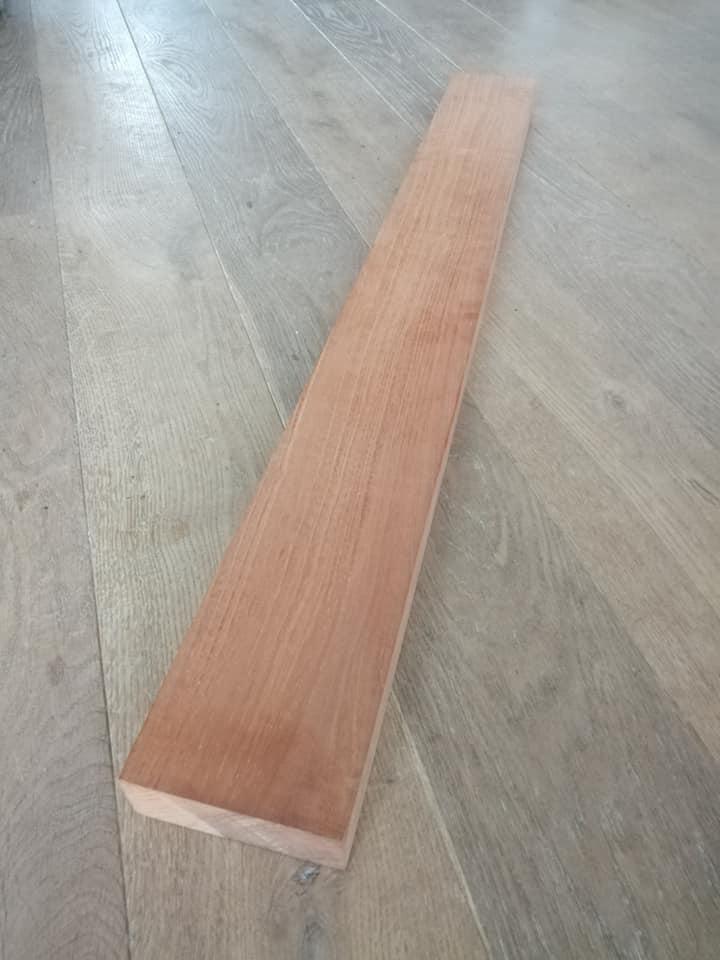
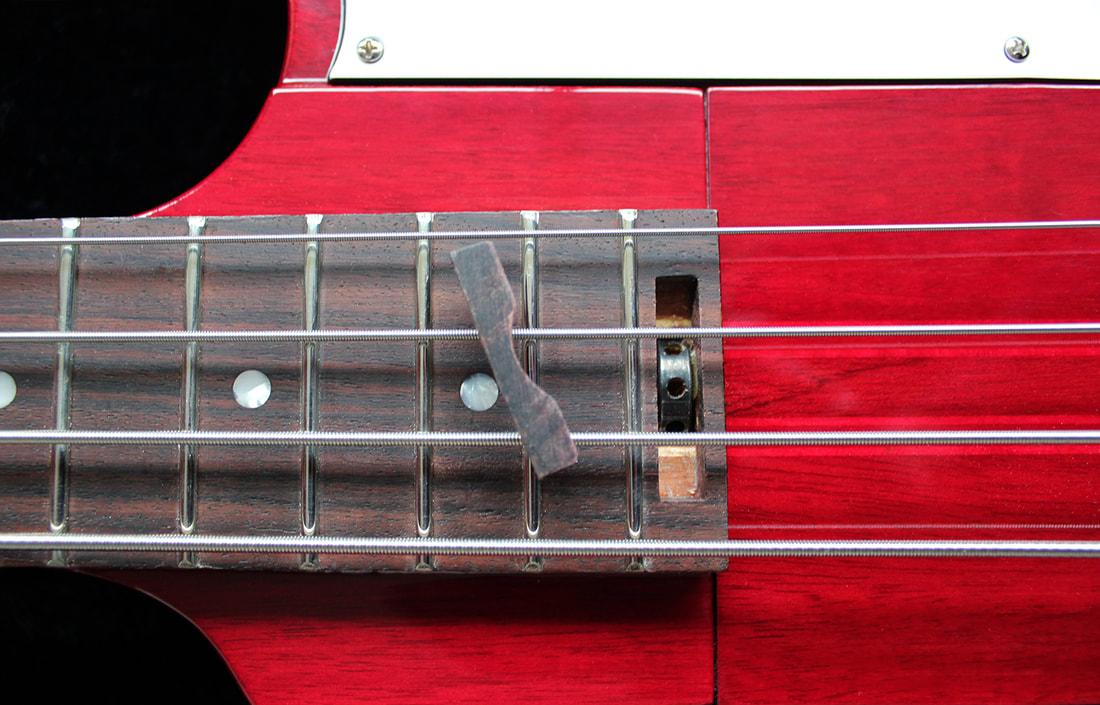
I bought a piece of ebony and sanded it to a thickness of about mm.Sawed it in the shape for the headstock overlay.
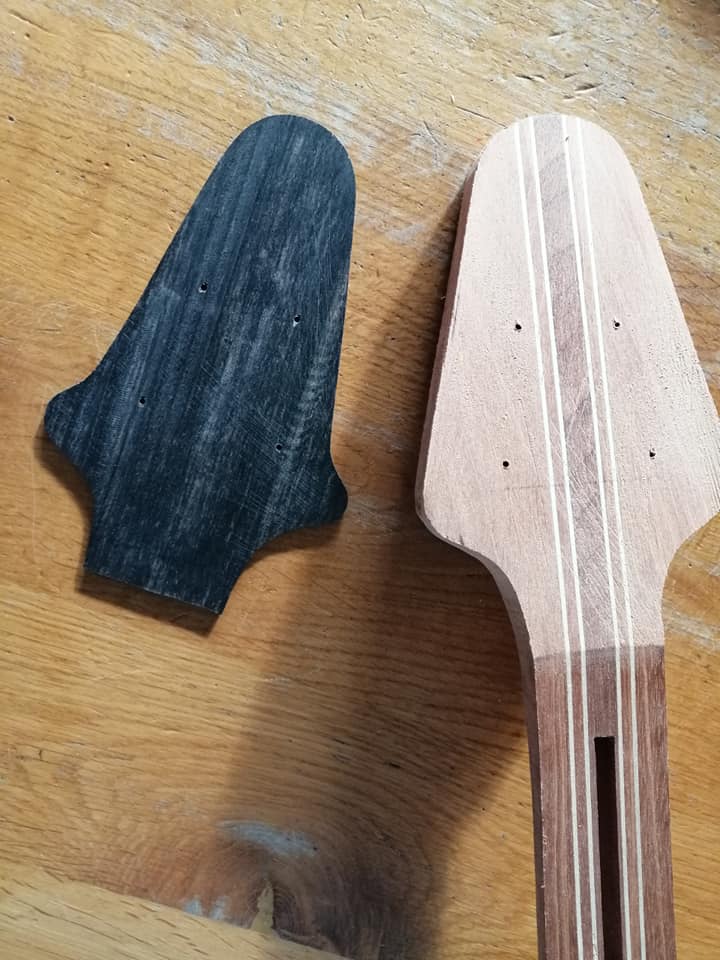 I drilled small holes for tiny nails that prevent the faceplate from sliding while glued and clamped.
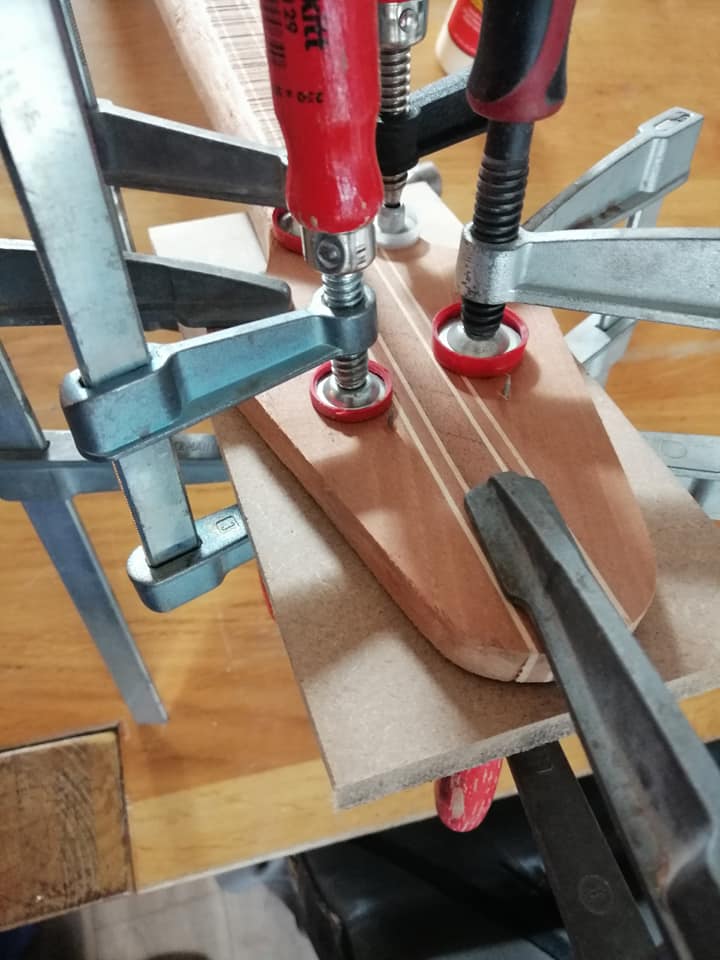 Printed out a paper template of the design to check the definite shape.
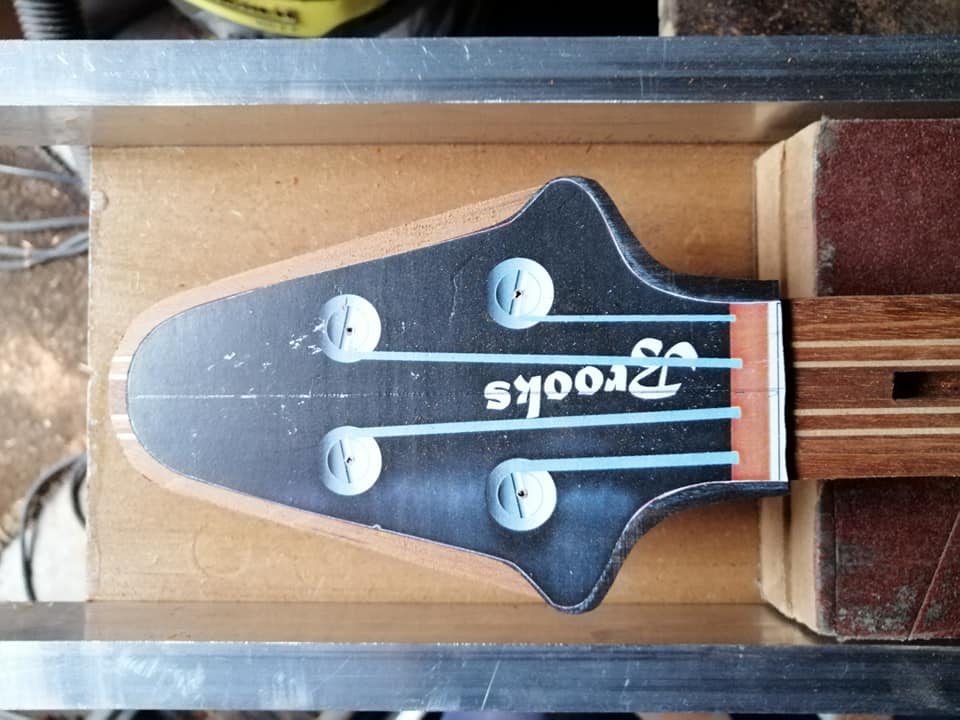
 Did a few tests for the sliding mechanism. I used scrap wood that I had lying around
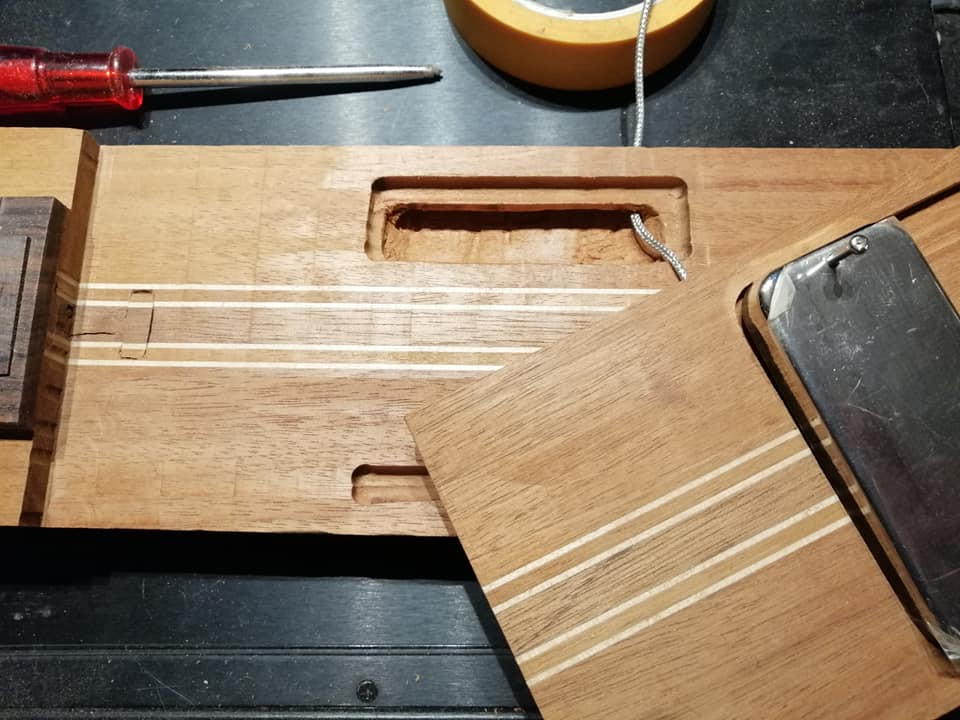
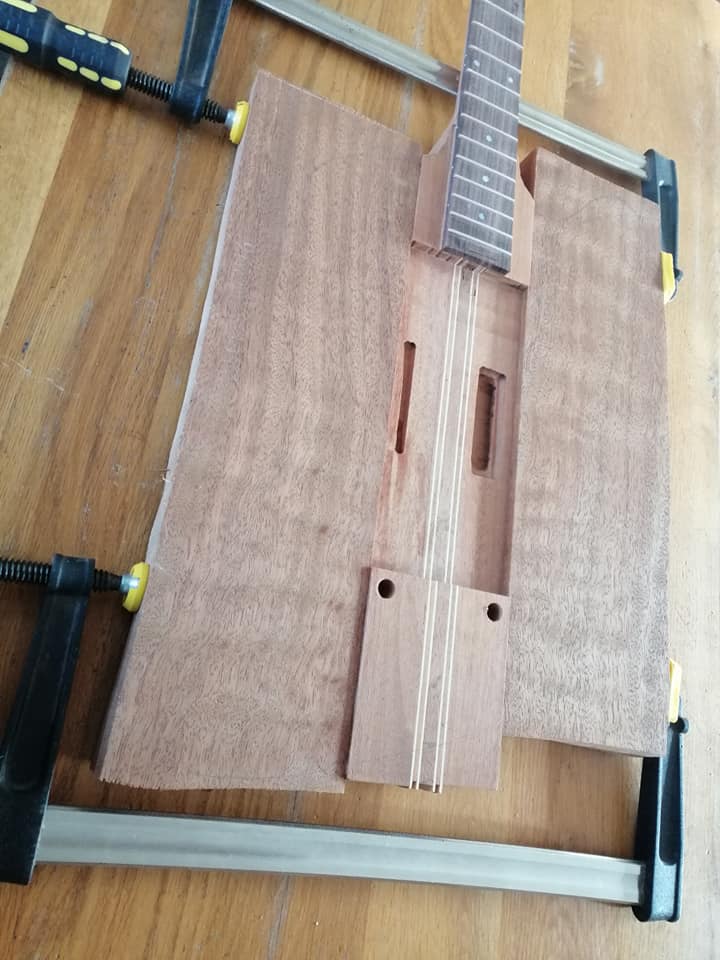
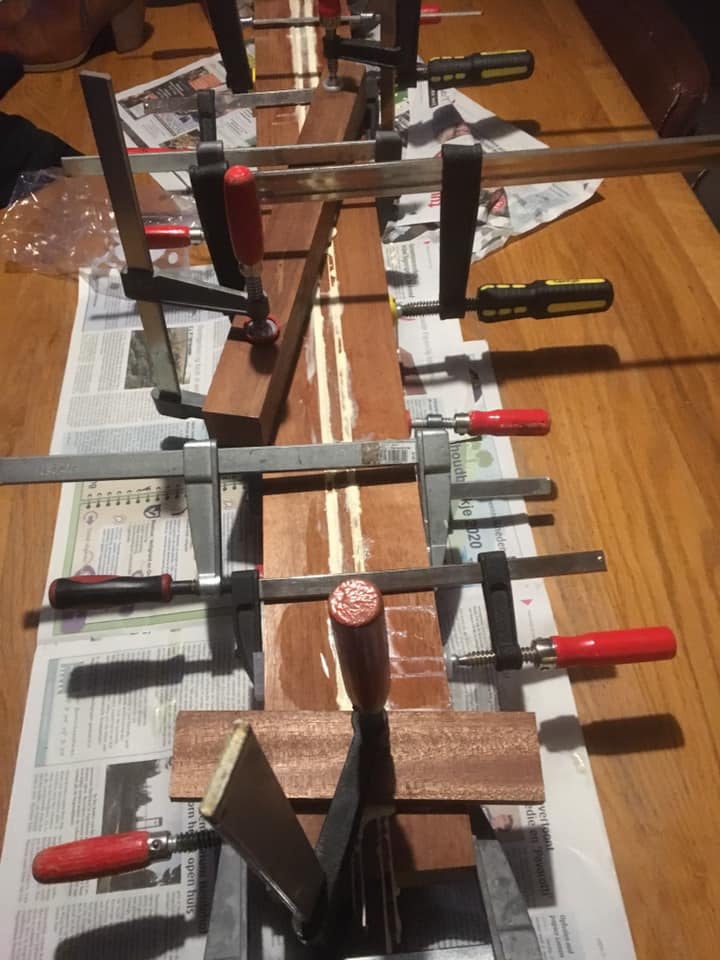
 When I knew the sliding mechanism worked according to plan, I glued the fretboard onto the neck.I always use strips of bicycle tubes tied together by mean of clamping. You get a nice and even pressure on the entire fretboard. And it doesn't slide because its wrapped all around.
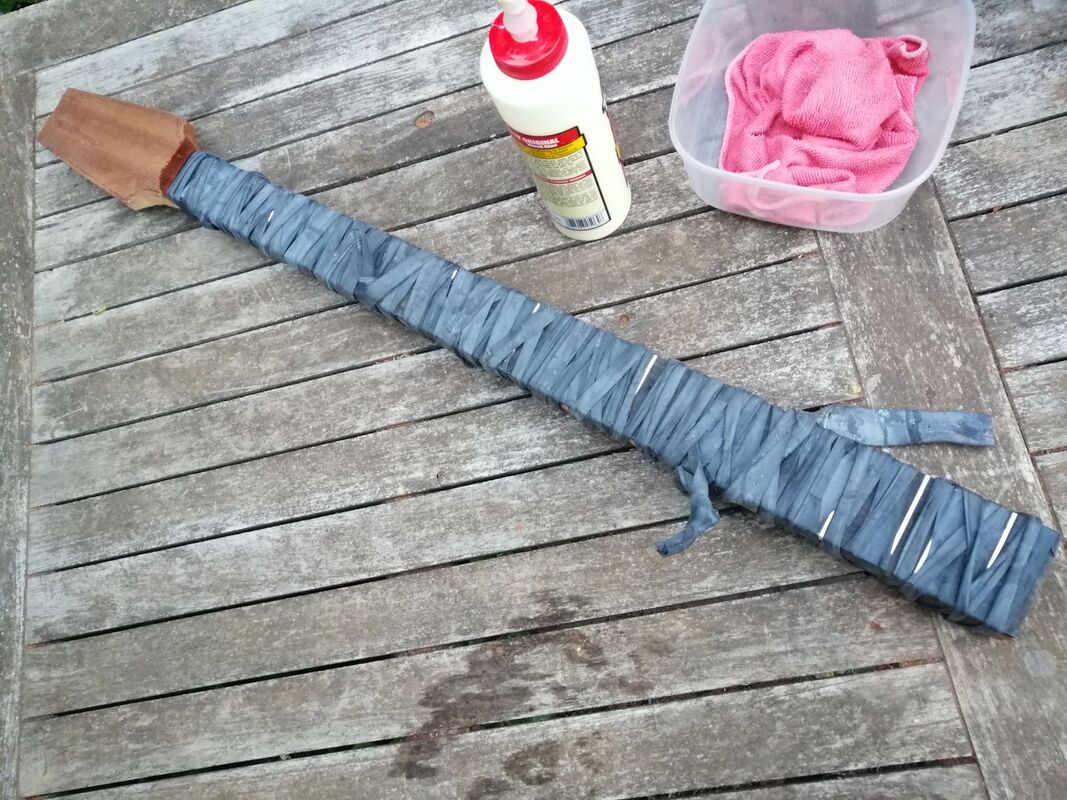 I cut the parts for the sliding mechanism from the same nine ply center piece. I just used the part that was under the neck. I had to remove a lot of wood there anyway.
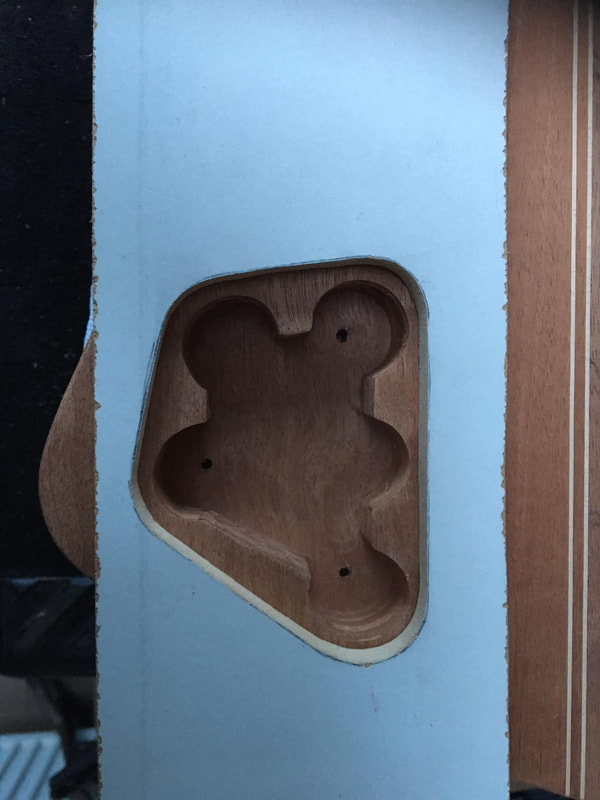
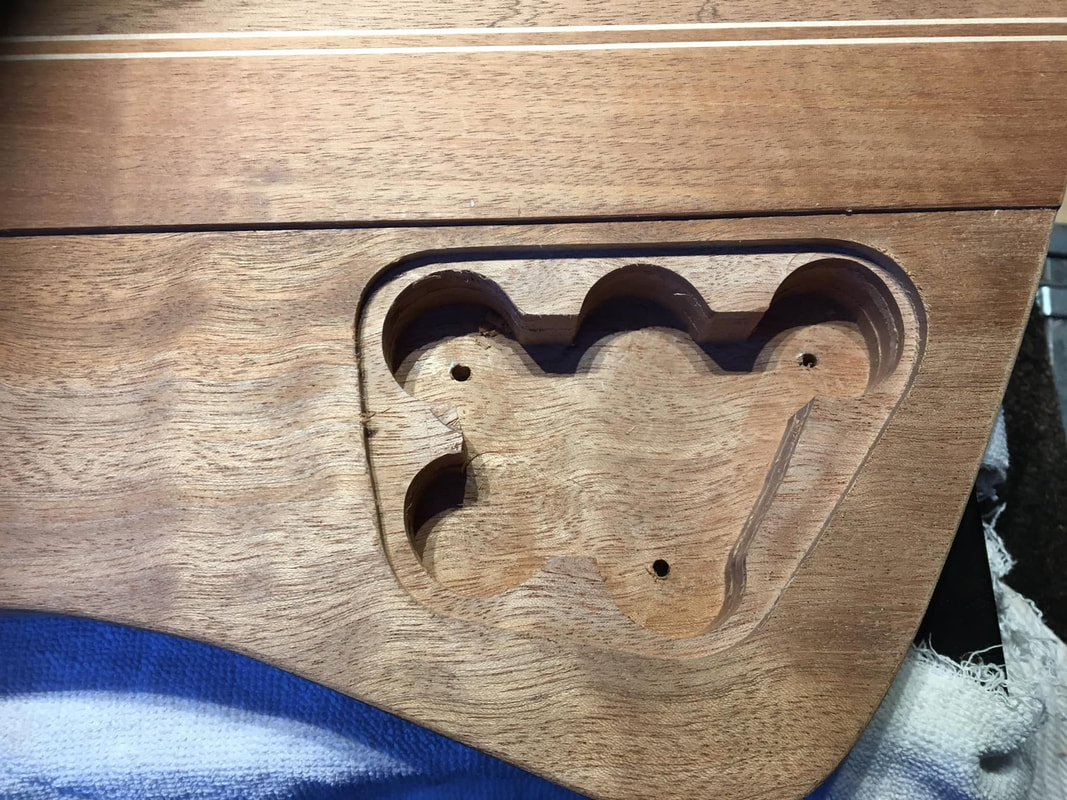
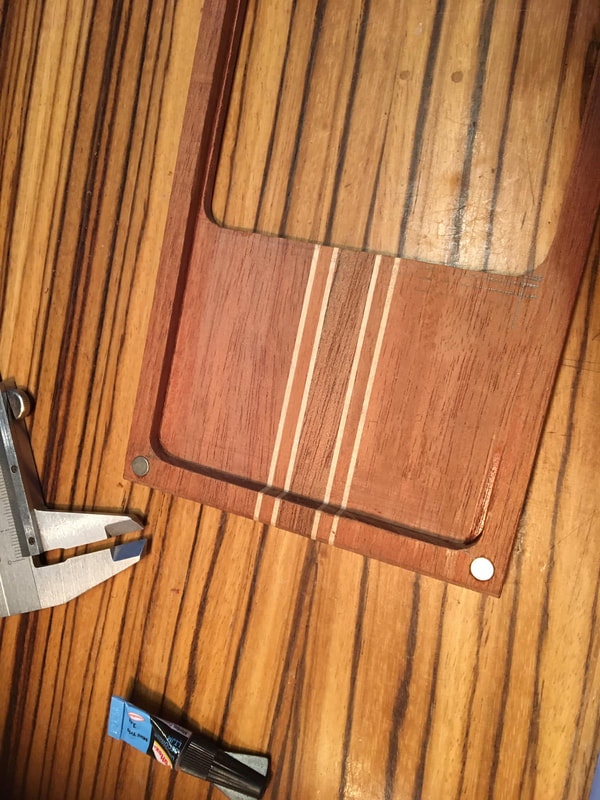
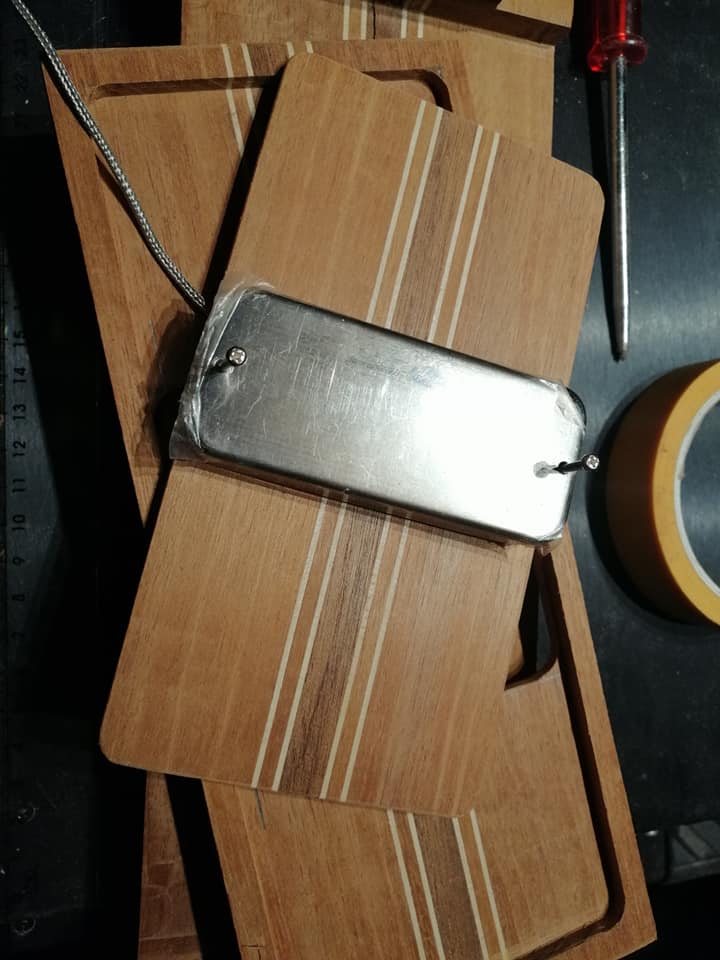
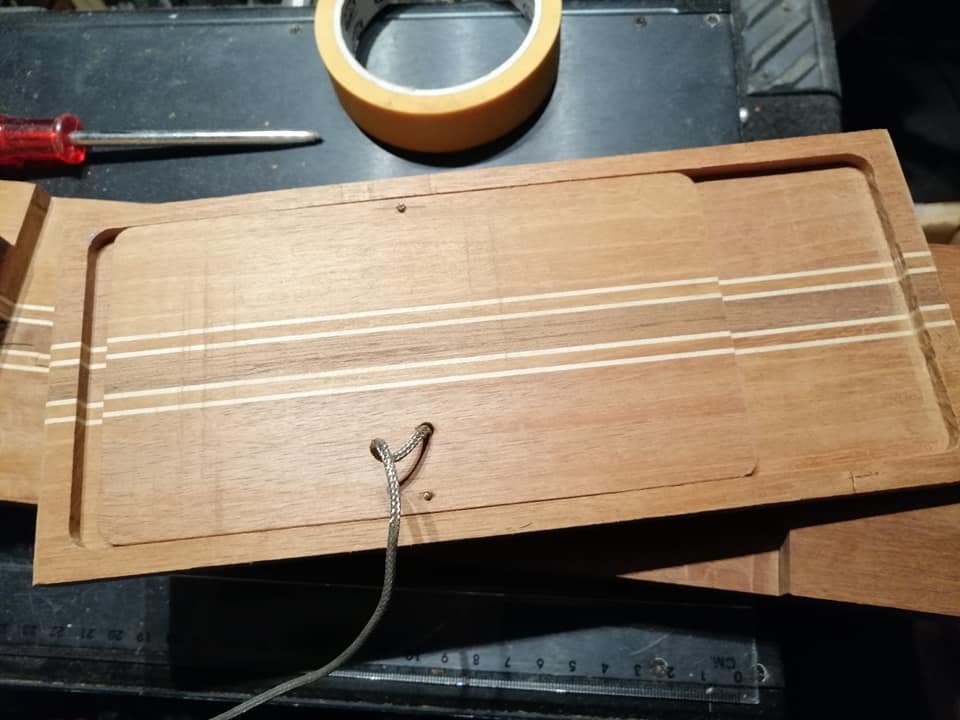
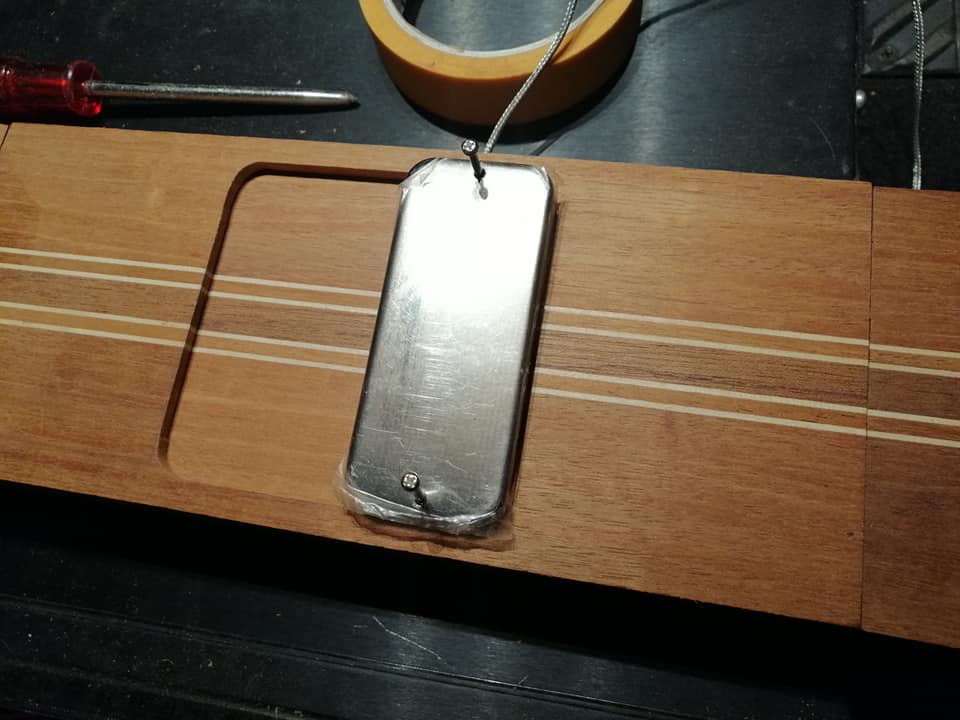
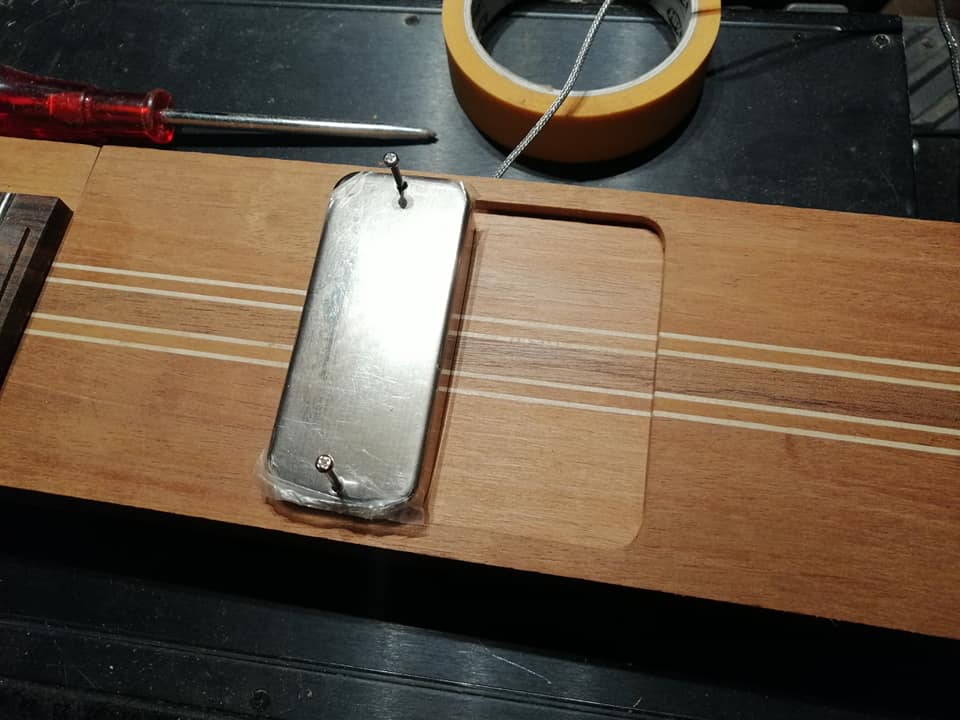
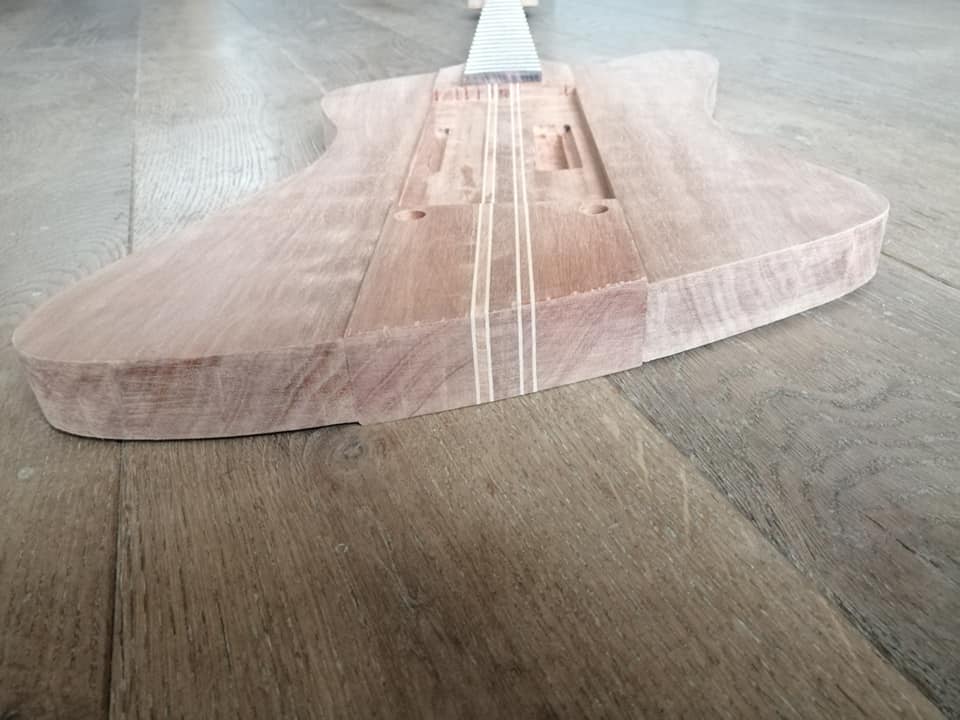
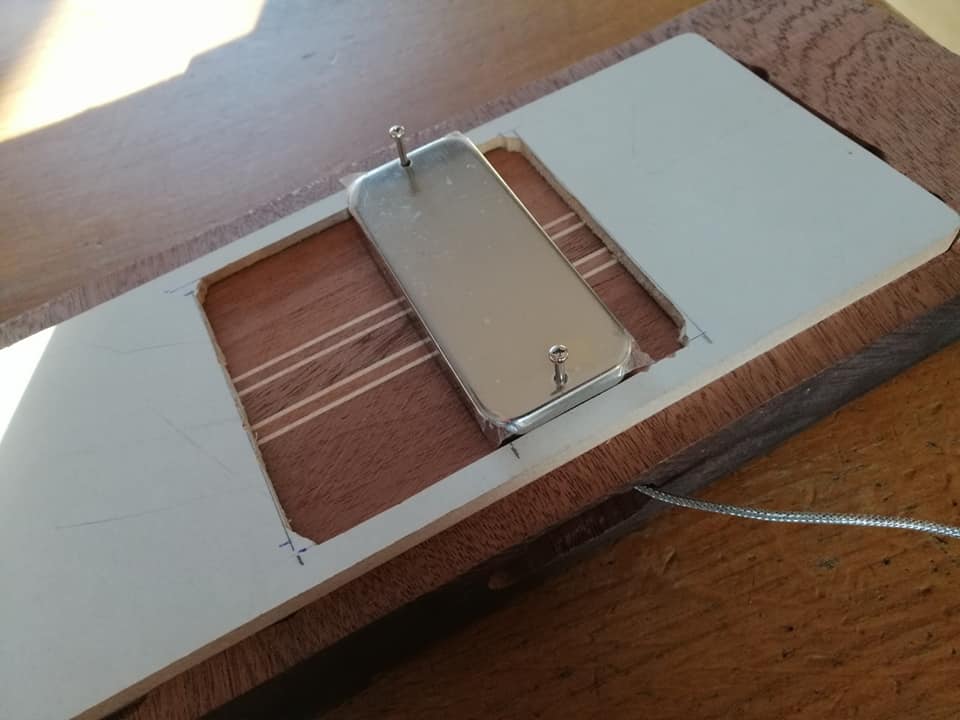
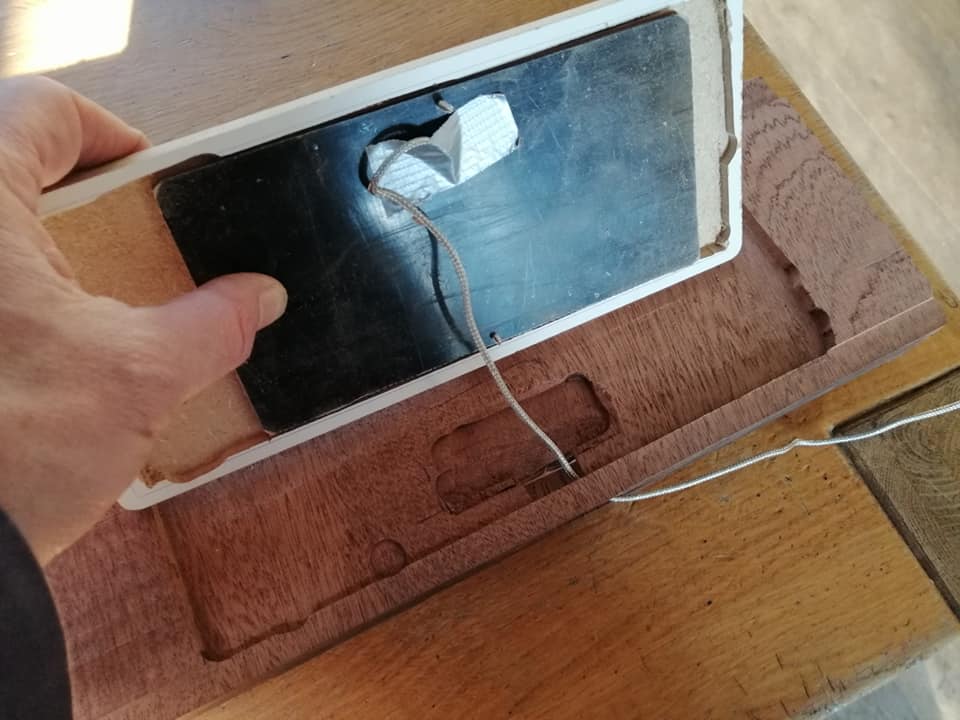
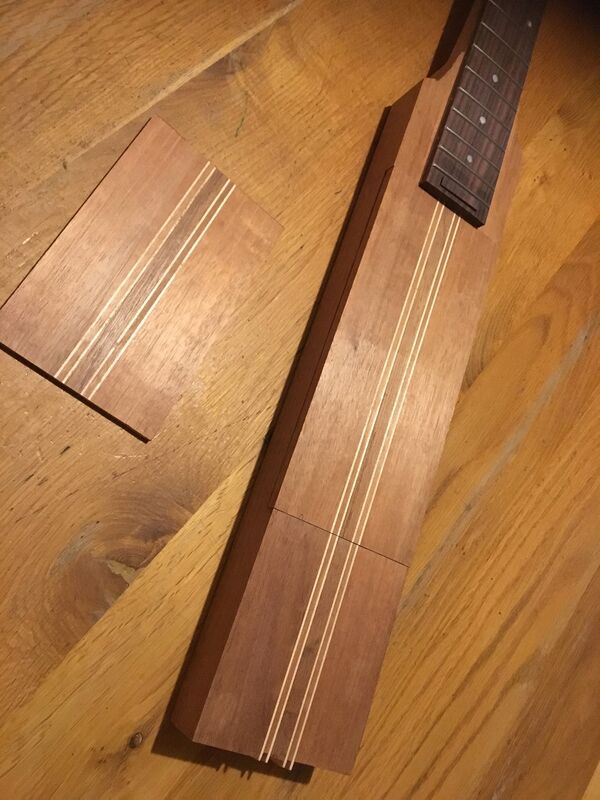 And I routed some slots for the pickup screws and the pickup wiring
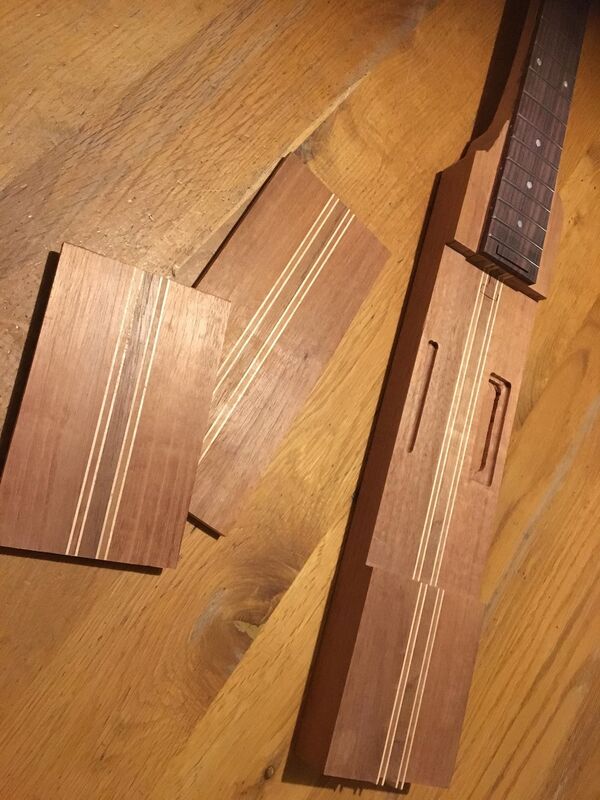 I sawed a hole for the pickup in the part that was going to be the frame. Plus I routed the back side, so the plate with the pickup would fit in nicely.
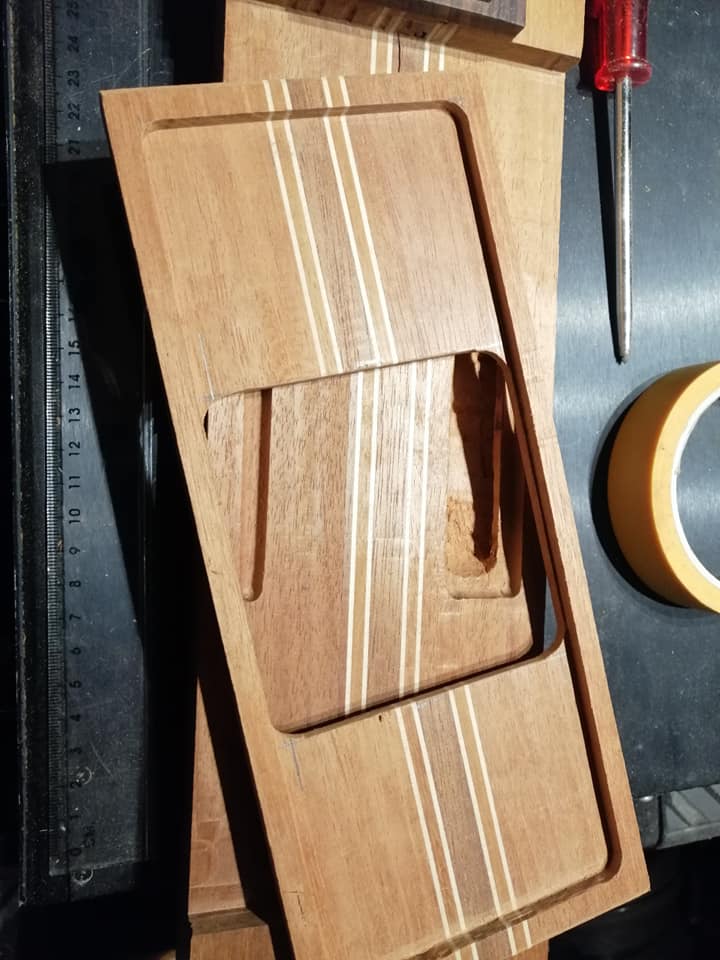
-
3
-
-
I started out with a big mahogany neck blank.
 I went to a friend who has a saw table and cut it into four long pieces.Plus I bought some maple veneer to put in between those pieces. I had another piece of slightly darker mahogany lying around, which I used for the middle.
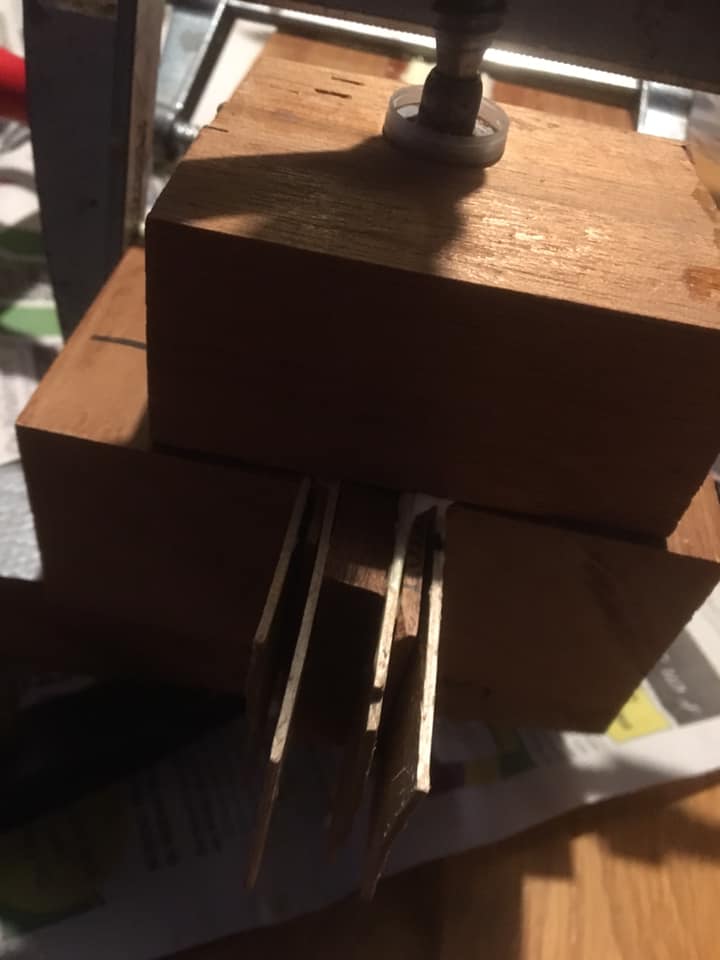
 It was a bit of a puzzle because there were two tiny) knots in the blank that I would rather avoid in the new laminated blank. I made sure they were in the outer ends of the blank.
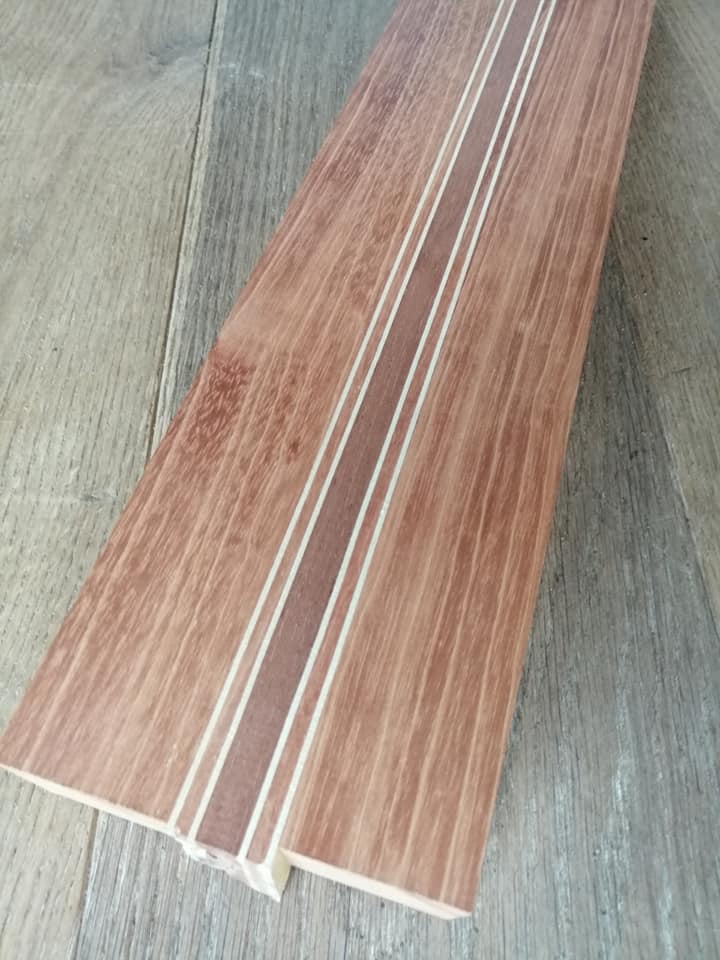
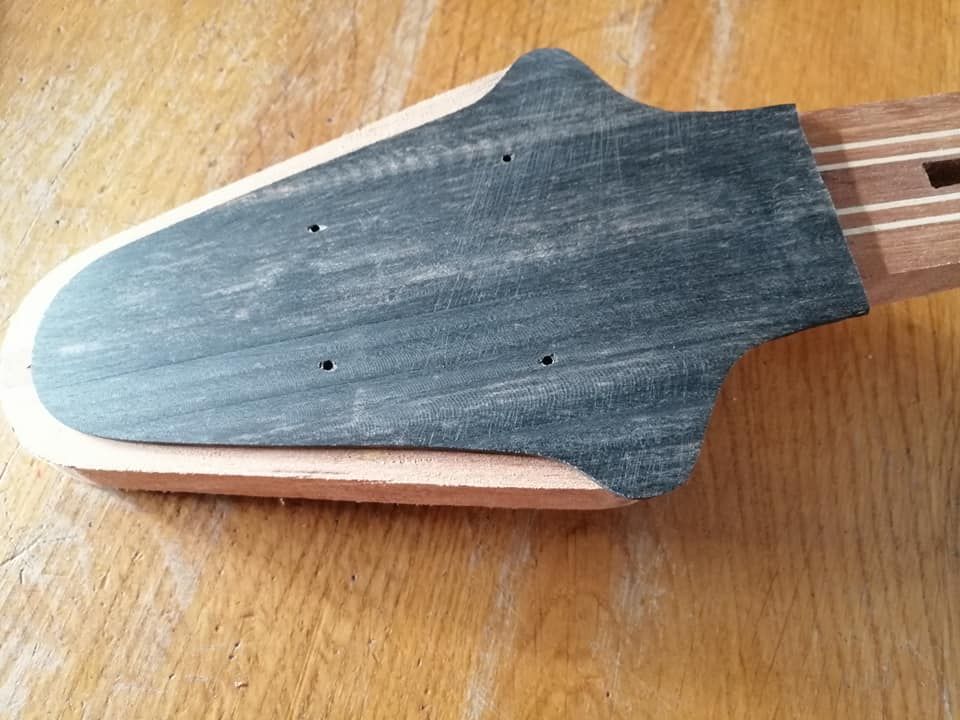
Next I routed the truss rod channel. And chiseled out the part where the spoke wheel goes.
 Sawed the neck blank into a rough shape for the neck, headstock paddle and the middle part of the body.
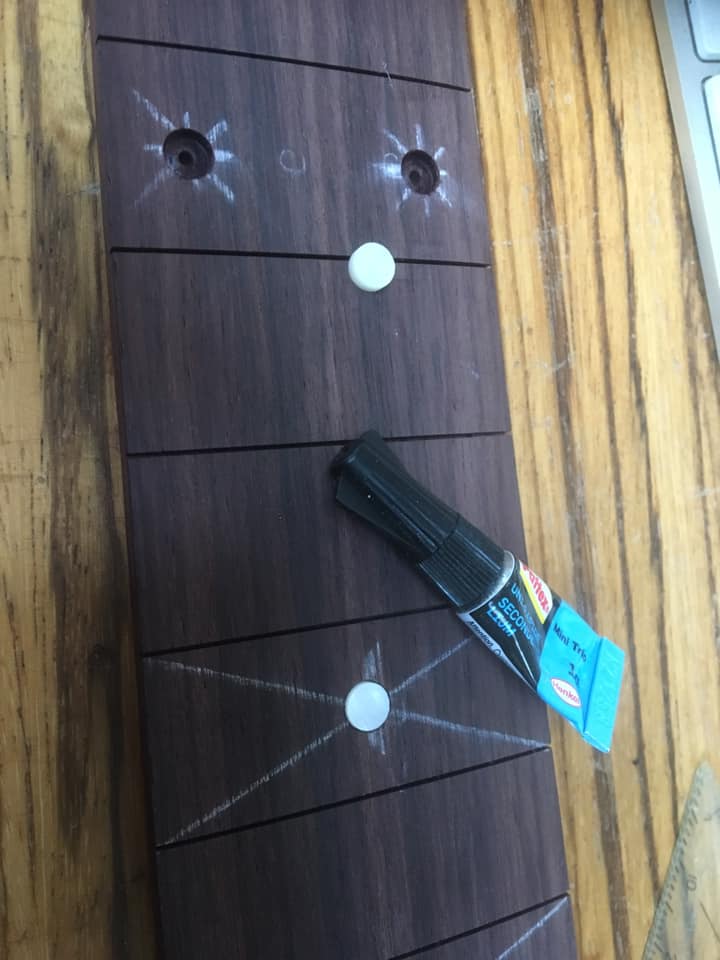
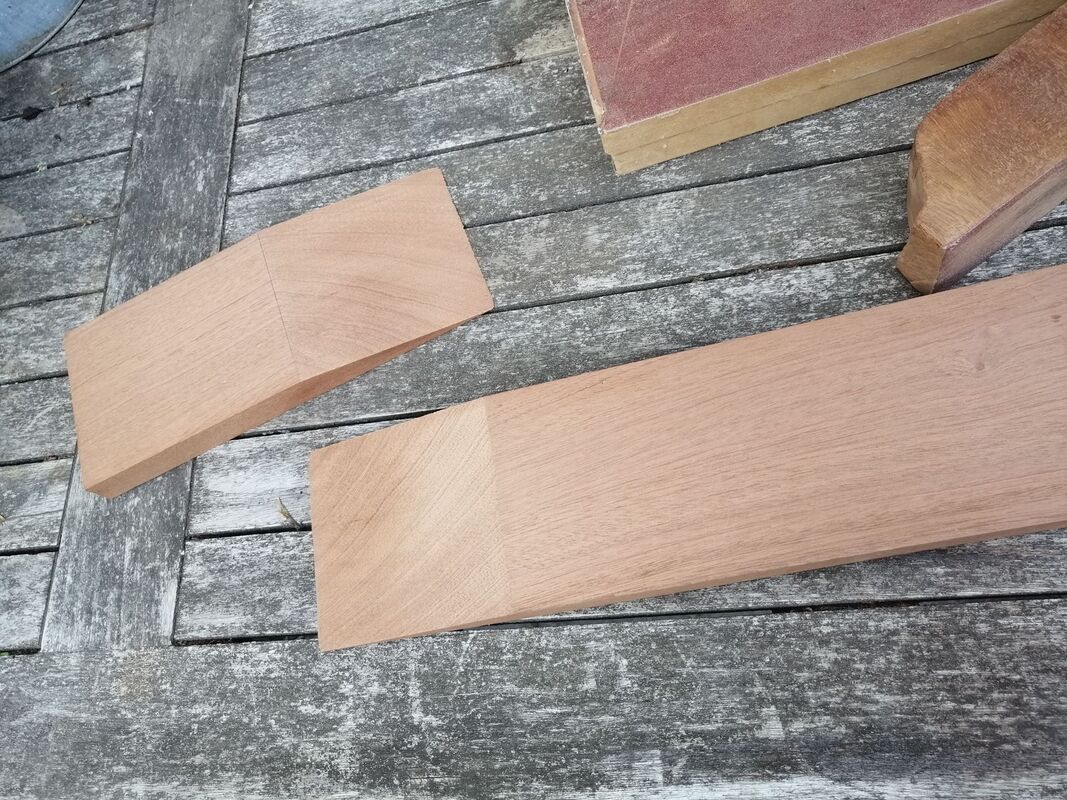 Bought a nice piece of rosewood. And drilled holes for the position dots. Glued them in and sanded them flush with the fretboard in tjhe correct radius of 16".
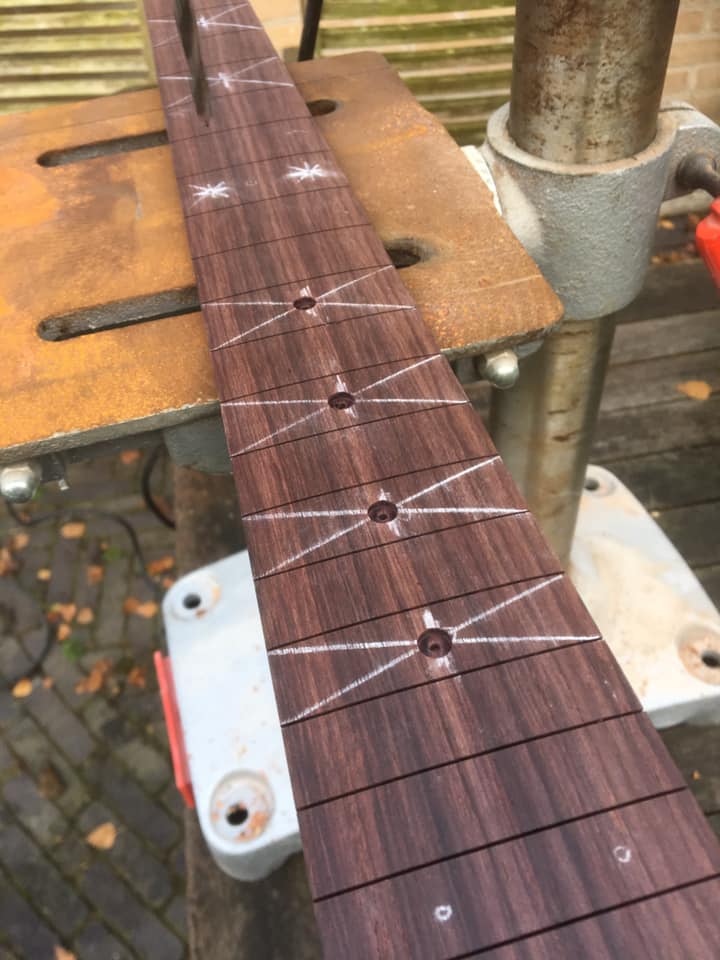

-
3
-
-
I have just finished my latest bass build. It's the Brooks Grabbird.This bass combines the 1964 Gibson Thunderbird II with the 1973 Gibson Grabber.It features a nine ply neck through construction just like the Thunderbird. But with strips of maple veneer in between the mahogany, instead of walnut.The nickel covered humbucker resembles the pickup of the sixties Thunderbird. But the sliding mechanism in the raised middle section refers to the Grabber of course. The shape of the headstock echoes the Grabber headstock, but the ebony veneer on top is a nod to the Thunderbird headstock.The shorter headstock and the Ultra-lite tuners make sure it doesn't suffer any neckdive!
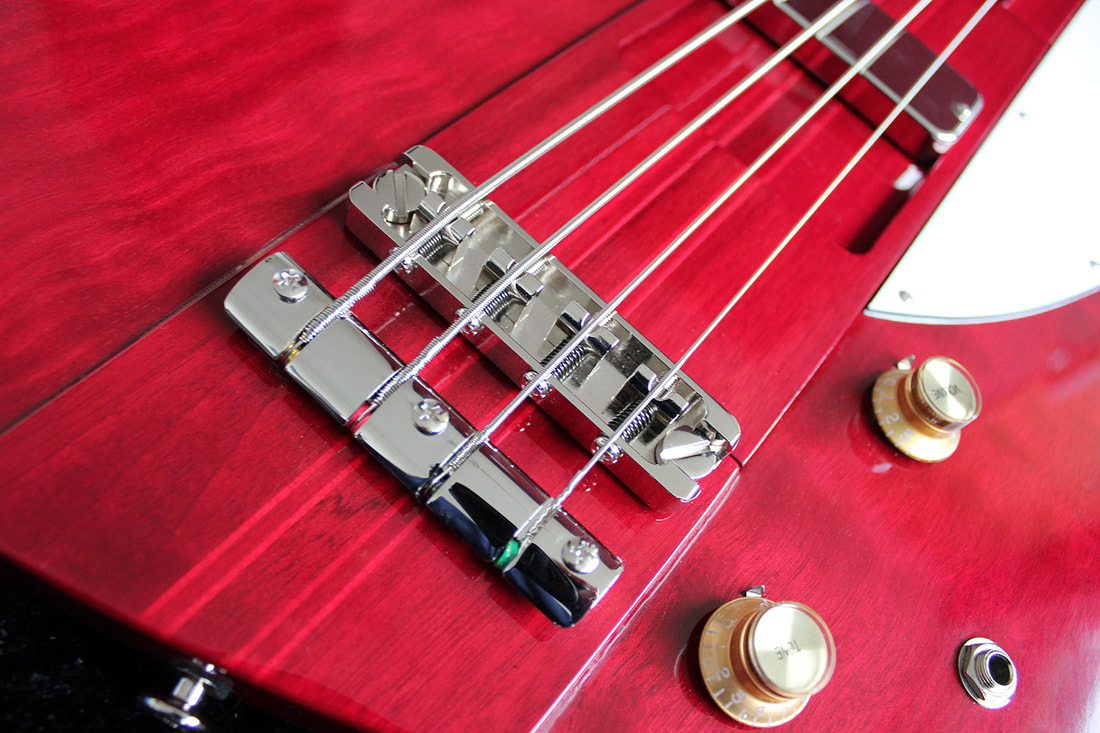
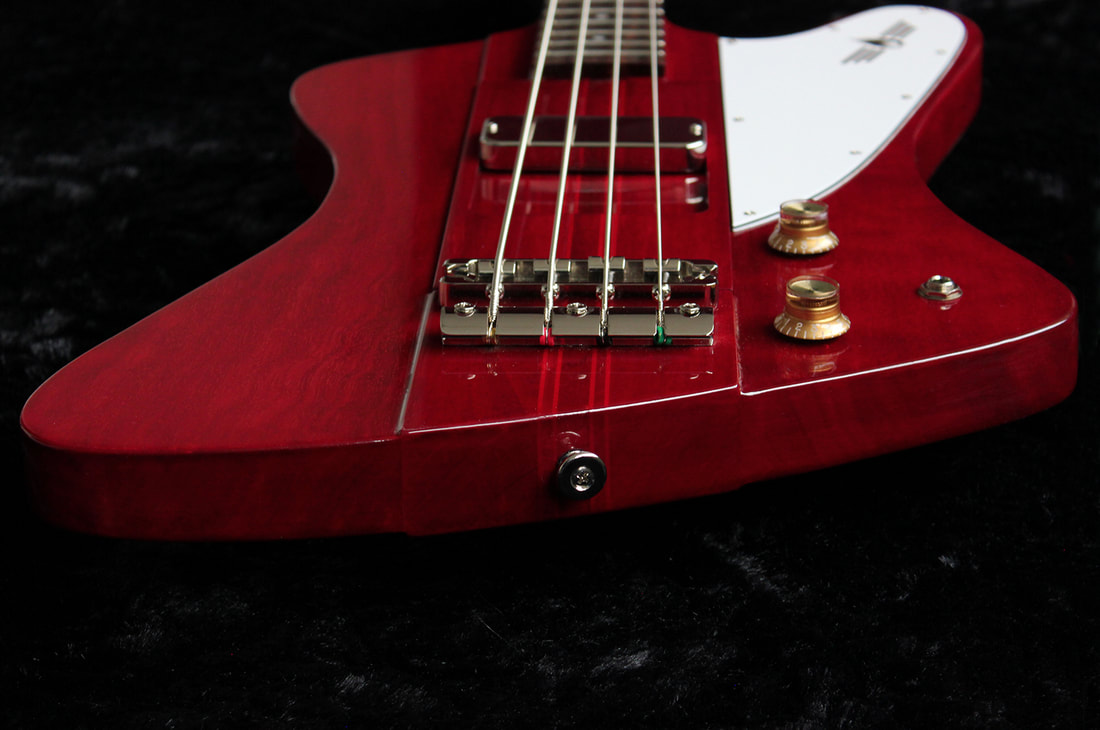
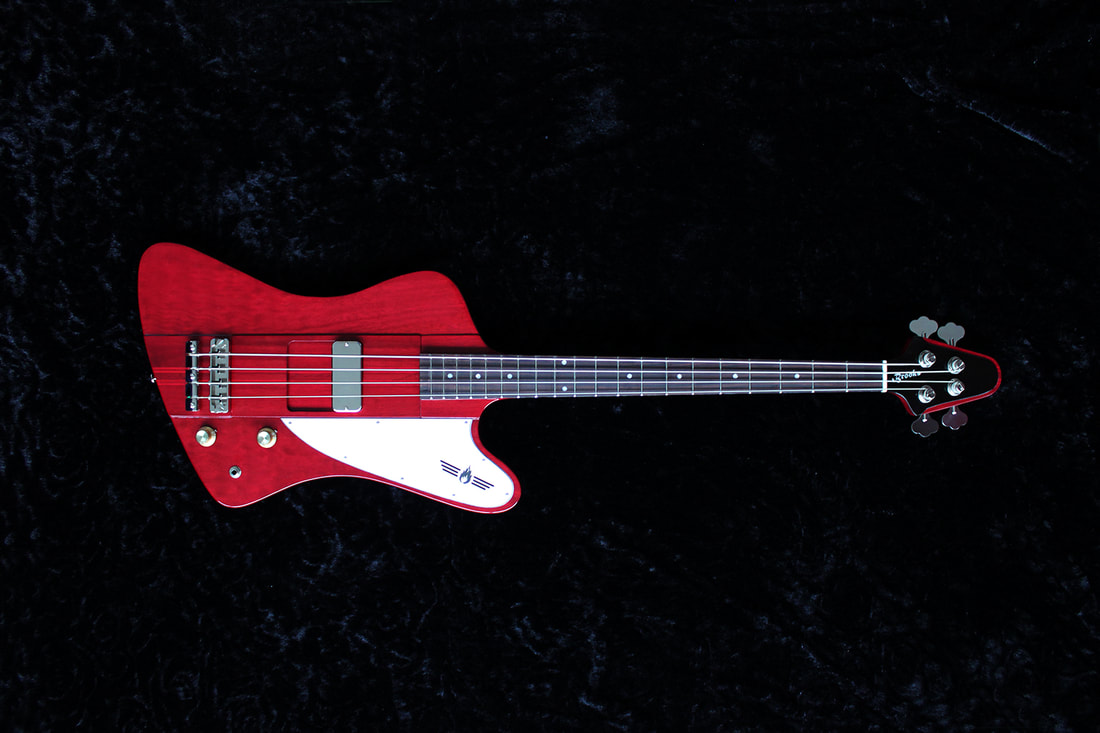
 Specs:- Neck through with figured mahogany body wings- Nine ply mahogany/maple neck- Ebony faceplate on headstock- Cherry gloss transparent acrylic finish- Rosewood fretboard- Jumbo frets- 34" scale- Handcut bone nut- Three ply white-black-white pickguard- Wide travel Thunderbird bridge plus tailstop- Spokewheel trussrod- Sliding Thunderbird pickup nickel. 9.2 K Ohm- Hipshot ultralite nickel plated tuners- Volume pot Bourns 500 kOhms logarithmic SRT
- Tone pot Bourns 500 kOhms logarithmic SRT
- Kemet capacitor 47 nF paper insulation- D'Addario Nickel plated Roundwound 45-105-
24
-


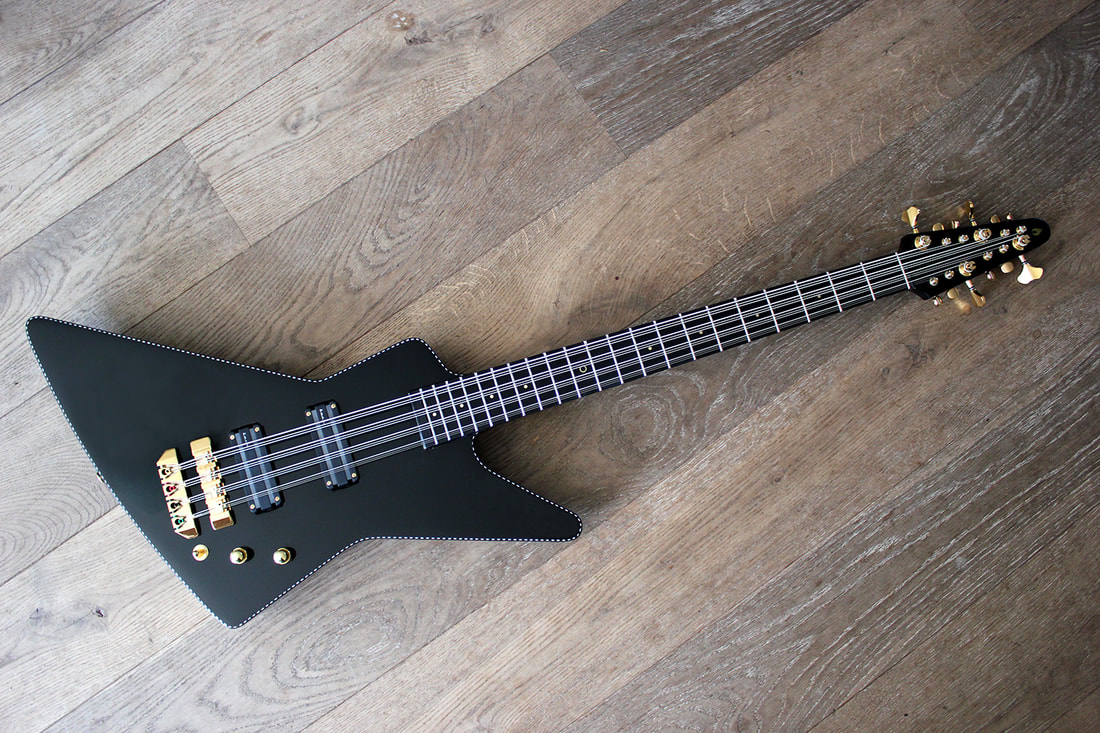
Black basses
in Gear Gallery
Posted
New black bass born today!