


Basvarken
-
Posts
272 -
Joined
-
Last visited
-
Days Won
4
Content Type
Profiles
Forums
Events
Shop
Articles
Posts posted by Basvarken
-
-
Two brandnew Brooks bass guitars
More infos soon...

-
 11
11
-
-
1 hour ago, ezbass said:
😮 I think some more detail is required here (stacked knobs, twin output…) but it can only live up to its Thunder name.
Here you go:
- Mahogany body wings
- Nine ply Mahogany/Walnut neck. Neck through
- Opaque white (blonde) high gloss finish
- Abalonoid binding
- Ebony fretboard
- Circle position dots
- Jumbo frets
- 34" scale
- Buffalo horn nut
- Three ply black/white/black pickguard
- Custom made twelve string brass bridge set
- Two spokewheel double action trussrods- Carbon reinforcement strip in the neck
- Lace Alumitone Bass Bar in the neck position
- Lace Alumitone DeathBar in the bridge position
- Allparts stacked pots (volume/tone volume/tone)
- Mullard capacitors
- MEC on-on switch for coil split (humbucker-single coil)
- Gotoh GB 350 lightweight bass tuners
- Gotoh Stealth ST 31 guitar tuners
- 2 xPure Tone Multi Contact jack output
- d'Addario EXL 170 - 12 strings
- Weight: 4.2 kg
-
 1
1
-
-
The white twelve-string Thunderbird that I bullt 4 years ago.


-
8
-
-
On 01/06/2025 at 08:26, james Ezekiel 84 said:
thats awesome love to hear it
I don't have a proper demo available.
But here is a song that I recorded with this bass back in 2008
-
1
-
-
Took some new pictures of my Epiphone Jack Casady Signature.
I modified this bass about 20(!) years ago with a Gibson lo-z humbucker from a Les Paul Bass that I had bought on Ebay at the time. I was not so impressed by the Electar element that Epiphone had developed in collaboration with Jack Casady himself. I never believed the marketing story that Casady didn't think the Gibson element of the Les Paul Signature was good enough. Knowing Gibson, they just had no idea how the original element was put together and then made a brave attempt to come up with something as close as they could to the real thing.
Anyway, I took the plunge at the time and put the saw in the gold top to be able to mount the large oval Gibson humbucker in it. Thanks to CTS I managed to get hold of the right potentiometers that match the low impedance of the element.
And the three-position rotary switch does not operate an impedance converter, (as with the original Epi JCS), but chooses from the three coil-taps that come out of this majestic Gibson pickup with no less than 8 wires. The head of the bass also got an overhaul. Every JCS suffers a major neck dive. So I replaced the tuners with much lighter Gotoh Res-o-lites. And I also adjusted the shape of the head slightly. Makes a huge difference
I also fitted the bass with silver cap reflector potentiometer knobs. I modified the pickguard to match the shape of the chrome pickup ring. I placed a chrome bridge cover. And behind the bridge hangs a so-called Modbar to keep the double windings at the ball end of the strings away from the bridge saddles. I replaced the plastic nut with a bone nut.
I've used the bass many times since. Live and in the studio.


-
8
-
-
Fanny was a great band.
And so was Birtha. Another all female rock band from the early seventies.
-
2
-
-
15 hours ago, NancyJohnson said:
I love your work.
Can I, could I, make a suggestion on the You Tube presentations? Maybe (maybe) run the bass through a crossover of some sort (Rolls make the SX21) and output the lows through a cleanish bass amp (or something with a bit of whump) and the highs through something with a bit of dirt. I owned a 12-string for a while, my personal feeling is that the bulk of owners/players are looking for a dUg Pinnick/Tom Petersson tone.
Thank you for the suggestion.
I present the bass guitars as honest as possible. No effects, no compression. Just the bass directly into Focusrite Scarlett > my iMac.
But my recording equipment and skills are nothing to write home about. 😉
On the twelve string builds with two separate outputs i did demonstrate how you can blend a clean signal with a distorted one. Because that was the purpose of the separate outputs.
Plus of course with the Brooks QB, I demonstrated the SansAmp and the Compressor because they are part of the actual bass itself.
-
Finally found the time to make a short video demo of the Brooks EB-MM-Q
-
3
-
-
The bridge "problem" was solved.
Before I did the staining, I sanded a little curved at the end of the fretboard

Then stained the whole bass black.
It really made the quilted pattern pop.
Drilled the potentiometer holes
Built up quite a few laters of clear. And sanded in between.
Then applied the decals to the headstock.

When everything was perfectly flat and well sanded I spayed the back of the body, the sides and the neck a matte black. And the some layers of transparent matte.
Applied the serial number
And then mounted all the hardware.
Put some old strings on for a little test drive.
Took care of Intonation, Action, tweaked the Hipshot Bass extender.

And then put the new set of d'Addario Chrome flatwounds on (per request of my customer)

I'll make a demo video after the weekend
-
17
-
-
Test fitted the pickup and the Guyker two point bridge with separate tailpiece that I originally had planned to install.

Only to find out I did not like how that combination looked.
Plus the guy who commissioned the build came by with a Rickenbacker he had acquired recently and he told me he wasn't too fond of its narrow string spacing. Which was the same as the string spacing of the Guyker two point (18mm).So I decided to order a MusicMan style bridge as an alternative. And see how that would fit.
This one has a 19mm string spacing.In my opinion it suits the bass very well. Especially in combination with the Lace MusicMan style humbucker.


The only problem was I had already glued in the neck. With the angle set for the Guyker two point bridge.
And the bridge post holes already drilled...I was going to have to plug the holes. And redrill them, with a different (narrower) spacing.
Plus I had to gain some extra height, since the MM style bridge is a fraction lower than the two point bridge.
So I made an extra bridge plate out of a plate of brass. And sprayed it matte black to match the Guyker MM style bridge.
-
4
-
-
Drilled the holes for the machine heads in the headstock

Routed the neck pocket
Shaped the heel
Checked the alignment of the neck, before I glued it in


Drilled the holes for the bridge


Made a template for the pickup cavity. And routed it.

-
4
-
-
Routed the profile for the controls cover


Later on I decided to widen the controls cavity a bit more, to create some more room for soldering.
I have no pics of that (sorry)Then routed the channel for the binding


Glued the binding in, using acetone instead of glue. Because I was going to stain the top I did not want to risk any glue on the top. Acetone just softens the binding and makes it stick to the wood by itself.I used the same rubber strips of bicycle tubes for the clamping.


-
4
-
-
Worked on the headstock shape a bit...


...And the neck profile some more.
Then moved on to the body.
First I drilled some holes with a forstner bit to make it a bit lighter
Routed the controls cavity


Glued the bookmatched set up quilted maple on top

And routed the outline shape along a template.
This time I tried a different method by not cutting out a rough outline first.
I just routed along the template straight into the slab.
This way I hoped to reduce the risk of router tear out. Which in this case did work. But the downside is that the router bit get dull sooner (I guess)


-
4
-
-
Ordered a pre-radiused ebony fretboard at Holz Faszination in Germany.
And drilled the holes for the potion markers.
Glued the markers in and sanded everything flush with the 16" radius beam
Hammered the frets in

Before I glued the fretboard on, I closed up the part where the spokewheel part lies deeper. Maybe it's nonsense, but I think it's neater to have a bit more wood in that place 😉

Glued the fretboard on. As you can see I roughly shaped the outline of the neck prior to that.
The rubber strips of inner bicycle tube pull the fretboard and neck nicely together.
Let it dry overnight. And then took to cleaning up the sides and shaping the neck profile.

When the sides were all cleaned up nicely I drilled the holes for the side markers.

And glued the side markers in

-
4
-
-
I asked my wood supplier to make a body blank of two nice slabs of Khaya (mahogany)

And a neck blank of three pieces of the same Khaya.

I routed the trussrod channel.
And chiseled the spokewheel part


Cut the headstock angle with the band saw. And planed it nice and smooth

-
3
-
-
Just finished the build of a new bass.
It is a hybrid of a Gibson EB-0 (Les Paul Junior Double Cut) and a MusicMan Stingray.
The shape of the body and headstock are the Gibson ingredient. The scale (34"), the pickup and the bridge are the MusicMan ingredient.Hence the name
[B]Brooks EB-MM-Q [/B]
(The Q is for Quilt)- Mahogany body
- Bookmatched quilted maple top
- Mahogany set neck. Glued in
- Transparent black stain on top
- High gloss finish on top and headstock face
- Solid matte black on back of body and neck
- Pearloid binding
- Ebony fretboard with m.o.p. dots
- Aluminium circle 12th position marker
- Jumbo frets
- 34" scale
- Buffalo horn nut
- Guyker MM style bridge
- Spokewheel double action trussrod
- Lace MM style man o war humbucker
- Hipshot Ultralite tuners plus Bass-extender
- CTS pot Volume Push Pull
- CTS pot Tone
- PureTone jack output
- Dunlop StrapLocks
- D'Addario Chrome Flatwound strings 50-105
- 3.75 kg


I'll post pics of the build process in separate posts below.-
15
-
-
I got these. They're one louder...
-
3
-
 5
5
-
-
Easy fix 😉
Here's what a friend of mine did:

-
Got many requets for a video demo of this bass.
So I caved in and made on this morning 😉
-
5
-
1
-
-
4 minutes ago, Geek99 said:
Is it any good for metal? Just wondering…
Kings X shouldn't be a problem
-
1
-
-
19 minutes ago, itu said:
You make it look like this project would have been easy. Sure it is easy for you. Fabulous work!
Trust me, it is never easy.
-
2
-
-
Made a label and glued it in

Cut the top nut (string guide) from a piece of buffalo horn. I used the brass template the ETS provided with the bridge
Mounted the tuners. Had to modify the carbon base plates of the (light weight) Gotoh CXB-01 tuners that I used for the octave strings.
Because the "ears" were overlapping each other.

-
7
-
-
After lots of checking and measuring I finally glued the neck in


Then drilled the holes for the controls
And stained the back a dark mahogany (with a dash of red)
The quilted maple top was going to get a cherry burst
First did the yellow stain.
And then (while still wet) did the red outline.
And feathered it out to make nice smooth gradient.
Then built up lots of layers of clear

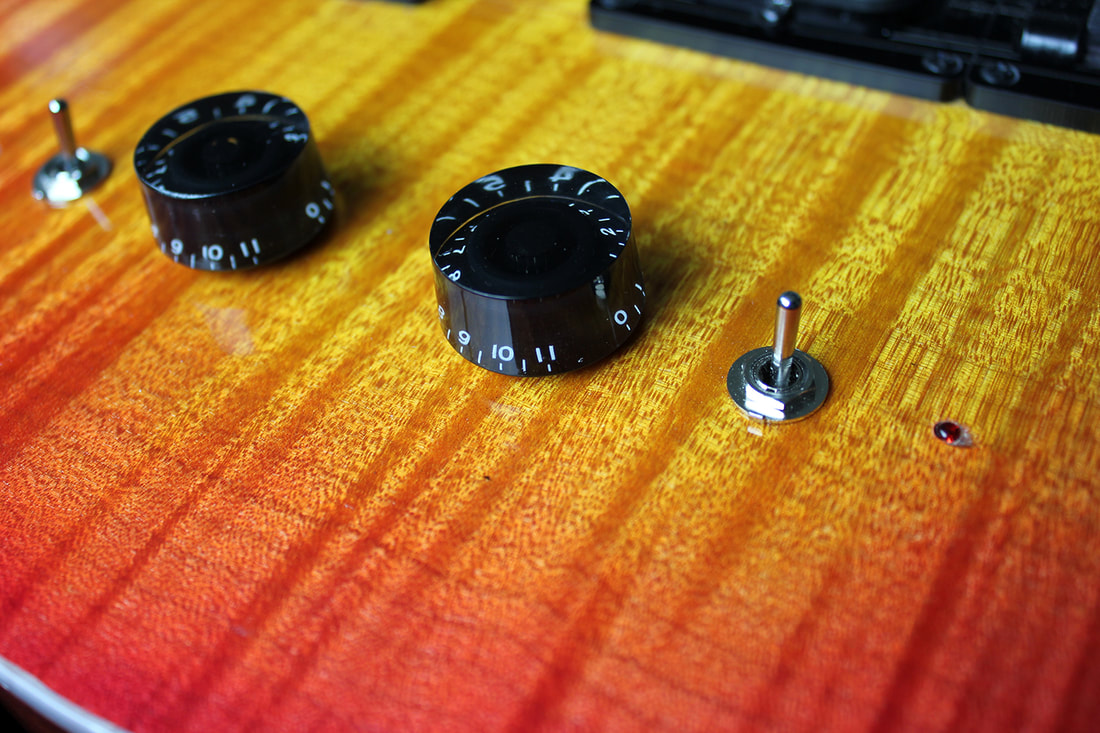
After lots of sanding and polishing I mounted the pickups and hardware

-
5
-
-
Routed the body outline (along the template of course)

Then routed the binding channel

Glued the pearloid binding in

The routed the neck pocket. And shaped the heel


-
4
-


Can anyone identify this 8 string bass (with trem!)?
in Bass Guitars
Posted
Looks like Marleaux maybe? That string anchor behind the bridge is typical for Marleaux.