


caitlin
-
Posts
173 -
Joined
-
Last visited
Content Type
Profiles
Forums
Events
Shop
Articles
Posts posted by caitlin
-
-

Oops, it'll sand out 🙀
-
 1
1
-
-
It's now had the last primer it's getting. I knocked it back till there was a percentage of defects remaining to the point where I don't care any more
")
I've buried as many of them as I can in the last 500ml of spray primer. I've learned my lesson about grain filling and high build primer.
I should have used coloured filler primer even though it was coloured and then used white primer over the top of that but I got scared by the white paint insisting non-white primer would suck.
Tomorrow I'll put another coat of tru-oil on the neck (how many coats? some forums say 15?! that's over two weeks of waiting), stash that somewhere very safe, and then give the body it's last sand before the 'appliance white' (maybe I should put a fridge or tumble drier logo on it or something) goes on.
Still need to source what's going on with the clear. I could get a 2K clear and add the sparkles in and use my cheap as chips compressor and even cheaper spray gun, but that would require making sure I have a lot of other supporting crap like mixing gear, and many cleaning solvents.
is an option, but phew that's not cheap is it?! dunno how many coats I'd get out of 290 ml either.
-
In bass news, I've sanded the neck to 1000 grit and applied the first coat of tru-oil. urk. That stuff makes your head swim, doesn't it? and I DID have the window open.
-
1
-
-
20 minutes ago, SpondonBassed said:
Is it on the Basschat 'bike thread? Ex 'biker wants to know.
Nope. It's a B600 I got for a couple of hundred quid, which does (now) start, roll, and stop. It's needed some welding on the brake support and swingarm (luckily I have a TIG qualification and a small welder) I'm in the process of getting the guts up to strip the swingarm bearings whilst it's out of the frame and re-grease them. then a lot of hammerite before reassemble, tyres, and an attempt at an MOT. Oh the indicators also need a stern 'sorting out' since they rusted completely out and there's a small stack of bolts that sheered and need procuring. Y'know the usual crap you need to do to get a rat bike back on the road.
Of course the bike garage is sharing space with the bass spray booth and everything so doing it all at once is a challenge.
-
 1
1
-
-
I've, uh, already printed out the plans for a telecaster and priced up plywood (just to annoy purists), bwahahahahahahahah. no no no, I have to fix that motorbike.
-
2
-
-
Nothing, but INTERMINABLE sanding.
Also: out of sandpaper; meh.
-
1
-
-
1 hour ago, SpondonBassed said:
Mine had such nice grain that I had to leave it natural.
You're not making me like you, you know? lucky you for having it easy

-
 2
2
-
-
16 minutes ago, Pea Turgh said:
Just draw doodles over it in black marker, and clear Matt coat it. Maybe. Or probably not.
I'm real bad at drawing

-
So because I'm a flap I'm *considering* getting some dust off ebay, the prismatic junk you can put on your lowered and neoned nissan to make it look different colours in different light angles and putting just a BIT of that over in the clear coat.
I think that's a terrible idea though because it's mostly likely just going to show up all the flat spots and dings in the underlying wood that i sanded for, oh, i don't know... a hour maybe
Otherwise I'm just hoping the hardware base colour contrast will 'do it'. I expect to be wrong and it'll just look 'cheap' but what's learning without trying stuff?
-
2
-
-
Hmm
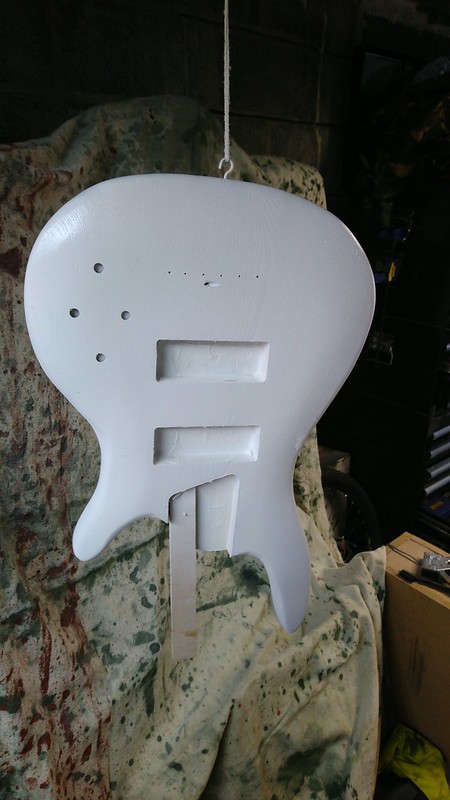
masked it:
And then gradually emptied a whole can of primer over it
I can certainly see all the bits I didn't manage to sand properly, a bunch of end grain and some general lumps and bumps.
I'll leave that to dry for a good while and then sand some more and dump the second can of primer over it.
It's only going white because @SpondonBassed has functionally *dared* me to do it. There is always the recourse to matt black though.
The straploks have not arrived, I will stagger across that bridge when it hoves into view, there's a certain amount of finish damage that will be hidden by the flange of the lok anyway.
I still hope against hope that they may arrive in the mail tomorrow.
-
1
-
-
@SpondonBassedwill be happy (I saw I was name dropped in that other thread :P) to know that I've got two rattle cans of fill primer and two cans of 'appliance white' which may be a terrible choice.
I've got a lot more sanding to do and I really do wish my flush straploks would turn up because I don't want to drill the recess for them till I know they're going to turn up and I can't really paint till I have all the holes drilled appropriately
The oil for the neck is also being ignored by Royal Fail's finest parcel non-delivery section
Stupid pandemic.
Still, I almost have everything in hand to *Finish* this thing, urk.
-
1
-
-
Thanks for your advice, it's super appreciated.
-
1
-
-
looks like about a 4mm screw shank by my chinese off-by-at-least-a-mm calipers. I was planning to throw a 3mm drill bit in and wax the screw. I don't want *any* flipping risk of not having enough bite.
Of course the instructions just say screw the neck on, not a mention of a pilot hole, they also of course say nothing of earthing the bridge so they're not, uh, good.
Here's the thing, the holes on the BODY are not large enough to allow the screw through without 'screwing' it, and to my mind they should *just* push through so that the can use the washers and the neck to *clamp* the body to the neck. But also I've seen fender custom shop videos where they clearly screw the screw through the body before hitting the neck.
The threads are wider than the screw shank of course, but there's not a whole 'body' thickness of unthreaded screw at the end of the screw so I'm a little unsure of whether to gently relieve the body holes or not
Moot for now since I don't seem to be able to choose a colour of 'white' off the website I'm looking at for body paint yet /o\
-
1
-
-
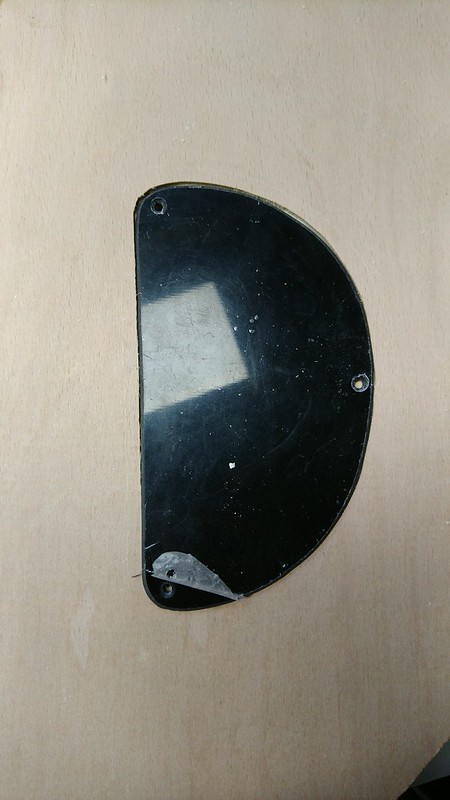
Obviously I've made a cack handed mess of it, but it'll 'do' and it's not so bad it doesn't *work*, but there's not much surface for the plate round some of it.
I can of course re route that if i decide to make a custom plate later on. Here's some traumatic photos I took whilst still shaking from fear:
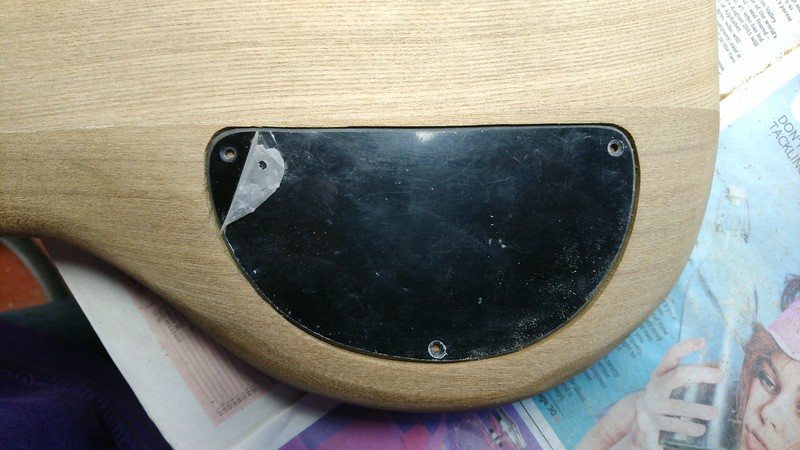
I used my template and another scrap of ply to sandwich the body between and bend the template over the body, I don't think there's any marking to speak of although the routing is a little uneven in depth.
I've ordered some tru-oil for the neck, so next jobs are pilot holes for the neck screws (what on earth drill size should one use?!) and sanding the neck ready for finish.
There's a tiny chance my straplok sockets might arrive today, but those can't be more than test fit before paint.
It's quite exiting, this. I can see my future involving a scratch built neck through fretless with LED fret markers in my future

-
1
-
-
I thought I'd better start a thread since I'm taking a bunch of photos and stumbling around in the dark.
I've spend most of my time so far working the heel of the neck to better fit the pocket on the body.
The body seemed the straighter of the two. Now with a single thin shim of laminated card slid in with the neck it squeaks into the pocket and feels really snug.
I moved onto the body today, first finding the center line then trying to position the bridge
Here's measured up to drop the saddles at 34"

See

Here's the literal 'strings' over the saddles

And here's the 24th fret area, I dunno who that bloke is.

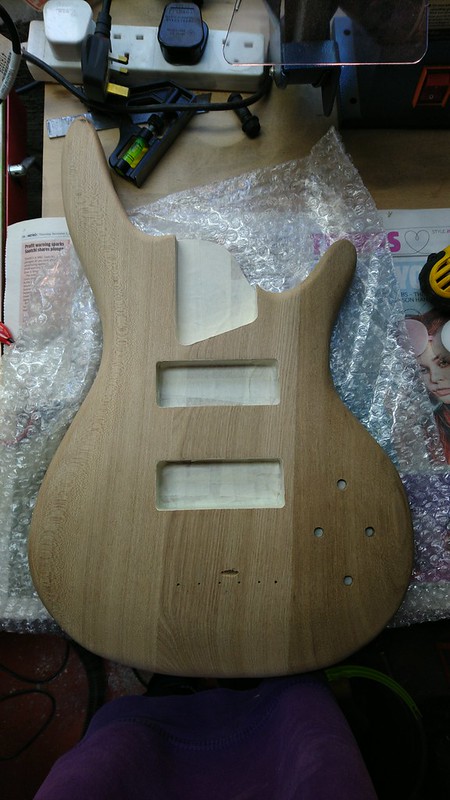
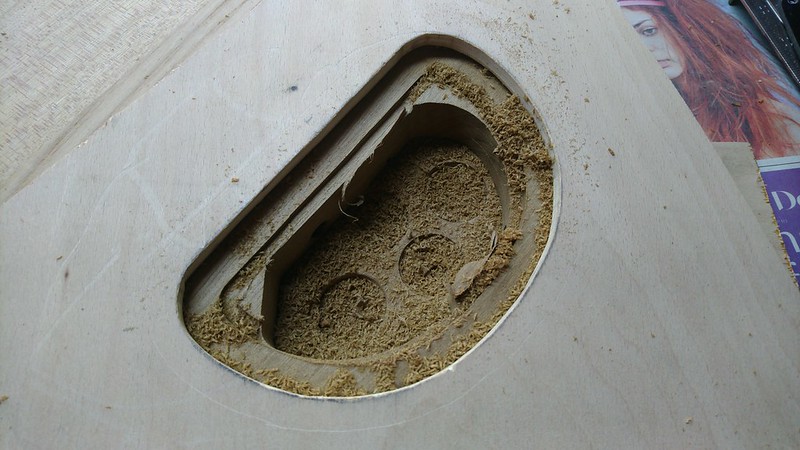
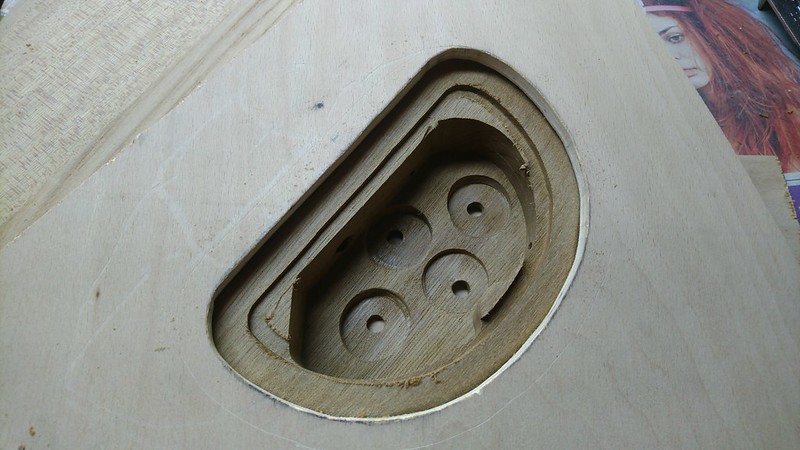
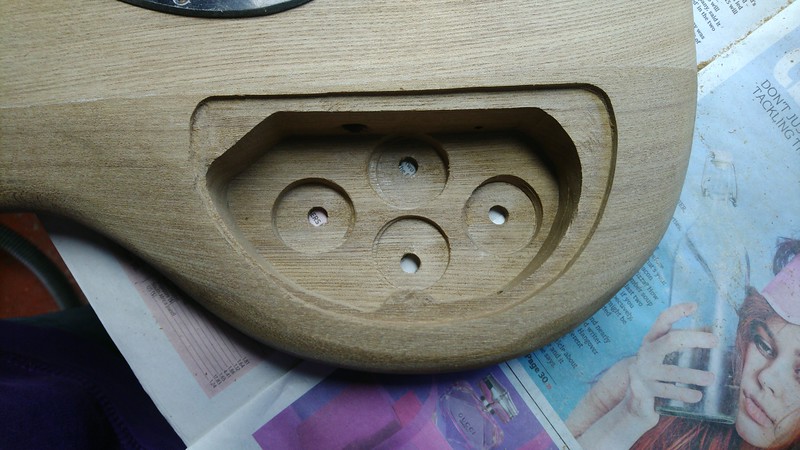
Since then I was starting to sand the body with 240 grit but I remembered that I want to recess the control cavity for the cover.
I checked the offset from the template gauge on my router to the inside of the plunge tool and it came out at 11mm, amazingly i found a washer with a hole to edge size of 11mm so I used that to trace around the cavity cover to jigsaw out a routing template.
Here's the results of my first test cut:

The fit isn't perfect, but too small is much better than too big
I'm hoping in the future i can remake that cover in a nice bit of wood and swap that in.
Of course the body is curved, so I have no clue how to get the template to match the curve
I'm wondering about soaking the template and clamping it through some foil or grease proof paper to stop the bass getting wet and letting it dry to match, but any tips would be cool about now
I'm currently thinking of painting it some kind of white because all the hardware is black and I quite like a black white contrast.
-
4
-
-
nnnnnngggg... I'm in central Scotland so this almost seems a no brainer.
I'd only want one though
What's this about the 4ohm conversion because I'd want to push it with an elf... is that insane?
-
64 foot port on the cab should sort a vaulted church just fine.
Vox Dei pedal after a compressor, perhaps?
-
3
-
-
23 minutes ago, mikel said:
Why would you form a band with people you dont get on with and have different musical tastes to you anyway?
People you don't get on with is mostly the bad idea unless it's just for money and there is professionalism to rely on.
Different musical tastes though, I don't listen to a lot of metal but hells its FUN playing drums in a metal band *smash smash dugga dugga* etc. It can sometimes be nice to stretch your legs a bit, no?
-
4
-
-
Yeh, That epoxy thing looks like a better plan. I was mostly just popping in to say that if you use a normal screw through the laminate and the block you're hoping to glue clamp in then it wouldn't deliver a clamping force unless you add the strap button at the same time *and* have the hole in the laminate oversized so the screw threads don't bite into it.
-
Opening the tin on something mains powered which puts voltages across your head AND has a warrantee sounds like silliness to my mind
I've never heard of ANY kit since a crystal radio set that had a mono headphone socket, this this sounds like it's broken and needs to get sent back, this is quite probably the reason for the first return but it tested out ok because they didn't check the headphone socket
-
Have you tried cleaning your ears?
Still curious what these ear bins actually ARE.
-
What kind of headphones are these? brand? model, picture?
-
See how the connectors on the cables have metal bits and black bands? The metal is the contact for one of the channels or earth or microphone or whatever.
The very end that you can poke yourself with is the Tip (T) then there's a Ring (R) and then there's metal all the way down to the base of the plug, which is the Sleeve (S) (TRS)
If you find some headphones that came with a mobile phone or something that has a microphone you'll see there's another metal band, so there's the Tip, a Ring, another Ring and then the Sleeve (TRRS)
Sometimes the contacts inside a socket aren't set up to understand TRRS and fail to ground out properly if the wrong connector is used.
Your headphones don't have a microphone attached do they? Because a TRS cable might confuse the headphone end if it WANTS a TRRS.
-
I'm out of ideas, thanks for the clarification, it doesn't look like you have a TRRS issue anyway.
If this thing is new you should get warrantee support, right?


SR style 5 String Kit Build
in Build Diaries
Posted
Well i worried about the string snapping, but I wasn't sure what else i could realistically do, anyway the string snapped and it's got a ding on the horn, but it's on the backside so it's not immediately obvious.
I'm filing this under 'learning' and pressing on. I can always refinish this body down the line and i'm keen to push on towards a playing instrument rather than stressing about a knock when it's far from the last knock it's going to get.
My straploks turned up, obviously the day after i put paint on it, but since it fell on the floor anyway I just popped it on some bubble wrap and smashed a drill through it.
still, I have not *yet* ruined the neck, but there is still time.