


GarethFlatlands
-
Posts
1,474 -
Joined
-
Last visited
-
Days Won
1
Content Type
Profiles
Forums
Events
Shop
Articles
Posts posted by GarethFlatlands
-
-
Sold a Demogorgon Fuzz to Patrick in May 2025. Very good communication, and a nice easy transaction. Would sell him other things from my cupboard in a heartbeat.
-
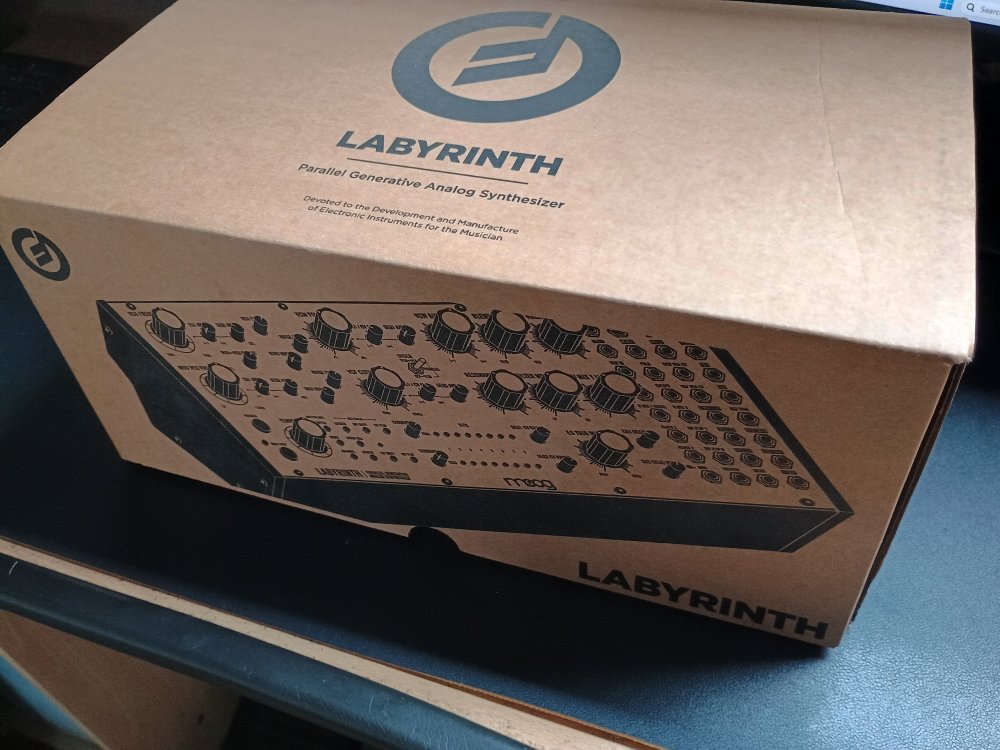
Bought new by me back in March, but it hasn't found a space in my workflow and therefore is being moved on.
"A ‘parallel generative’ synthesizer combining two very different approaches to synthesis synonymous with the so-called East Coast and West Coast schools. It sports two sequencers, two oscillators and two envelope generators, along with a wavefolder and a novel (for Moog at least) dual-mode filter.
Labyrinth feeds its two fixed-wave oscillators, outputting sine and triangle waves respectively, into a mixer section offering the addition of noise and a ring modulator. The mixer output is then faced with a voltage-controlled wavefolder (VCW) on one hand and a filter on the other. These two circuits can be placed in parallel or in series, in either order, and between them provide enormous scope for sound sculpting"
£450 ONO plus £5.79 delivery. Based in Sheffield if you want to come collect it.
Delivery will be 1st class recorded.


-
First and last pre-ebay bump.
-
Last bump before this goes on eBay!
-
Just sold my Eden amp head to Tim, seems like a very nice guy and the process went through very smoothly.
Plus he has a cute dog picture as his avatar, so 11/10.
-
30 minutes ago, 2pods said:
I've just read the review

Some pedal.
GLWTS
It's a bit much for me tbh. Definitely a pedal for someone who likes tweaking controls whereas I'm a 'set and forget' kind of player.
-
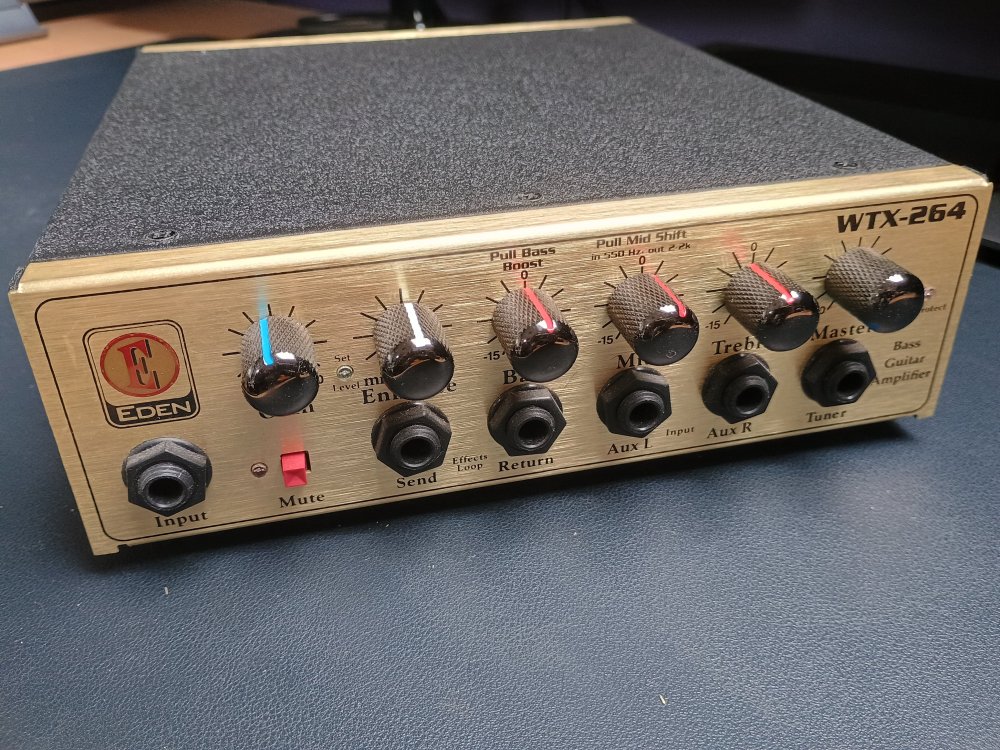
Eden WTX264 head.
264 watts into 4 ohms. Weighs about 2Kg. Nice, tight, refined sound. The only issue is that the mid knob sticks around the 2 o'clock position. You can use more force to twist it, or pull it out, move past the sticky point and then push it back in again. No cables, manuals etc; it's just the head.
£100 ONO.
Price doesn't include postage, which will be Royal Mail 1st class recorded unless the buyer specifies otherwise. Based in Sheffield.
-
Description taken from effectsdatabase.com as there's very little info available about these online. I don't have the box which is why the text is struck out.
Effects Database - Demogorgon Fuzz
"A gnarly, snarly, dual stage fuzz that will get you when you least expect it. Things definitely get stranger when you kick on this multidimensional beast of a fuzz pedal. You are looking at two, high gain silicon fuzz circuits smashing into each other like two opposing realities. (Each with independent controls).
- These bad boys are made one at a time, by hand in Rochester, NY by the rad dudes at Adventure Audio. So you know its good. Features include:
- True Bypass (duh)
- LED doubles as a "starve" control for dying battery sounds and new textures
- Two Independently controlled fuzz circuits
- Top mounted jacks
- Acid etched enclosure by main.ace.fx
-
Custom firebranded wooden box with pedal riser lid - The only pedal in existence that knows exactly what happened to Barb.
Rumor has it that only 11 of these creatures were made"
Price doesn't include postage, which will be Royal Mail 1st class recorded unless the buyer specifies otherwise. Based in Sheffield.

-
Chase Bliss Audio Clean. Probably about 2 hours of home use in total. Sounds great but unfortunately not something I can see myself using regularly either as a desktop effect or on a board.
Why is it so cheap? I paid 300 Euros for it during the Mystery Box promo and would like back what I paid for it (approximately) rather than flipping it with a 40% markup. I'd rather try and sell it on to a fellow Basschatter before I brave eBay.
Trades considered; Chase Bliss Mood Mk2, Red Panda Particle, Walrus Effects Fable or Qi. Sorry those are very specific but I'm not really interested in anything else right now unless it's a nice granular delay/reverb I've not listed.
Price doesn't include postage, which will be Royal Mail 1st class recorded unless the buyer specifies otherwise. Based in Sheffield.

-
 2
2
-
-
An interesting box ideal for someone who wants to dip their toes into the world of west coast synthesis. Too much going on for me to describe everything it does without this turning into a wall of text so here's the Sound On Sound review where you can get an idea of the unit's functionality.
Sound On Sound Review - Korg Volca Modular
Selling as I bought this on a whim when I was dipping my toes into the world of synths, but never found a place for it in my workflow. The software download code has not been redeemed, so is all yours.
Price doesn't include postage, which will be Royal Mail 1st class recorded unless the buyer specifies otherwise. Based in Sheffield.

-
I don't have any of those unfortunately, just thought I'd ask as I have a 6 string AGC that's ruining my tiny hands and we're both in sunny Sheffield.
glwts, looks like a fantastic synth.
-
 1
1
-
-
Are you considering any trades or just cold, hard cash?
-
Beautiful! Mainly commenting so that if I sell my ACG 6 string, I can consider this.
-
1
-
-
There are a couple of £300 HX Stomps on Facebook marketplace from accounts created this year, which seems suspicious. The others are all £420+. As there's a GT1000 Core in my local music shop for £450, I think I'm going to go buy it if it's still there on Tuesday.
-
The one gig I tried IEMs was using an XLR from my pedalboard (Behringer BDI-21) into a belt pack, while the FOH guy ran a jack from the 1/4" output into his own DI. I did it for the first time live as we I had to transport the PA, sound guy and singer in my Fabia and had no room for cabs. It actually worked great and meant I had to bring less gear, maybe I had in the back of my mind I could do that again but ditch the Berhinger and not replace it with a different, more transparent DI if I ever went back to gigging. For now, it's mainly so I can practice bass silently at home without having to fire up my PC and a VST.
-
Thanks for the advice so far. Seems like a I might have been overthinking things (again) and the HX Stomp is a good choice. I'll check out the MOD and Boss units too.
I briefly owned a Zoom B3 but didn't really like the quality of the effects enough to keep it for long.
And maybe calling XLR out "essential" was overstating things, although I'm surprised more units don't seem to have it.
-
1
-
-
I'm considering a multi fx (with an amp sim), but it's been a while since I looked. There seem to be more than I remember and I get option paralysis easily. The Helix Stomp jumped out at me as you can hook it up to your PC for some deep dive editing, and being able to isolate different frequencies and apply effects to them seemed like it would be very useful, but from what I've read the DSP isn't the best and there are presumably better options out there. The Hotone Ampero 2 looks good but seems to have had a slightly rough launch. I have a budget of around £500. Mainly for home practice but I may want to gig again some day, so a headphone jack and an XLR out are essential. I don't use a ton of effects so really just need excellent compressors and amp sims, and everything else would be a bonus.
Instead of reading about them all for months and not buying one, what are you using and would you recommend it? Are you a millionaire who's tried them all and has opinions? Did you buy one and loved it so hard it cured your GAS forever?
-
Lovely bass but being a short derrière with cramp prone hands, I'm a bit wary of the long scale length ☹️.
-
1
-
-
Never thought I'd sell this but a lack of time to play and being the owner of small, crampy hands mean that this just isn't getting played and isn't likely to any time soon 😞
Seymour Duncan Quarter Pounder and Badass II bridge installed (I don't have the originals). Currently doesn't have any strap buttons which I didn't notice until I started taking pictures but I can pop the Schallers back on and thrown in the leather strap they're attached to if that helps. The serial number dates it to around 2002-2004. Very good condition considering how much it's been played and gigged. Why is it £2-300 cheaper than other similar basses on Reverb? It's the price I paid for it, and without wanting to sound like Rebekah Vardy, I don't need the money. At least not enough to squeeze a fellow Basschatter for every last £ I can. I'd rather it went to a good home and got played. If it goes on Reverb however, then I'll align it more with the market price.
I don't have a suitable box for shipping, so collection preferred from Sheffield (0.6 miles from the station), or I can meet you part way. I'd consider trades for a nice short scale or something with a less baseball bat-like neck that I can actually get my hands around, with money either way depending on what's on offer.
EDIT:- I found a box in the cellar which should fit, so postage is potentially an option. I've had a few offers and am working my way through the messages in order of arrival.


-
10
-
-
A handful of contrast issues reported by Chrome Lighthouse, the text could be a bit lighter too to make it slightly easier to read. But overall, looks great!
-
Bought a set of Tonerider Jazz pickups from Bagsie, he posted them out very fast and was generally great to deal with.
-
I'm missing out on discovering that no bass (or other piece of gear) will ever make me sound like Geddy Lee or Chris Squire. I'm never buying one so I can hold onto that dream.
-
 2
2
-
-
More slow progress for a few reasons. Once everything was assembled, I decided I didn't like the neck. This led to a sanding down, re-shaping and then 6 or so days spent re-oiling it with gun oil. During the re-shaping, the post on the E string tuner fell clean out. No problem, that'll go back in right? It did not, and the main assembly is rattling around and seems properly broken.
Now, I have some Fender style tuners, but they have no bushings.
I could buy some bushings, but the existing holes are the wrong size.
I could dowel and re-drill the tuner holes, but the Fender style tuners and bushings need a 3/4 inch hole and 3/4 inch drill bits are weirdly expensive compared to metric ones.
Another option is try to find some tuners that will fit a 12mm hole, but that's also expensive.
Lastly, and I think this is the route I'm going to go down; use the neck template to make a template of just the headstock, and use a bottom bearing router bit with one of my other bass headstocks to make some holes the correct size in this new template, then transfer these over. A wrong move and I've taken a chunk out of a perfectly good bass neck, but I think it's actually the easiest option, and the only cost is the new bushings.
Also, there are some nut files on the way, kindly loaned to me by ForbiddenWytch. They should be arriving any day now, so at least that's a job I can get done.
-
1
-
-
Thanks for the tips and tricks everyone, I've had a couple of offers of loans of Hosco files so I should be sorted. I'll invest in a set if I decide to do any further bass building in future, but this will get me over the finish line for now.


Feedback for jsprax
in Feedback
Posted
Brand new account messaging about a purchase? I had doubts, but Jamie sent over a link to his eBay account and I was able to check his rating on there before receiving payment and sending my Chase Bliss Clean to him. The interaction went smoothly.